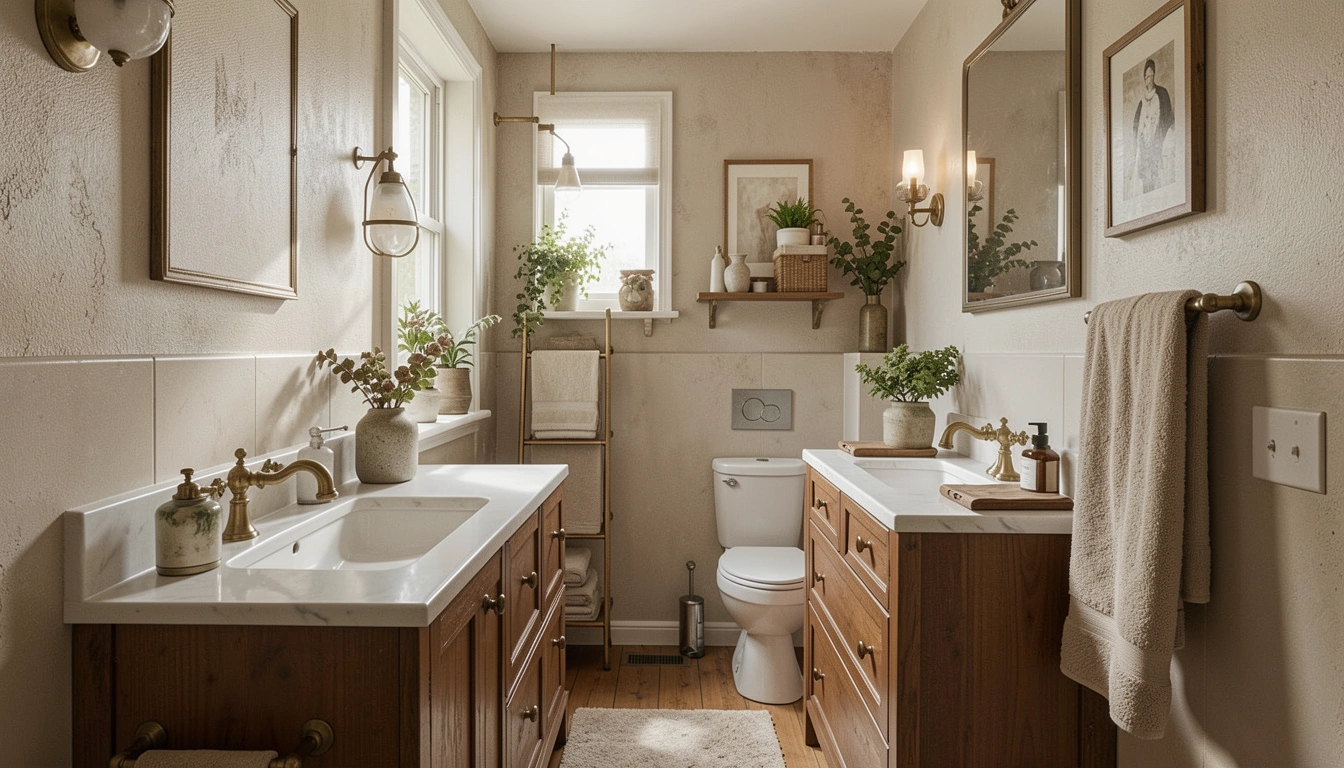
My small bathroom always felt cramped and cheap. The fixtures screamed budget, no matter how I scrubbed. I'd stare at the faucet, thinking, why does it look so plain?
One day, I swapped a few pieces. Suddenly, the room breathed easier. It wasn't bigger, just balanced.
If your bathroom mirror or light makes the space feel off, this is for you.
How To Choose Fixtures For A Small Bathroom That Look Expensive
This guide walks you through how I select fixtures for tight bathrooms. They end up looking polished without breaking the bank. Your space will feel clean and intentional, like it belongs in a calm home.
What You’ll Need
- Matte black bathroom faucet for small sinks
- Brushed nickel towel bar 18 inches
- Round frameless mirror 24 inch diameter
- Wall sconce light matte black single
- Glass soap dispenser with nickel pump
- Slim recessed medicine cabinet 16×24
- Brass cabinet pulls 3 inch modern
- Quartz countertop sample white veined
Step 1: Measure Light and Scale First

I start by standing in my bathroom at different times. Note where light hits the sink and mirror. Small spaces need fixtures that don't block this flow.
This changes the feel right away. The room opens up visually. People miss how light makes cheap look rich—test it with your hand first.
Avoid oversized pieces. They crowd everything. I once picked a big faucet; it swallowed the counter.
Scale draws the eye gently. Now, mine feels balanced.
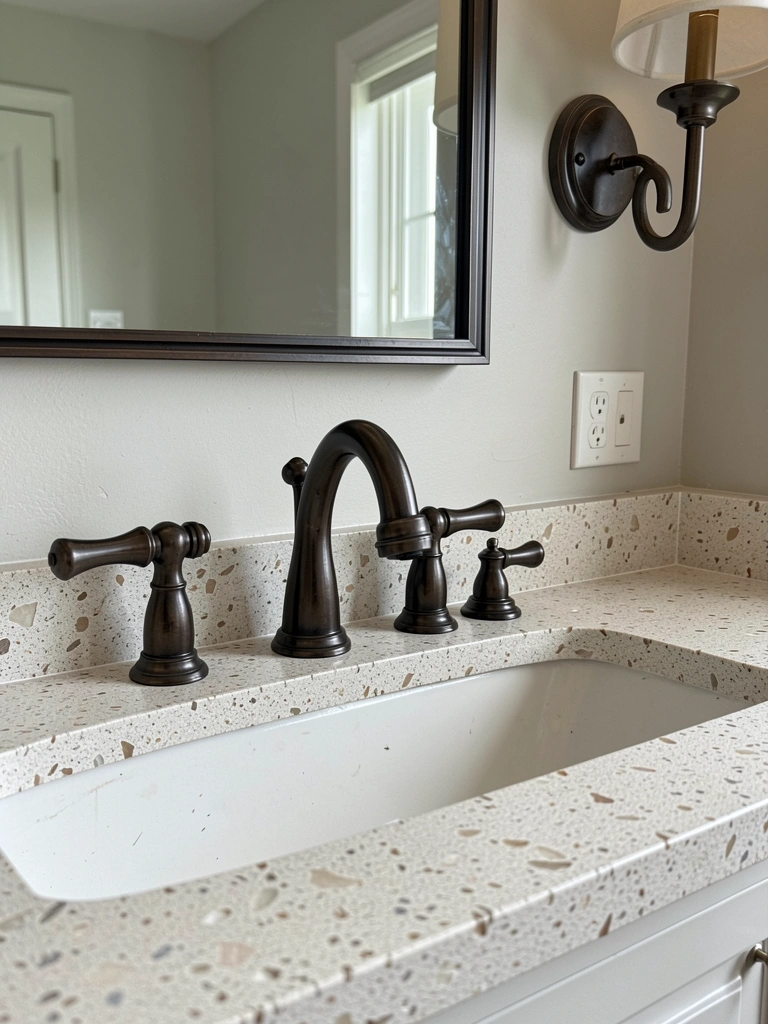
Step 2: Pick One Metal Finish for Unity
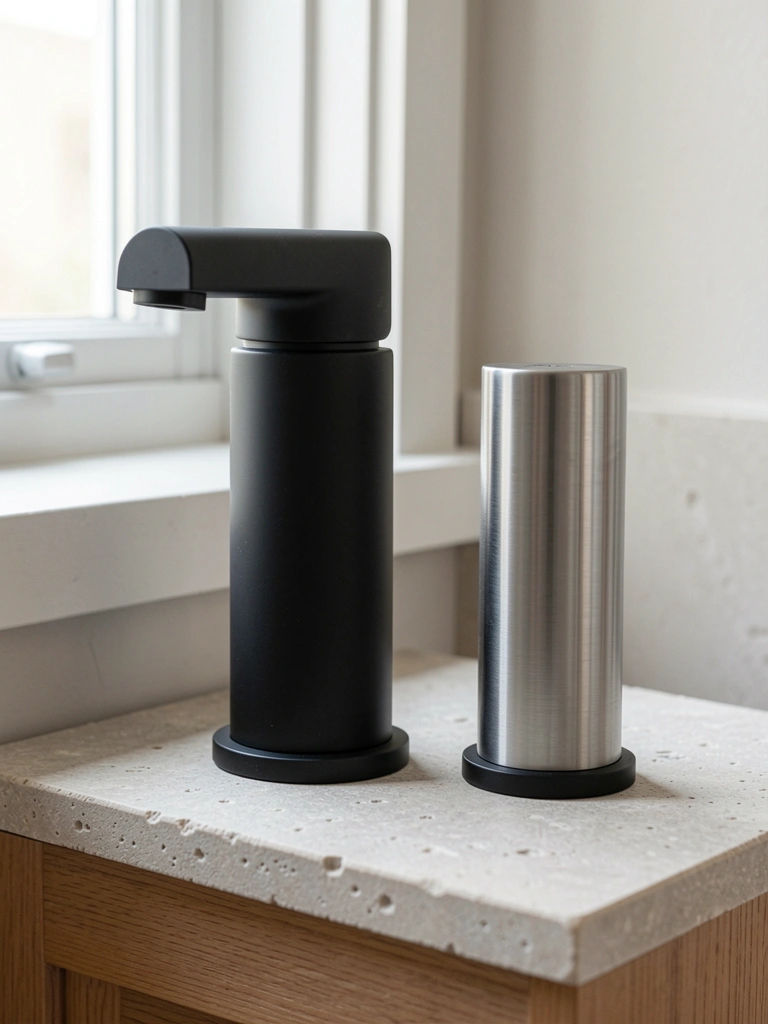
I choose matte black or brushed nickel across all fixtures. It ties the vanity to the walls without shine overwhelming.
Visually, chaos turns calm. One finish makes pieces read as custom.
Most overlook mixing metals in tiny spots—it fights the eye. Stick to one.
Don't grab shiny chrome. It shows water spots and feels dated. Matte hides life better.
Step 3: Layer Lighting Above the Mirror
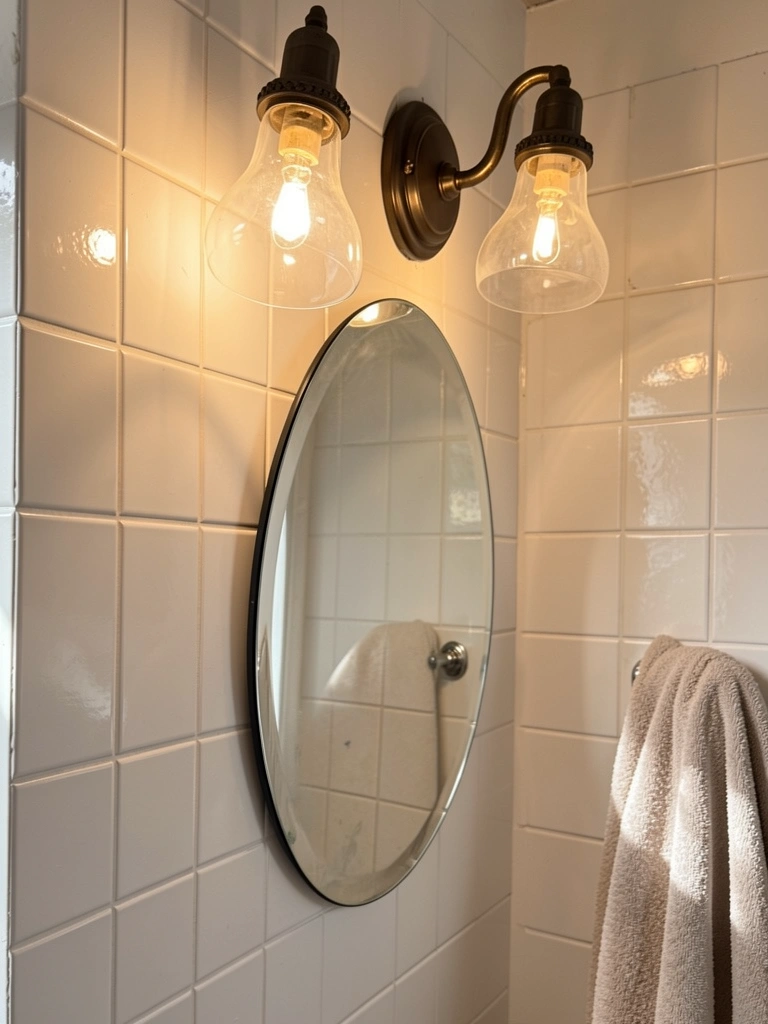
I add slim sconces flanking the mirror. They wash light down, not harsh overhead.
The mirror pops, face softens in it. Space feels taller.
Folks forget side lights over center ones—they flatten small rooms.
Skip bulky fixtures. They steal air. Mine hug the wall perfectly.
Step 4: Swap Hardware on Cabinets and Towels
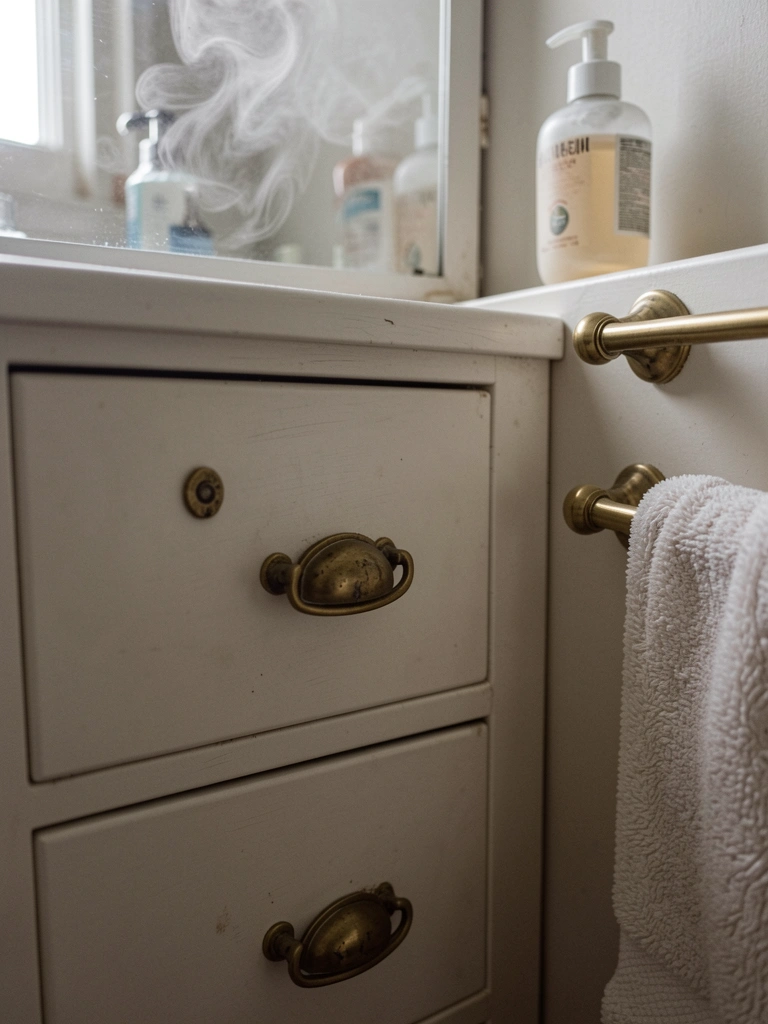
I replace pulls and bars with slim brass ones. They add quiet weight without bulk.
Drawers feel solid now, towels hang neat. Balance shifts to grounded.
People miss hardware's pull—it anchors or distracts.
Avoid plastic coated stuff. It chips. Real metal wears well.
Step 5: Choose a Simple, Oversized Mirror
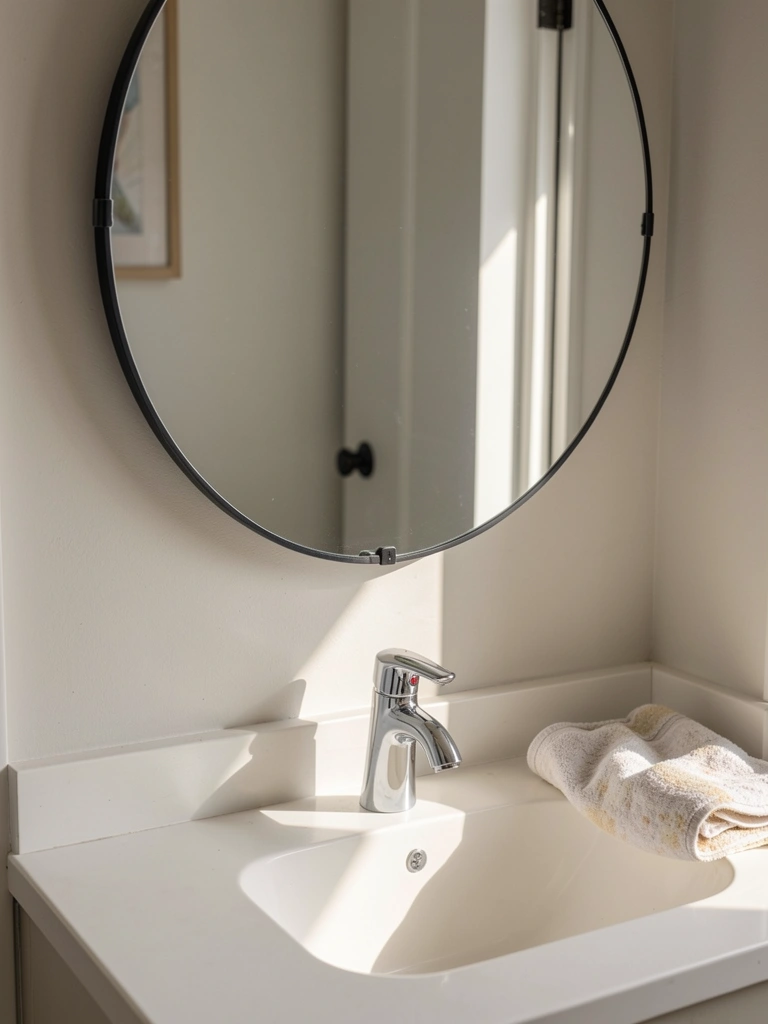
I hang a round mirror bigger than the sink. Frameless keeps it clean.
Walls recede, room expands. Light bounces right.
Tiny mirrors shrink everything—big ones trick the eye outward.
Don't center perfectly. Slight offset adds life. Mine sits just right.
Step 6: Test the Full Set in Place
I mock up everything with tape or prints first. Live with it a day.
The whole feels expensive or not. Flow shows gaps.
Rushing buys kills harmony—test reveals it.
Overbuying kills budget. Reuse what works.
Finish Choices That Last
Matte finishes hide fingerprints in bathrooms I use daily. Brushed nickel warms white tiles without yellowing.
I tried gold once. It clashed with grout.
- Matte black: Hides soap scum best.
- Brushed nickel: Pairs with most colors.
- Avoid polished brass: Too bold for daily.
Now, mine stays clean longer.
Scaling Fixtures Right
Small doesn't mean tiny fixtures. I upsize mirrors slightly for balance.
A 24-inch round lifts my 18-inch vanity.
Common slip: Matching sink size exactly. It pinches.
- Measure wall space first.
- Add 2-4 inches over sink.
- Hang at eye level when seated.
Feels spacious, not squeezed.
Everyday Maintenance Tips
Wipe fixtures weekly with microfiber. Keeps the expensive look.
I use vinegar on matte black—no streaks.
- Soap dispenser: Refill clear liquid only.
- Sconces: Dust bulbs monthly.
- Avoid abrasives on nickel.
They hold up through mornings.
Final Thoughts
Start with one fixture, like the faucet. See how it sits.
You'll build from there, room by room.
Small bathrooms can feel just right. Yours will too, with these picks.
Leave a Reply