Author: Brooke Hazel

  • 10 Fresh White Couch Green Living Room Decor You’ll Save

    10 Fresh White Couch Green Living Room Decor You’ll Save

    I remember staring at my new white couch, loving its clean lines but feeling the room was flat. Then I added green—real plants, soft fabrics—and it breathed. The white stayed crisp, the green warmed it up without overwhelming.

    That combo hits different in real homes. It feels fresh, lived-in, not showroom sterile.

    I've dirtied that couch, wiped spills, returned wrong shades of green. These ideas come from what stuck.

    10 Fresh White Couch Green Living Room Decor You'll Save

    These 10 ideas bring green to your white couch without the guesswork. I've tested them in my own space—they're simple, save money long-term, and make the room feel right.

    1. Flanking Ferns That Frame Your White Couch

    I placed two Boston ferns on either side of my white couch last spring. They curve gently over the arms, softening the stark white. The room went from echoey to enveloped, like a quiet hug.

    Before, the couch floated alone. Now, green arcs pull eyes in, making the space cozier. Dust settles on leaves, but a quick shake fixes it.

    Watch pot size—too big tips over. I swapped heavy ceramic for lighter ones after one fell.

    Go for hanging varieties if floor space is tight. They drop just right, trailing over the couch edge.

    What You’ll Need for This Look

    2. Sage Green Pillows Tossed for Casual Depth

    Sage pillows on my white couch changed everything—they add squish without bulk. I tossed three one afternoon, and the room felt settled, like we'd always had them.

    The green mutes the white's brightness, grounds it. Kids lean back now, no stiff sitting.

    I bought bright green first—too loud, returned them. Sage fades nicer over time.

    Mix sizes: two lumbar, one square. Fluff daily; they hold shape.

    What You’ll Need for This Look

    3. Woven Green Rug That Anchors the Whole Setup

    A low-pile sage rug under my white couch's front legs stopped the floating feeling. It pulls couch, table, chairs together—room shrank comfortably.

    Green peeks out, echoes plants. Bare feet sink in mornings.

    Synthetic first—slid everywhere. Woven jute grips better, hides crumbs.

    Size it so couch sits halfway on. Vacuum weekly.

    What You’ll Need for This Look

    4. Draped Moss Throw That Invites Lounging

    I drape a moss throw over one arm—pulls you to sit. White couch looks softer, less hotel-like.

    Green warms the cool tones. Pets curl up; washes easy.

    Bought chunky first—shed everywhere. This knit stays put.

    Trail it to floor for flow.

    What You’ll Need for This Look

    5. Emerald Vases Clustered on the Coffee Table

    Three emerald vases on my coffee table catch light, pop against white couch. Green depths draw you closer.

    Stems from yard—low upkeep. Table feels full, not empty.

    Glass first—tippy. Ceramic holds steady.

    Odd numbers work best; rotate flowers.

    What You’ll Need for This Look

    6. Hanging Ivy Trailers Over the Couch Back

    I hung ivy pots high above the couch—vines trail down, frame views from seats. Green canopy without crowding floor.

    Feels like outdoors in. Light filters soft.

    Overwatered once—yellowed. Now mist weekly.

    Secure hooks in studs.

    What You’ll Need for This Look

    7. Fiddle Leaf Corner That Balances the Green

    My fiddle leaf in the corner mirrors couch height—green mass balances white expanse. Room feels taller, airier.

    Leaves wipe clean; dust magnet otherwise.

    Too much sun first—scorched. North window perfect.

    What You’ll Need for This Look

    8. Lime Art Prints Leaning on Shelves

    Lime prints lean on open shelves by the couch—punchy green without wall commitment. Eyes bounce happily.

    Mix with books; evolves easy.

    Framed first—heavy. Prints lighter.

    What You’ll Need for This Look

    9. Olive Linen Curtains That Soften Window Edges

    Olive curtains puddle slightly by the couch—green frames light, mutes harsh sun on white fabric.

    Room dims cozy evenings.

    Cotton first—shrunk. Linen drapes true.

    Rod beyond window width.

    What You’ll Need for This Look

    10. Succulent Tray centerpiece That Stays Fresh

    Succulents in a tray on the table mirror couch pillows—green cluster invites touch.

    Low water; thrives ignored.

    Overpotted once—root rot. Small pots now.

    What You’ll Need for This Look

    Final Thoughts

    Pick two or three ideas that fit your light and habits. My white couch room built slow—greens layered over months.

    It works because it's yours. You'll spot what stays. Feels good living there.

  • 11 Soft White Couch Living Room Rug Decor Worth Stealing

    11 Soft White Couch Living Room Rug Decor Worth Stealing

    That soft white couch finally arrived. It sat there, pretty but floating. The floor looked cold, unfinished.
    I grabbed rugs at random. Some bunched up, others faded fast.
    Then I started layering and sizing right. The room settled in, cozy around the couch.
    Now it feels right every day.

    11 Soft White Couch Living Room Rug Decor Worth Stealing

    These 11 white couch living room rug decor ideas come straight from my homes. I've tested them, returned a few. You'll get the exact pieces that work.

    1. Oversized Cream Wool Rug That Grounds the Seating Area

    My white couch needed weight. I rolled out this oversized cream wool rug, letting it peek a foot past the front legs. The room stopped feeling like a showroom. Feet sank in soft, and the pale tones warmed the white upholstery without competing.
    It changed how we gather—cozier movie nights, no more chilly toes.
    Pay attention to the fit: at least 8×10 for standard couches. Stretch it under chairs too.
    One tip: vacuum weekly; wool hides dust better than synthetics.

    What You’ll Need for This Look

    2. Jute Rug Layered Under for Natural Texture

    White couches can feel stark. I added a jute rug under mine—coarse weave against smooth fabric. It brought earthiness, made the space feel lived-in from day one.
    Light bounces off the natural fibers, softening harsh afternoons.
    Size it so 18 inches show around the couch. Avoid glossy floors; jute grips better on matte.
    In my last place, it held up to spills—just hose it outside.

    What You’ll Need for This Look

    3. Subtle Striped Runner Beside the Couch Path

    I messed up first with a full rug—too much bulk next to the couch. Switched to a striped runner along the walkway. Thin beige lines guide the eye, balance the white without overwhelming.
    It makes narrow rooms feel wider. Foot traffic feels defined now.
    Mistake learned: match stripe width to couch height—subtle ones blend best.
    Tuck it tight; loose edges trip dogs.

    What You’ll Need for This Look

    4. Faux Fur Accent Rug in Front for Plush Feet

    Blank floors kill couch vibes. I dropped a round faux fur rug right in front—plush landing spot. Against the white couch, it doubles down on softness, invites bare feet.
    Evenings feel indulgent now, like a quiet hotel nook.
    Pick 5-foot diameter; smaller looks lost. Shake it out weekly.
    It hides crumbs better than you think.

    What You’ll Need for This Look

    5. Moroccan-Style Flatweave in Soft Ivory

    Flatweave rugs breathe under heavy furniture. This ivory Moroccan one with faint diamonds adds quiet pattern to my white couch setup. No bunching, just calm flow.
    The room gained depth—couch pops without screaming.
    Go 8×10; let it hug walls loosely. Wool blend sheds less.
    Pairs with plants like old friends.

    What You’ll Need for This Look

    6. Low-Pile Synthetic Rug for Pet-Friendly Durability

    Pets and white couches? Tricky. I returned a wool rug after muddy paws ruined it. Grabbed this synthetic low-pile instead—looks woolly, wipes clean. Gray-beige hides hair around the couch.
    Family time feels worry-free now.
    Size generously; pets claim edges. Steam clean monthly.
    Insight: texture fools the eye into luxury.

    What You’ll Need for This Look

    7. Fringe-Trimmed Neutral Runner Behind the Couch

    Couch backs look bare against walls. I hung a fringe runner there—soft tan, drapes just right. Defines the white couch without floor clutter.
    Wall feels dressed, room taller.
    Use 2×8 size; iron flat first. Light steam keeps fringes neat.
    Simple fix for awkward spots.

    What You’ll Need for This Look

    8. Circular Jute Rug for Modern Curve

    Straight rugs box in couches. A circular jute one softened my layout—invites flow around the white couch. Natural curve feels modern, not stiff.
    Conversations circle better now.
    6-foot fits most; center under coffee table. Brush sand off outdoors.
    Breaks up rectangles perfectly.

    What You’ll Need for This Look

    9. High-Pile Shag Rug Section for Lounging

    Full shag overwhelms. I zoned one with a 5×7 cream shag off the couch—pure sink-in spot for reading. White couch gets a plush friend.
    Naps improved instantly.
    Fluff it daily; rake revives pile. Mistake: too big traps dirt.
    Keeps one area special.

    What You’ll Need for This Look

    10. Textured Berber Rug in Pale Oat

    Loops add grip. This pale oat Berber rug holds couch steady, texture peeks out invitingly. White fabric loves the subtle contrast.
    Quiet luxury without fuss.
    8×10 standard; trim ends if needed. Machine-washable ones last.
    Feels custom-made.

    What You’ll Need for This Look

    11. Faded Vintage-Style Kilim for Layered Depth

    Layering hides flaws. I put a faded kilim over a plain rug—tiny red pops against white couch, adds story. No bold clash.
    Room feels traveled, settled.
    Pick 6×9 topper; overlap 6 inches. Mistake: fresh colors fight whites—go sun-faded.
    Rotate for even wear.

    What You’ll Need for This Look

    Final Thoughts

    Pick one or two ideas that fit your space. No need for all 11.
    Your white couch will thank you—warmer, more you.
    Start small. Live with it a week. Tweak as needed. You've got this.

  • 21 Rough White Couch Western Living Room Decor With Character

    21 Rough White Couch Western Living Room Decor With Character

    I got my rough white couch last spring. It was love at first sit—soft linen, slouchy shape. But in my western living room, with boot prints and dog hair, it screamed for help.

    Dark beams overhead made it float. I layered in ranch finds I'd gathered.

    Now it feels right, lived-in warm. Like the couch belongs.

    You can make yours the same.

    21 Rough White Couch Western Living Room Decor With Character

    These 21 ideas build character around a rough white couch in western living room decor. I've tested them in my home—they hide dirt, add warmth, and feel real. No perfection needed.

    1. Distressed Pine Coffee Table That Grounds the White Couch

    That white couch sat high and lonely until I dragged in an old pine coffee table from the barn. Scratches and knots matched the room's rough edges. Suddenly, the couch had roots—visual weight that pulled everything down comfortably.

    Boots no longer slid under it awkwardly. The table's low height made lounging easy, legs up without strain.

    I stained mine too dark once—learned to go lighter for balance.

    Pay attention to height: 16-18 inches keeps flow open. Stack a tray on top for remotes.

    It changed the feel from showroom to home.

    What You’ll Need for This Look

    Distressed pine coffee table 48×24 inch

    Rustic wooden tray large

    Leather coasters set brown

    2. Saddle Tan Leather Poufs as Extra Seating

    Poufs changed game nights. I pulled two saddle tan leather ones next to the couch—soft, scuff-resistant hide that echoes western roots.

    They tuck under the table when empty, no clutter. Feet up feels casual, invites lingering.

    White couch stays clean; dirt stays on poufs.

    Size matters: 18-inch diameter fits without crowding.

    What You’ll Need for This Look

    Saddle tan leather pouf 18 inch

    Tufted top faux leather ottoman

    3. Black and White Cowhide Rug Layered Underneath

    Cowhide rug was my fix for cold tile floors. Layered partial under the couch, it peeks out, adds pattern without overwhelming white.

    Hides boot marks better than plain rugs. Texture grounds the softness.

    I bought real hide first—too slippery. Faux grips better.

    Let it bunch slightly for lived-in vibe.

    What You’ll Need for This Look

    Black white cowhide rug 5×7 faux

    Non slip rug pad cuttable

    Jute rug layer small 3×5

    4. Woven Jute Wall Hanging Above the Couch

    Hung a jute weave above the couch—coarse fibers soften dark walls, echo hay bales from the ranch.

    It draws eyes up, balances couch scale. Dust settles less on texture.

    Centered it 6 inches above back—mistake was too high before.

    Feels intentional, not fussy.

    What You’ll Need for This Look

    Woven jute wall hanging 36×60 inch

    Neutral macrame wall decor large

    5. Antler Branches in Tall Ceramic Vase

    Faux antlers in a vase by the couch arm—wild west nod without taxidermy bulk.

    They catch light, add height. White couch pops against organic shape.

    Real ones shed; faux lasts.

    Weigh vase base to avoid tip.

    What You’ll Need for This Look

    Faux antler branches set tall

    Tall ceramic vase matte white 24 inch

    River rocks vase filler small bag

    6. Cream Fringed Suede Pillows for Texture

    Suede pillows with fringe—soft against linen, hide crumbs in fringe.

    Three in odd sizes: 20, 16, 12 inch. Western fringe sways gently.

    Machine washable ones saved me post-spill.

    Layer back to front for depth.

    What You’ll Need for This Look

    Cream suede fringed pillow cover 20×20

    Distressed leather pillow 16 inch

    7. Vintage-Style Mason Jar Lanterns on Side Table

    Two mason jar lanterns glow evenings—rustic light warms white couch.

    Handles let me move easy. Battery tea lights, no fire worry.

    Overdid count once; two perfect.

    What You’ll Need for This Look

    Rustic mason jar lantern battery operated

    Wood side table small distressed

    8. Potted Agave for Desert Ranch Edge

    Agave in terracotta—spikes contrast couch softness, pure west.

    Low water, thrives in dry air. Groups of three heights.

    I watered too much first—let soil dry fully.

    What You’ll Need for This Look

    Potted agave plant faux large

    Terracotta pot 12 inch aged

    Desert succulent mix small pots

    9. Navajo Wool Blanket Draped Over Arm

    Draped a wool blanket over one arm—pattern pops on white, adds weight.

    Hides wear spots. Machine-washable wool.

    Folded too neat before; casual drape better.

    What You’ll Need for This Look

    Navajo style wool blanket throw 50×70

    Faux wool throw neutral pattern

    10. Rope-Wrapped Floor Lamp for Glow

    Rope lamp arcs over couch—jute texture ties to western ropes.

    Dims for movie nights. 60-inch height clears heads.

    Bulb too bright once; warm LED fixes.

    What You’ll Need for This Look

    Rope wrapped floor lamp jute 60 inch

    Beige linen lamp shade 16 inch

    11. Burlap Roman Shades for Dust Control

    Burlap shades filter harsh sun—texture softens light on white fabric.

    Rolls up easy for views. Hides rod clutter.

    Cut wrong length first; measure twice.

    What You’ll Need for This Look

    Burlap roman shade 40×60 inch

    Neutral linen curtain panel pair

    12. Galvanized Tray on Pouf for Drinks

    Metal tray on pouf catches spills—shiny against leather, farm fresh feel.

    Holds coasters, books steady.

    Rusted pretty over time.

    What You’ll Need for This Look

    Galvanized metal tray rectangular 18×12

    Rustic coasters wooden set

    13. Wooden Ledge with Western Photos

    Ledge holds family ranch photos—leans casual, personal touch.

    Mix sizes, matte frames. White couch backdrop perfect.

    Overcrowded once; space them 4 inches.

    What You’ll Need for This Look

    Distressed wood picture ledge 36 inch

    Rustic wood photo frames 8×10 set

    14. Earthenware Pitchers with Dried Grasses

    Pitchers hold dried grasses—sway adds movement, earthy tones blend.

    No water mess. Group odd numbers.

    Faded grasses yearly refresh.

    What You’ll Need for This Look

    Earthenware pitcher tall matte 12 inch

    Dried pampas grass bunch neutral

    15. Iron Sconces with Edison Bulbs

    Sconces flank couch—industrial glow warms white.

    Swing arm adjusts. Dimmable bulbs.

    Wired wrong once; plug-in easy.

    What You’ll Need for This Look

    Rustic iron wall sconce plug in

    Edison bulb warm white pack

    16. Whiskey Barrel Stump Side Table

    Barrel stump table—low, sturdy for lamp.

    Rings tell stories. Seal top for drinks.

    Heavy; roll in place.

    What You’ll Need for This Look

    Whiskey barrel stump table small

    Sealer spray matte clear

    17. Wicker Baskets Under Coffee Table

    Baskets hide throws—handles pull easy.

    Woven texture western. Line with fabric.

    Too big blocked walkways; slim fit.

    What You’ll Need for This Look

    Wicker storage basket rectangular low

    Linen throw blanket cream

    18. Pendleton-Style Wool Pillows in Stripes

    Stripe wool pillows—classic Pendleton vibe, cozy sink.

    Two patterns max. Spot clean.

    Pilled after wash; shake out.

    What You’ll Need for This Look

    Pendleton style wool pillow 20×20 stripe

    Geometric wool throw pillow beige

    19. Rustic Boot Tray by Entry

    Boot tray catches dirt—galvanized, long enough for pairs.

    Keeps couch clean. Drain holes.

    Emptied weekly.

    What You’ll Need for This Look

    Rustic boot tray galvanized 36 inch

    Boot mat absorbent insert

    20. Faux Fur Accent Rug by Chair

    Faux fur rug adds shearling softness—feet sink in winter.

    Small 3×5, machine wash.

    Shed first weeks; vacuum often.

    What You’ll Need for This Look

    Faux fur sheepskin rug 3×5 cream

    Non slip rug pad small

    21. Fringed Textile Wall Runner Behind Couch

    Textile runner tacked behind couch—fringe softens wall gap.

    Echoes blankets. Staple gun secure.

    Pulled threads; choose durable weave.

    What You’ll Need for This Look

    Fringed cotton wall runner 12×48 neutral

    Jute runner tapestry small

    Final Thoughts

    Pick three ideas that fit your space—start small. My white couch western living room took months, not days.

    It feels good now, holds memories. Yours will too.

    Breathe easy; real homes evolve.

  • How To Create White Couch Modern Living Room Decor

    How To Create White Couch Modern Living Room Decor

    I got a white couch last year. It looked sharp at first, but the room felt flat. Empty walls stared back. The couch sat there, too bright against the floors. Modern meant clean lines, but mine felt cold.

    I moved things around. Tested heights and layers. Now it pulls the room together. Balanced. Comfortable.

    You can do this too. One spot at a time.

    How To Create White Couch Modern Living Room Decor

    This guide shows you how to make a white couch the clean heart of your modern living room. You’ll end up with a space that’s simple, balanced, and feels right every day. It’s the way I fixed mine—no big changes needed.

    What You’ll Need

    Step 1: Anchor the Couch with a Rug

    I start by sliding a low-pile gray rug under the couch. Front legs on, back legs off. It grounds the white fabric right away. The room stops feeling like floating furniture.

    Visually, the couch shrinks a bit. It fits the space better. People miss how a rug sets the scale—without it, everything looks too big.

    Don’t center the rug perfectly. Offset it toward the seating. That mistake makes the room stiff.

    Now the couch leads the eye naturally.

    Step 2: Layer Textures on the Couch

    Next, I add three neutral linen throw pillows. Two lumbar at the back, one square in front. Lean them against the arms. The white couch warms up fast.

    It changes from plain to inviting. Layers catch light differently. Most overlook pillow height—too stacked, it blocks the couch lines.

    Avoid matching pillows exactly. Mix subtle tones. That keeps it modern, not matchy.

    The seating pulls you in now.

    Step 3: Place a Low Coffee Table

    I set a slim wood coffee table centered in front. Low height, about 16 inches. Top it with two books and a seagrass basket. Space opens up around it.

    The flow improves—your eye moves from couch to table easily. Insight: tables too high chop the room vertically.

    Skip glass tops. They reflect too much on white. Wood grounds it better.

    Balance feels steady here.

    Step 4: Add Asymmetrical Lighting

    I position one matte black floor lamp to the side. Arch it over the couch arm, shade at eye level when seated. It softens the white at night.

    Shadows add depth without clutter. People forget one lamp creates movement—symmetrical pairs feel flat.

    Don’t face it straight at the wall. Angle toward the seat. That mistake darkens corners.

    Light ties the pieces together.

    Step 5: Hang Wall Art and Shelves

    Above the couch, I hang one abstract line art print, centered but low—eye level sitting. Flank with two black metal shelves, one higher. Add a plant on one.

    Walls wake up. The white couch gets a backdrop. Miss this: art too high disconnects from furniture.

    Avoid busy frames. Simple black lines keep it clean.

    The back wall frames the seating now.

    Step 6: Finish with a Tall Plant

    Last, I tuck a tall faux fiddle leaf fig in the corner by the couch. Leaves at shoulder height. It softens hard lines.

    The room breathes—green breaks the neutrals gently. Insight: plants add scale without overwhelming white.

    Don’t cluster multiples. One does the job. Too many tips it jungle-like.

    Everything settles into place.

    Balancing Neutrals in Modern Rooms

    White couches demand neutral balance. I lean on grays and beiges. They hold the clean look without mudding it.

    • Use pillows in three tones: light, mid, dark.
    • Rug in soft gray anchors floors.
    • Wood table warms the palette.

    Over time, this mix stays comfortable. No harsh shifts.

    Why Lighting Matters Most

    In my room, the floor lamp changed everything. It pools light on the couch at dusk. Modern means controlled glow, not overhead blast.

    Soft shadows make textures pop. White reads warmer.

    Test from your seat. Adjust till it feels right.

    Keeping White Clean Long-Term

    White shows dirt, but I wipe it weekly with a damp cloth. Throws protect arms.

    • Vacuum under cushions daily.
    • Rotate pillows for even wear.
    • Spot clean spills fast.

    It stays fresh. Lived-in, not worn.

    Final Thoughts

    Start with the rug and pillows. See how the couch settles. Build from there.

    You’ll notice the shift—room feels yours. Balanced.

    It’s just placement. Your space, your pace.

  • 25 Genius Small Bathroom Storage Ideas To Maximize Space

    25 Genius Small Bathroom Storage Ideas To Maximize Space

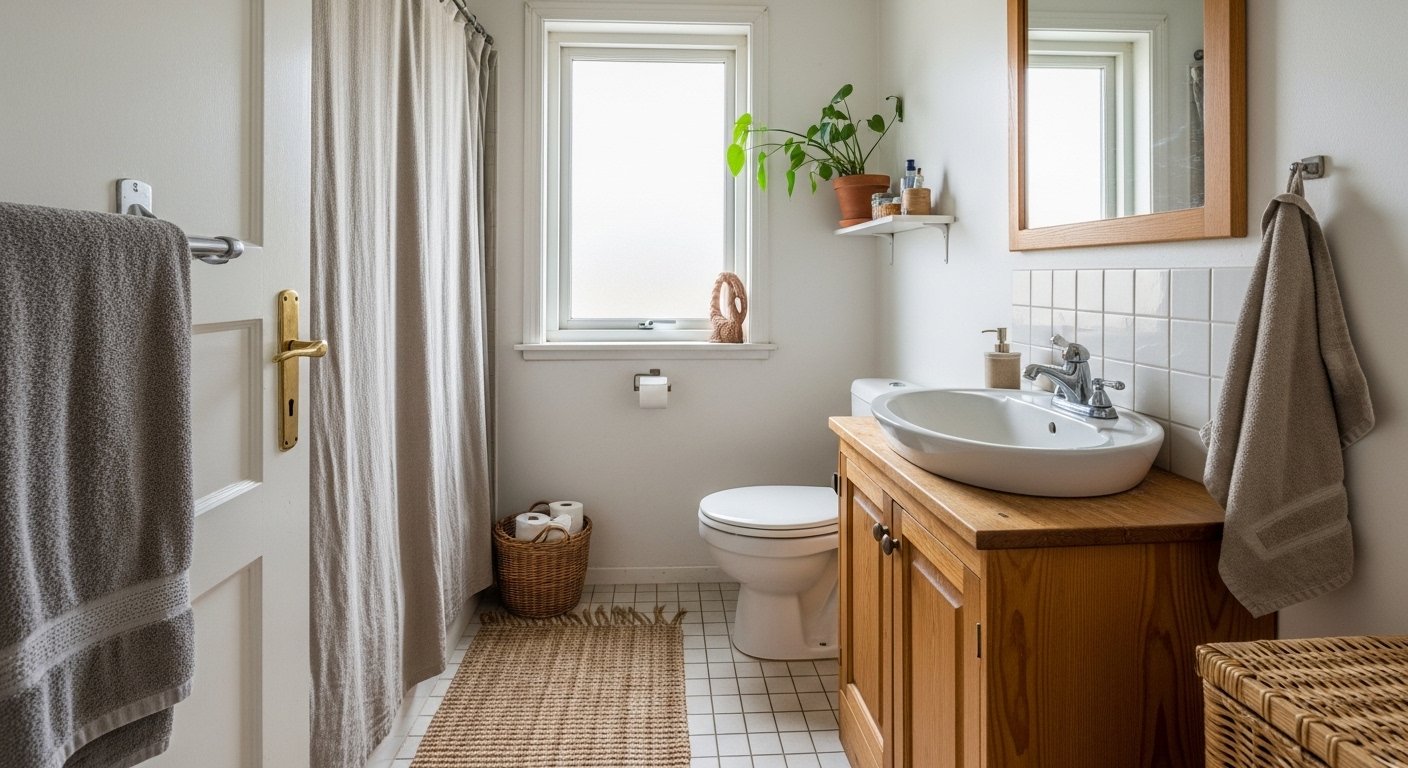
    I finally stopped shoving things into boxes and started using every vertical inch in my tiny bathroom. Small changes made mornings smoother and the space feel calmer.

    These are the practical tricks I actually use, the ones I learned by trial and error. They’re simple, affordable, and ready to order.

    25 Genius Small Bathroom Storage Ideas To Maximize Space

    These 25 ideas are hands-on, real-home solutions that saved me space and sanity. I include buildable tweaks, quick buys, and a few things I returned (so you don’t have to). Follow them one at a time—these are the 25 ideas I used and recommend.

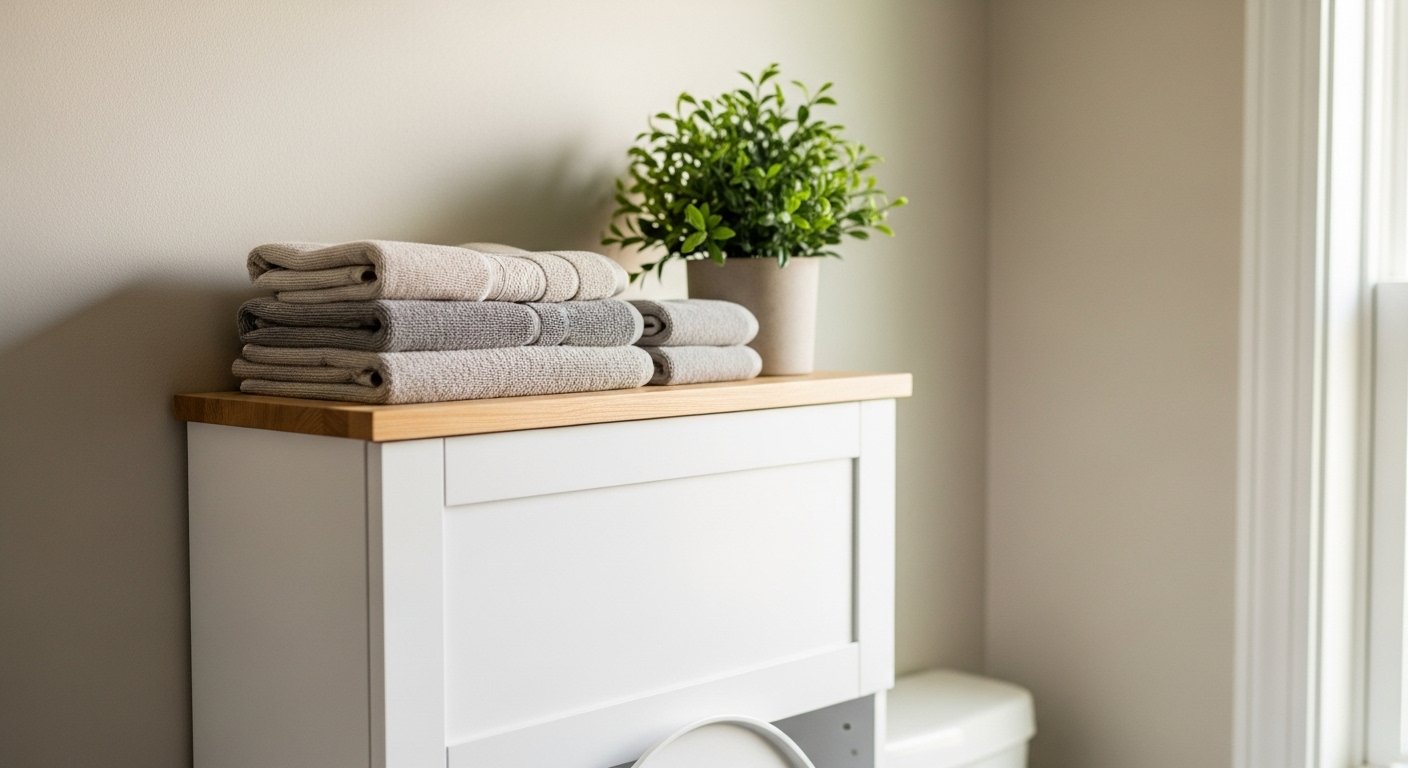
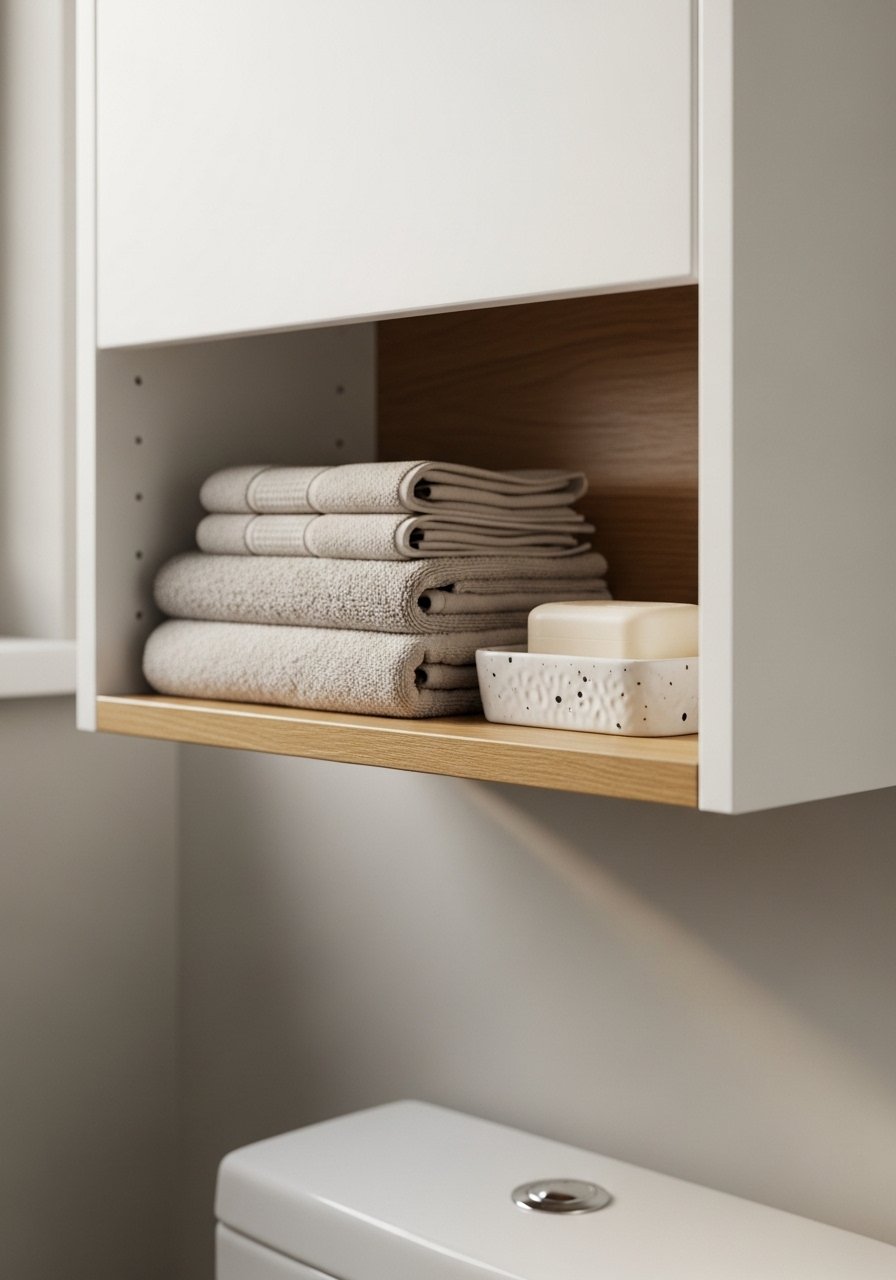
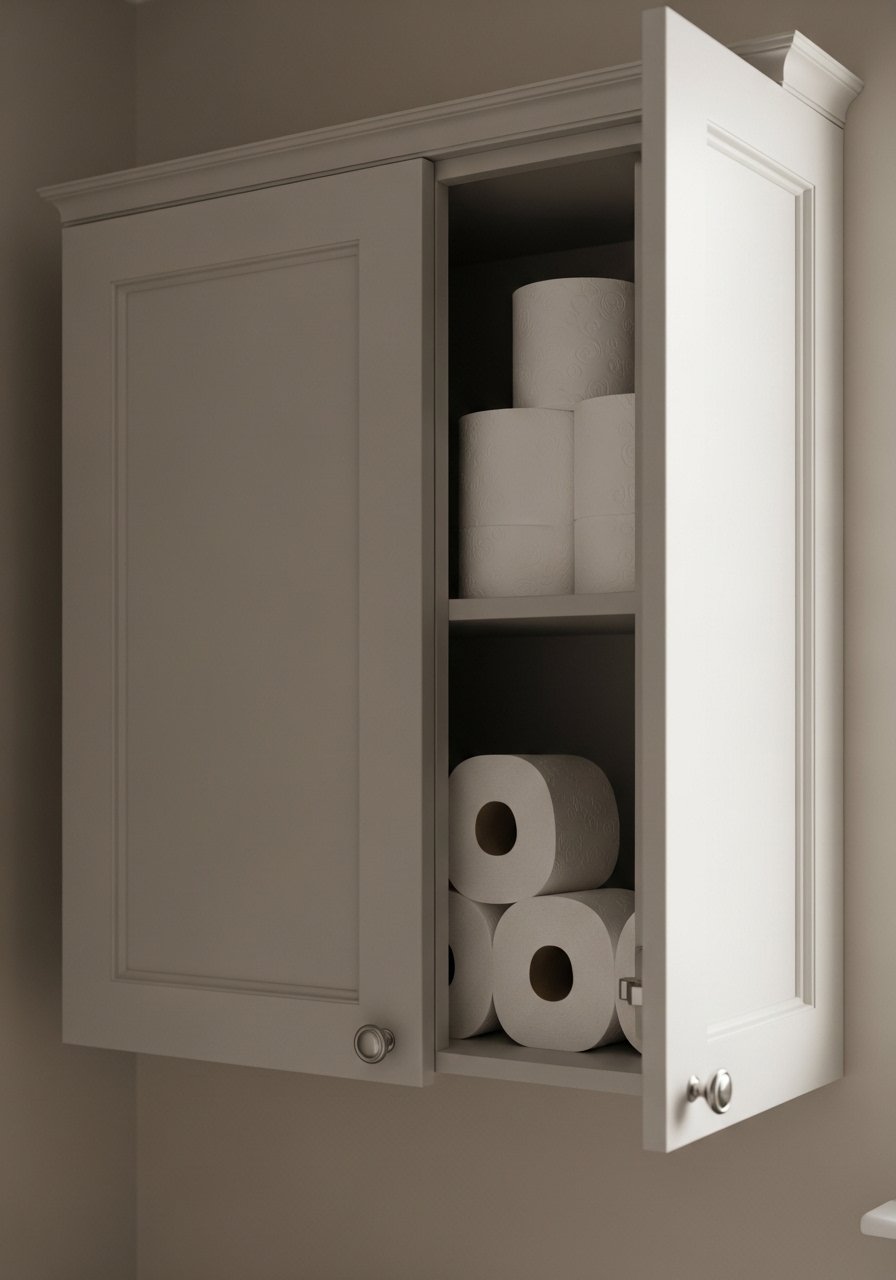
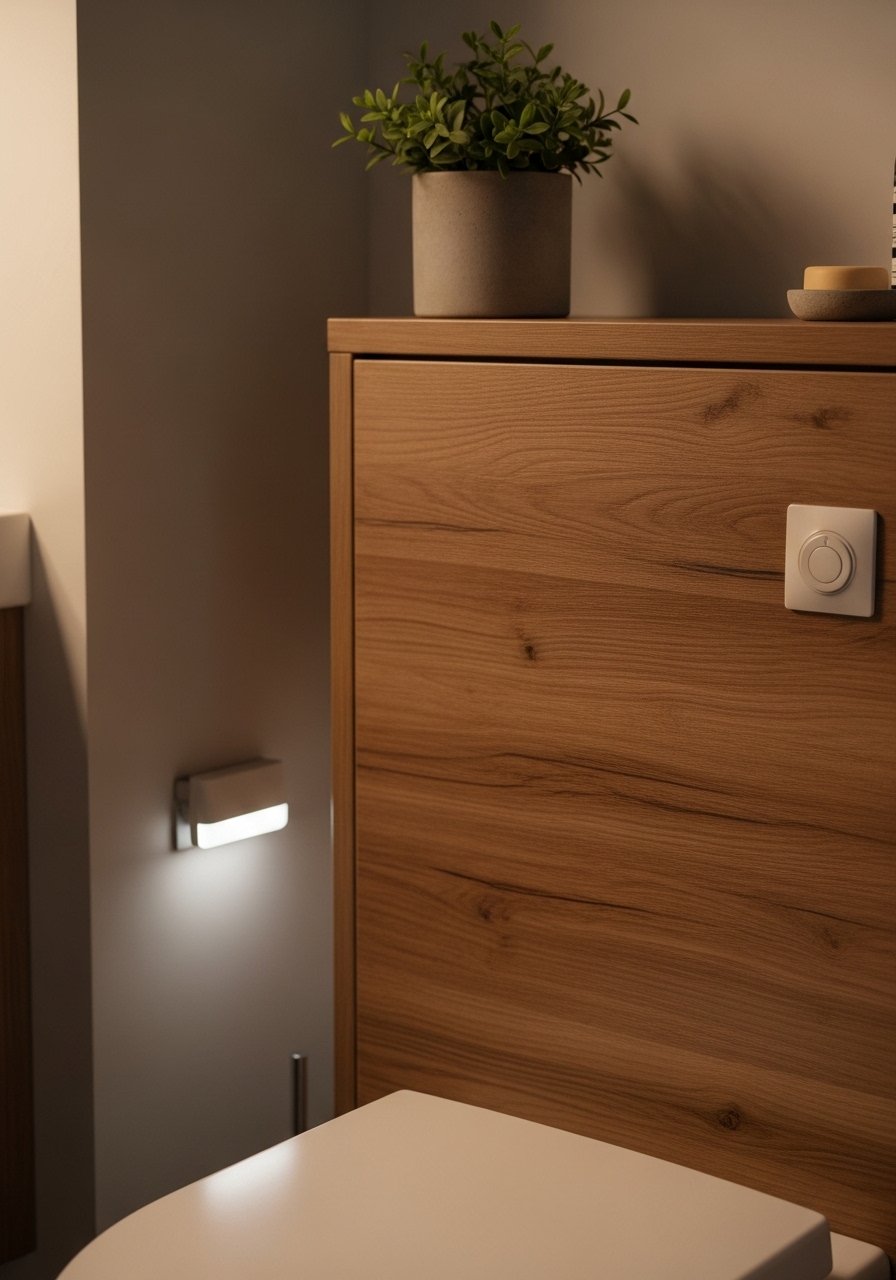
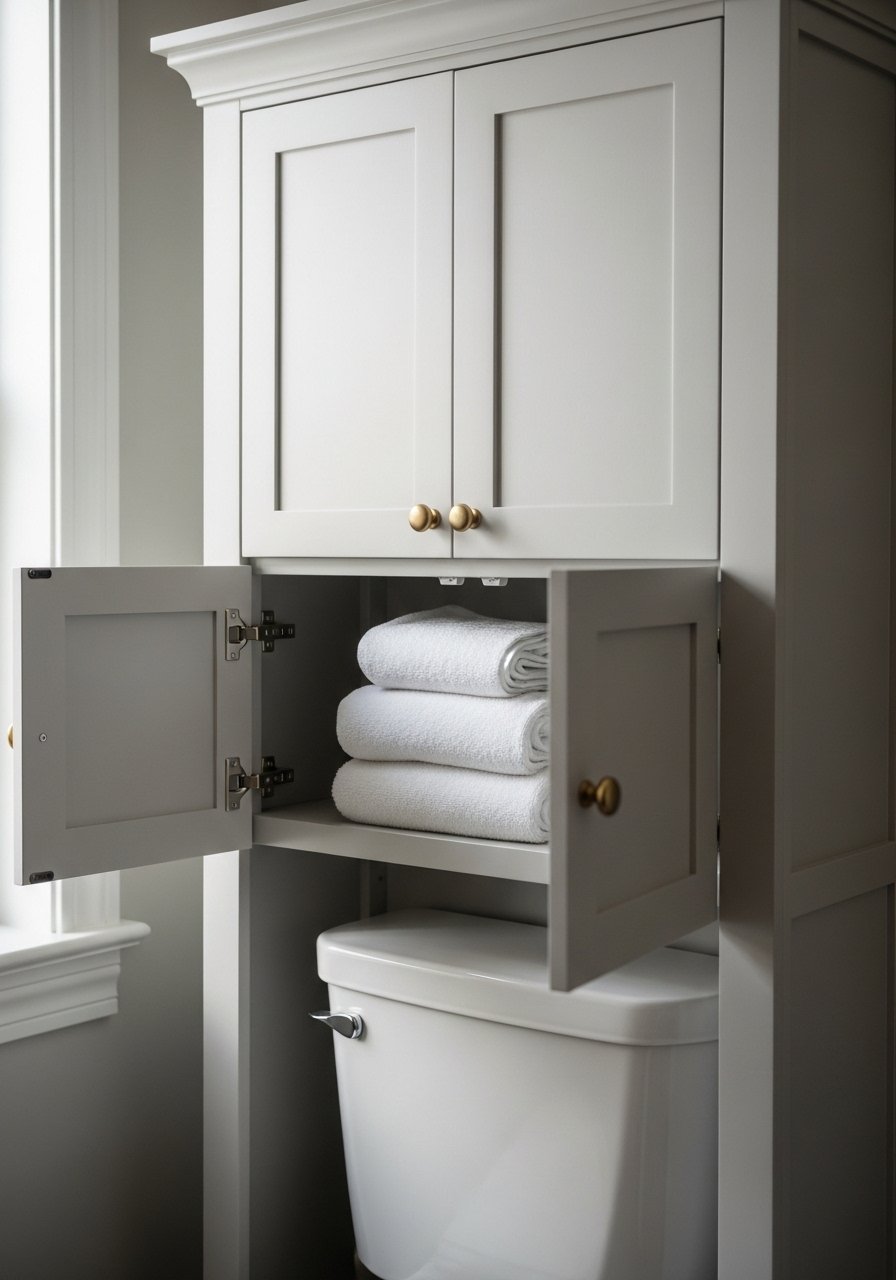
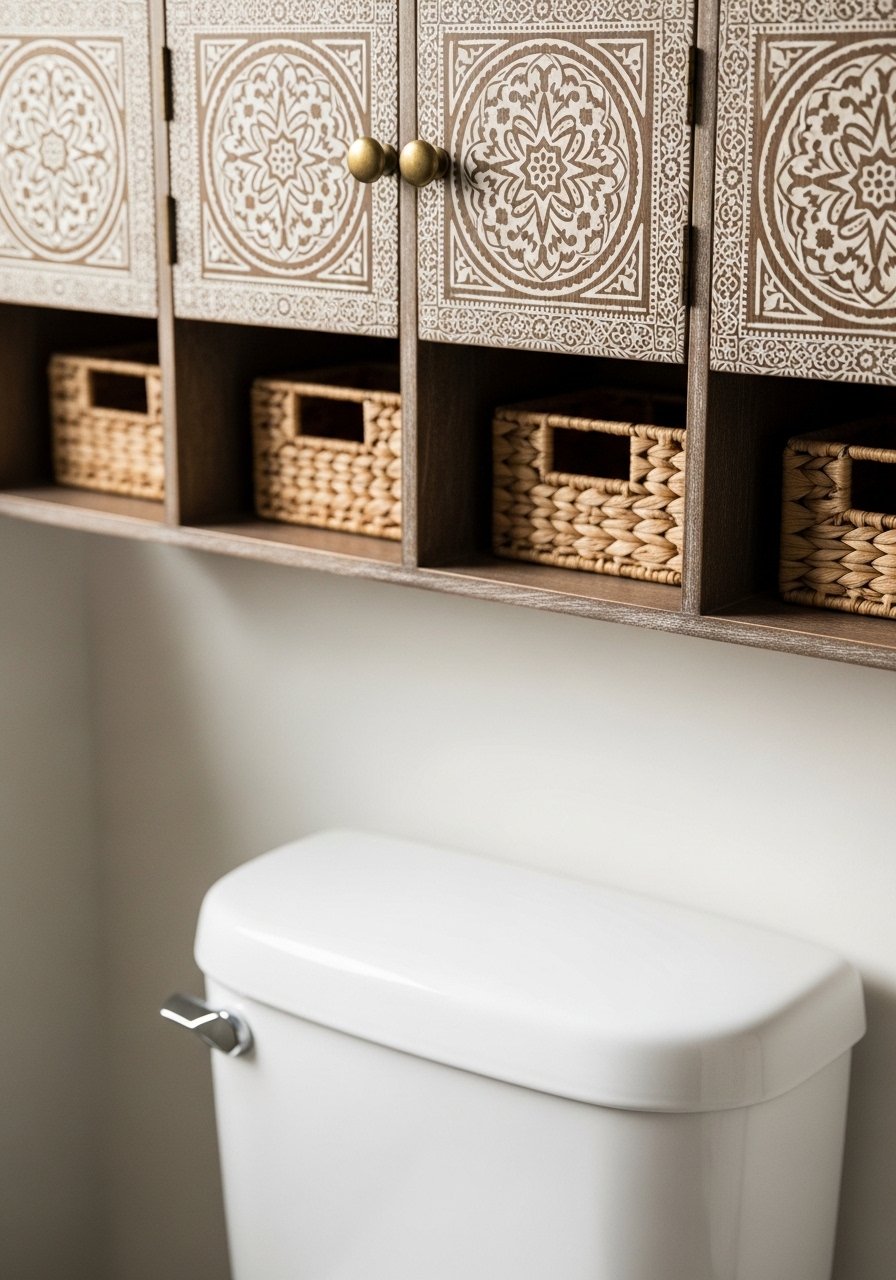
    1. Slim Over-the-Toilet Cabinet for Hidden Storage

    I bought a slim cabinet to hide toilet paper, meds, and the chaos that lived on top of the tank. It made the room feel taller instantly.

    At first I got one that was too deep and it crowded the toilet. Learn from me: measure the space from tank to wall first. A 10–12" depth usually works.

    I keep everyday items behind doors and pretty things on the open shelf. The visual pause above the toilet calmed the whole room.

    What You’ll Need for This Look

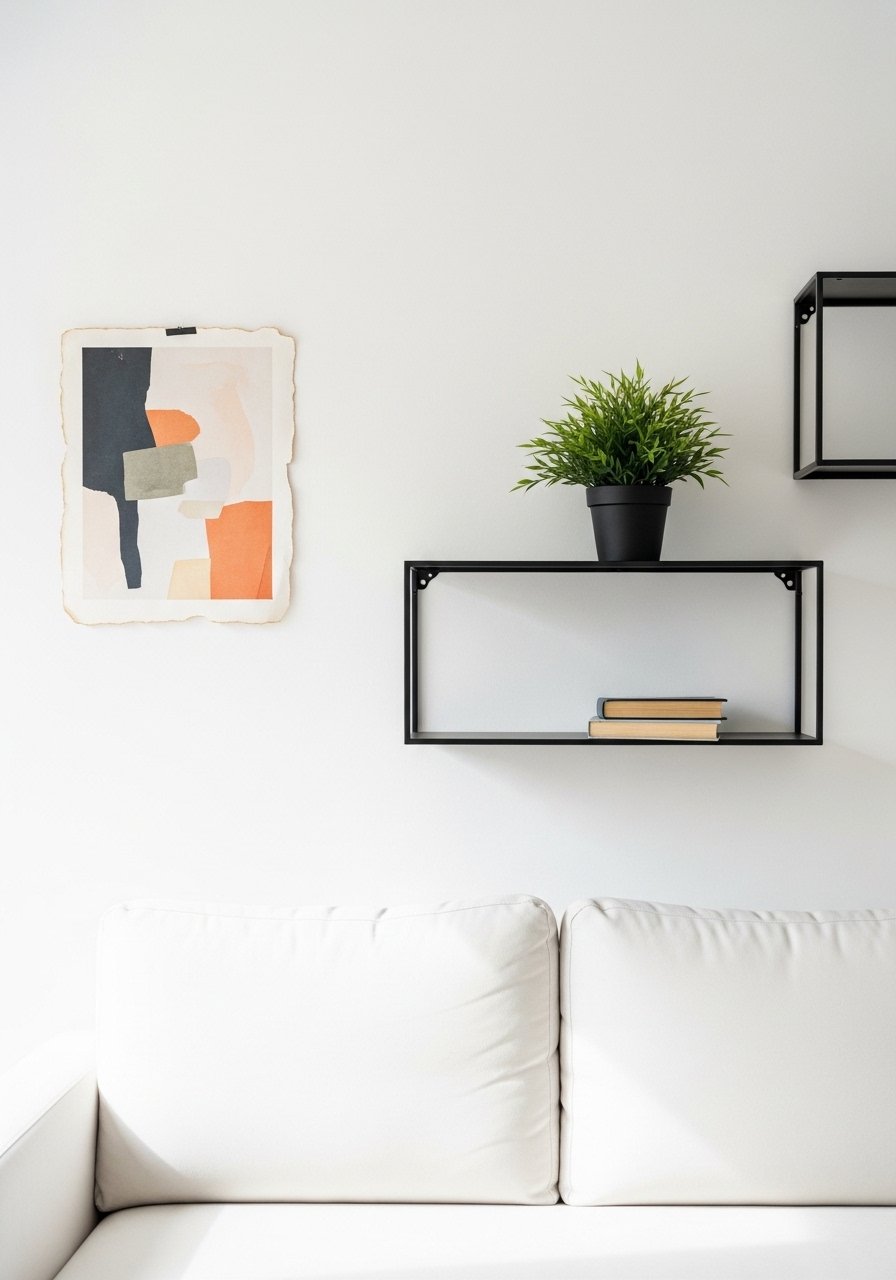
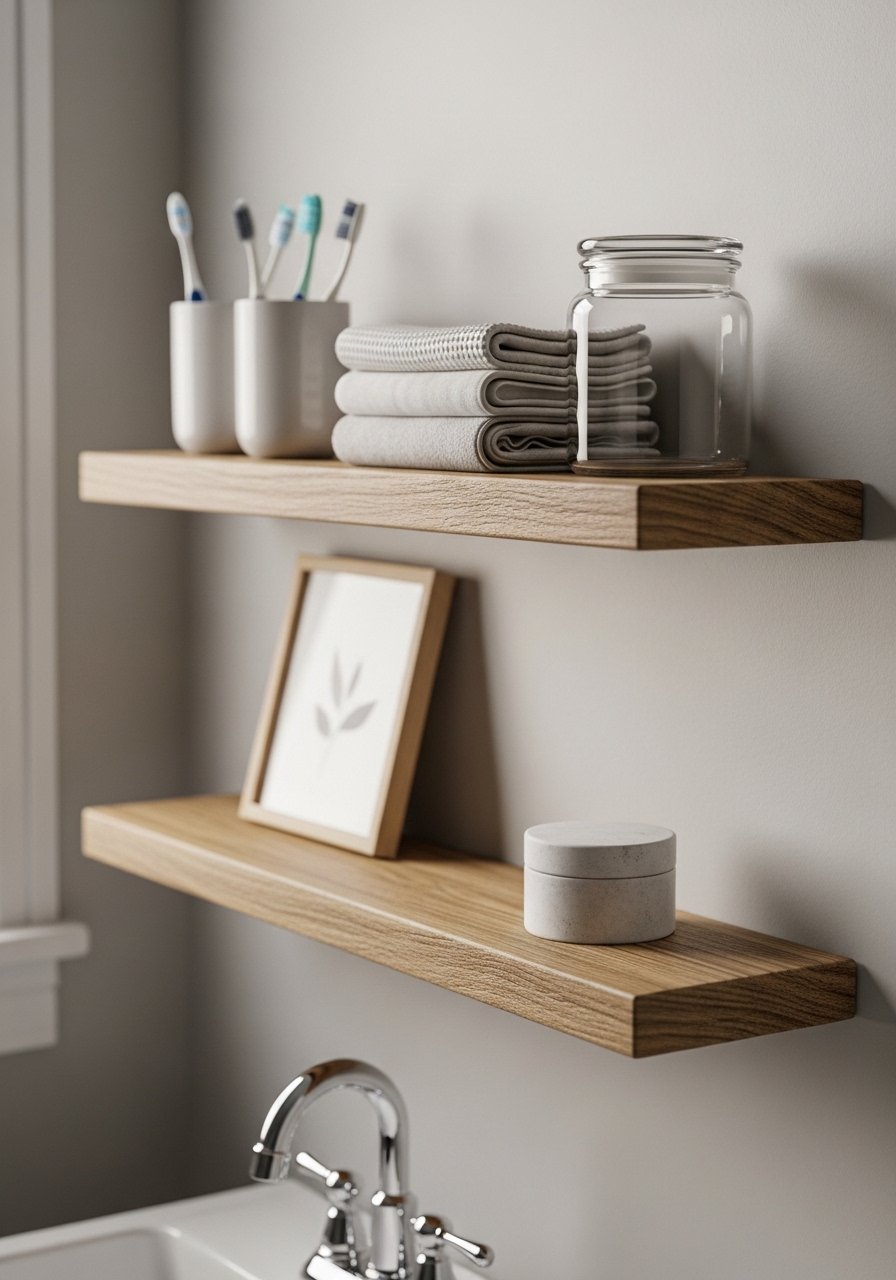
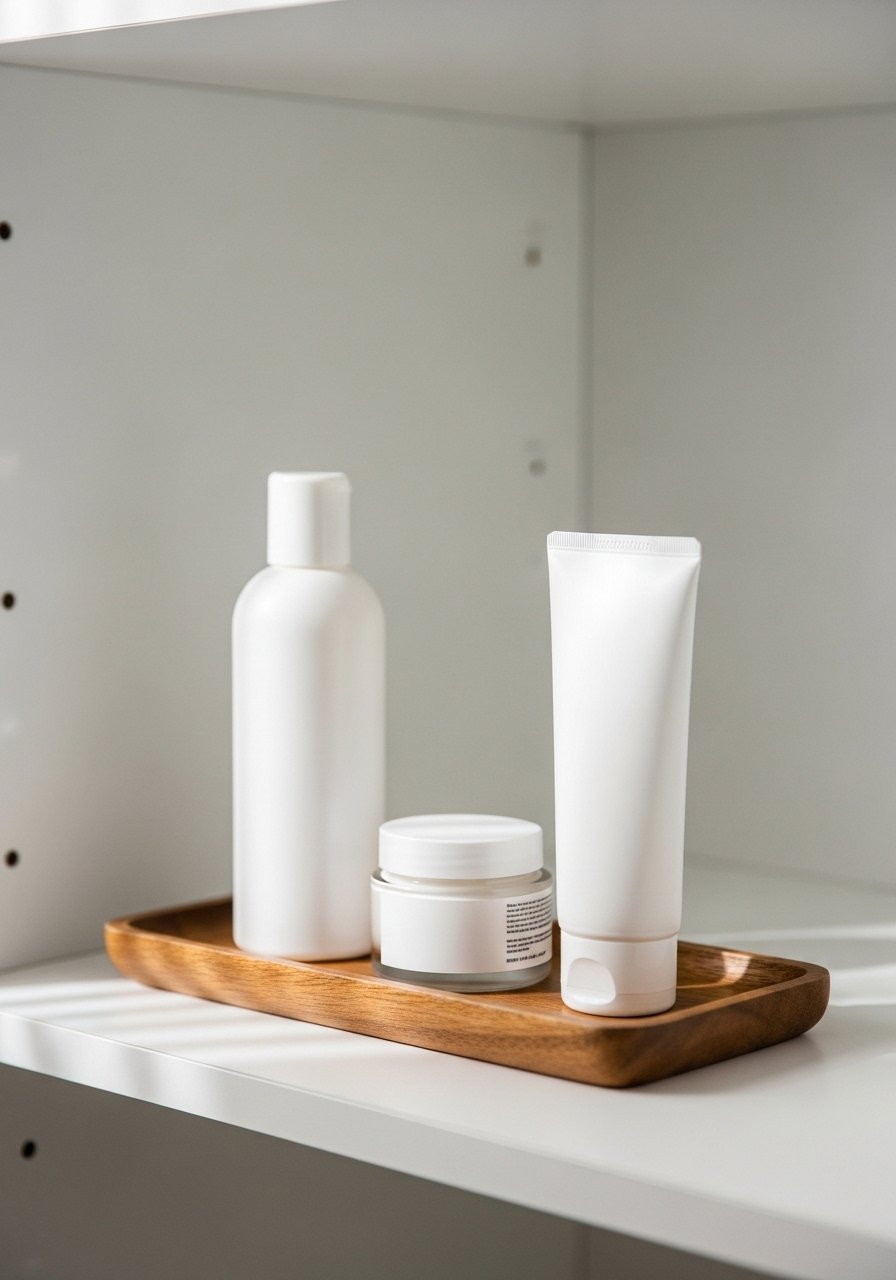
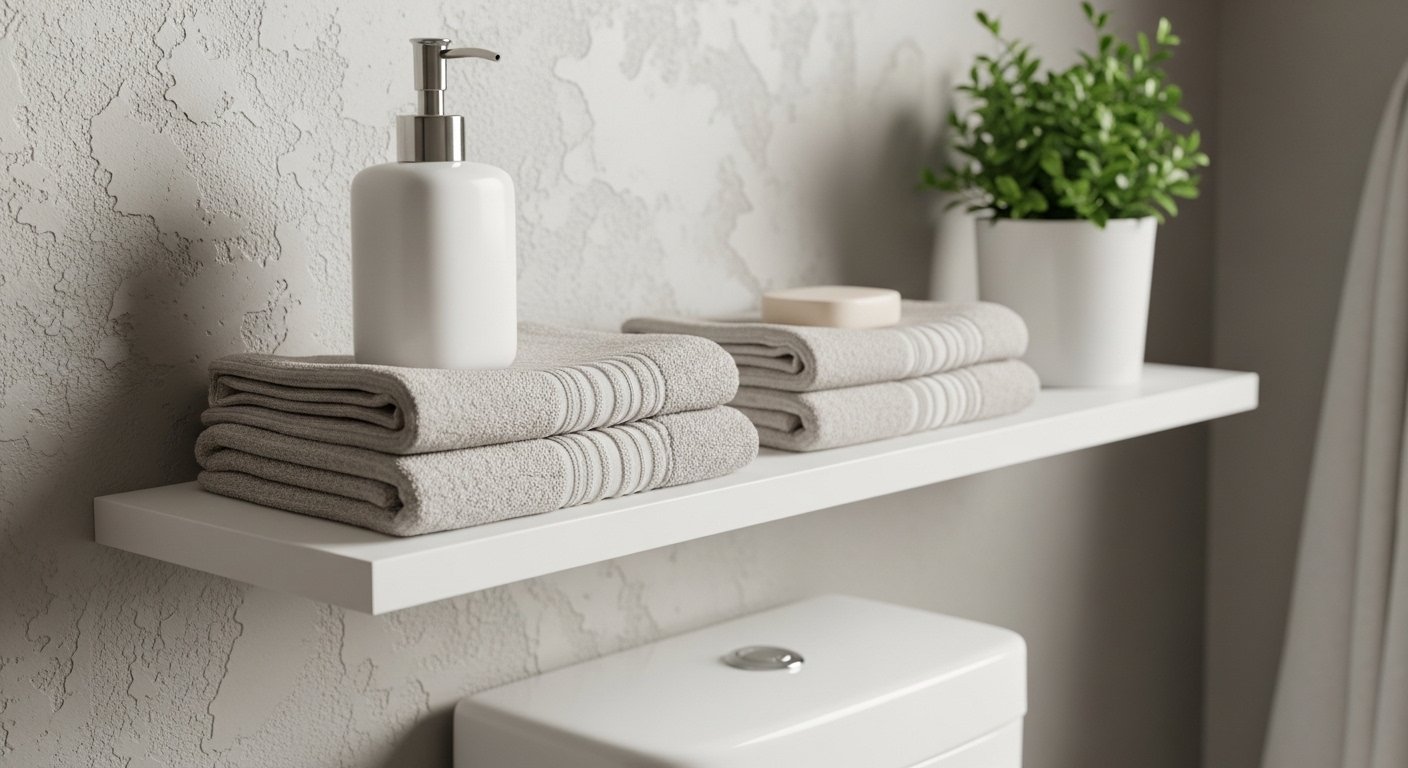
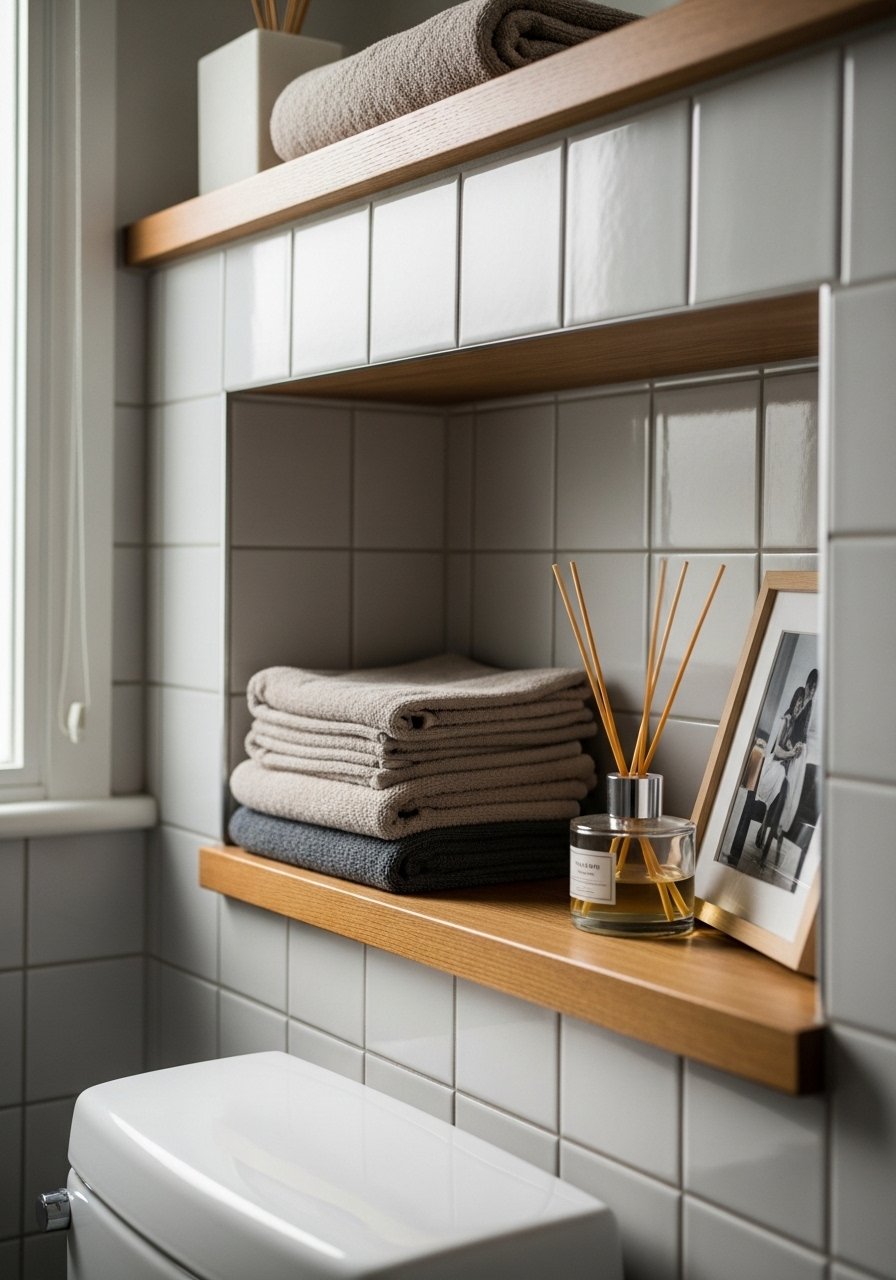
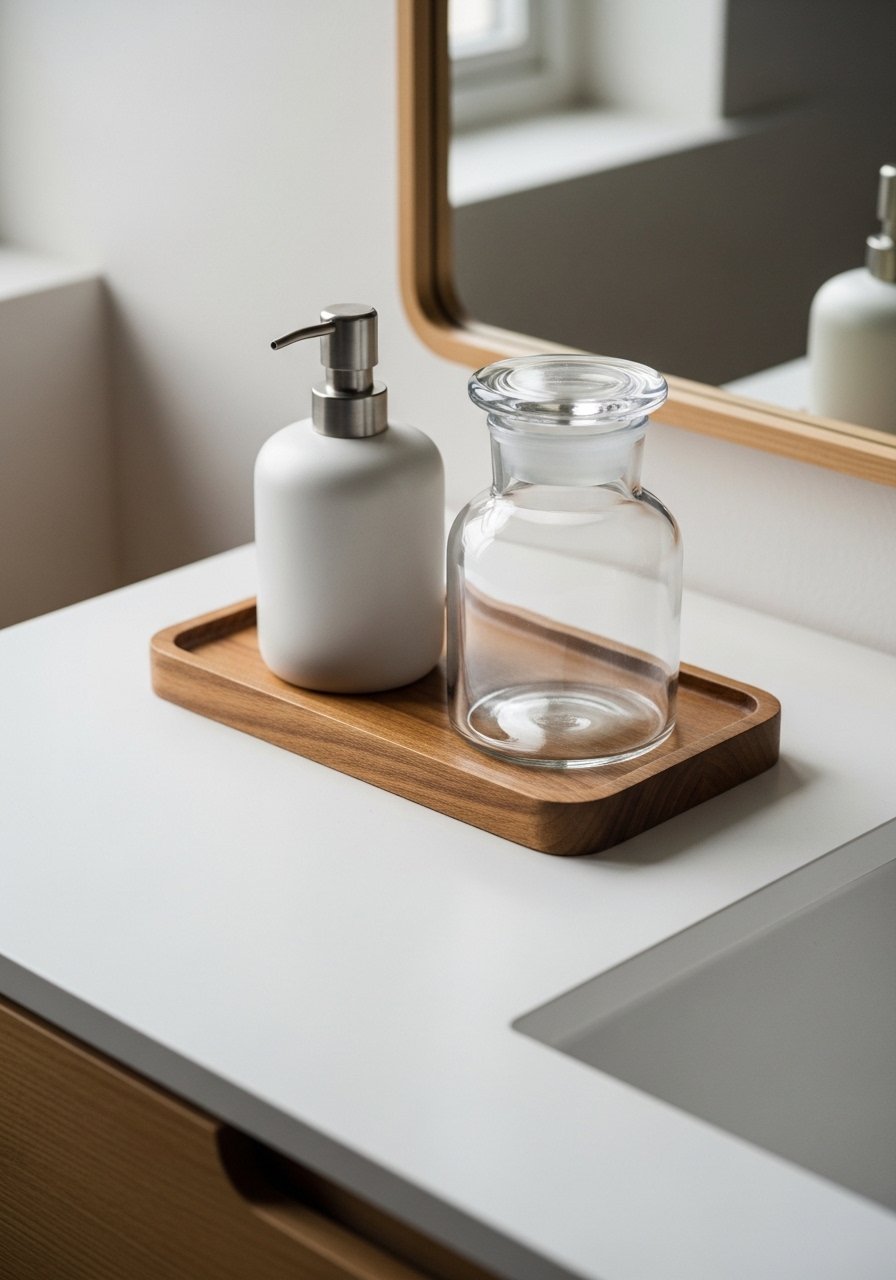
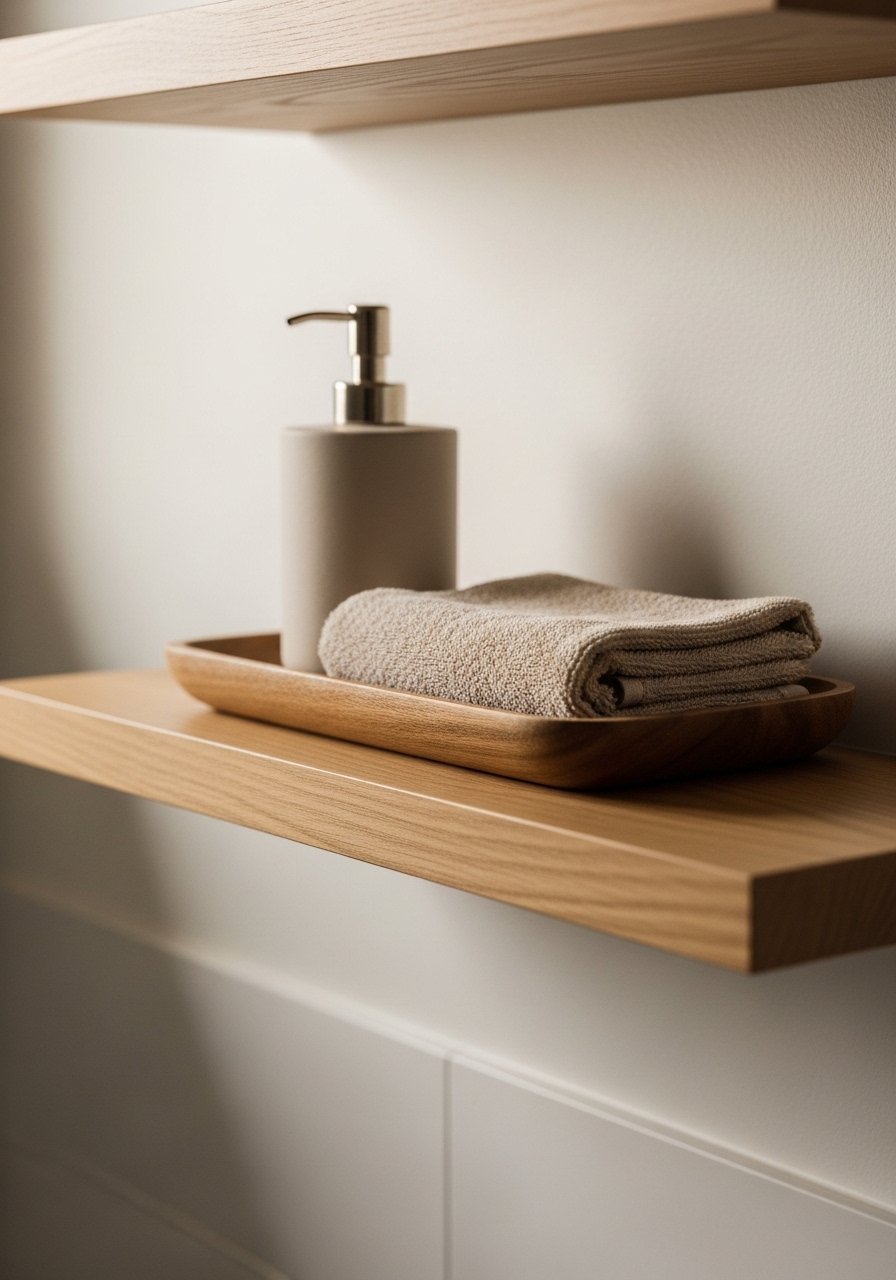
    2. Floating Shelves Above the Sink for Daily Access

    I put two floating shelves above my tiny sink and stopped jamming things into the medicine cabinet. I can see and reach what I use every day.

    Shelves force you to edit. I put only daily items here—hand soap, face cloth, a candle. It looks neater and feels intentional.

    Use thick brackets or anchors for tile walls. I lined the back with a small tray to catch drips and protect the wood.

    What You’ll Need for This Look

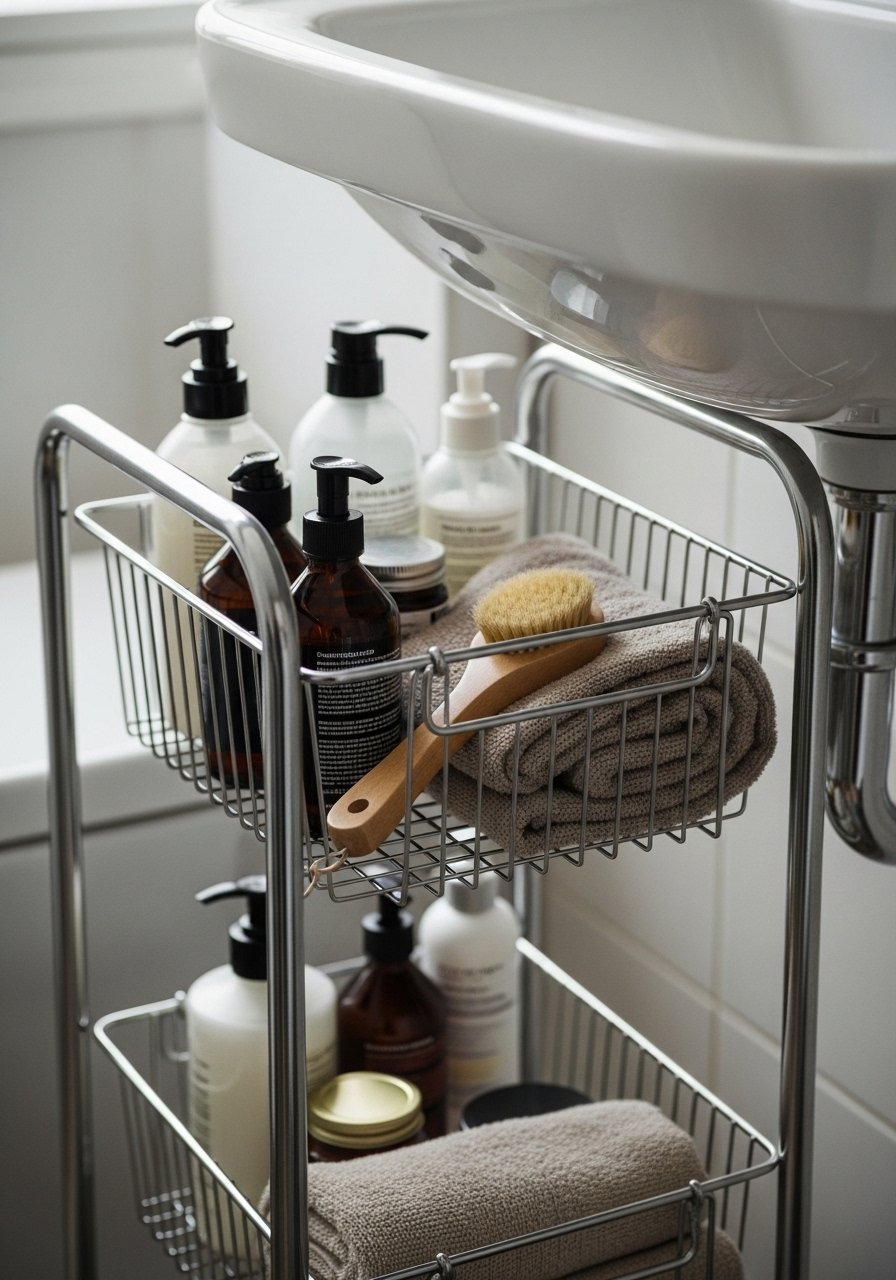
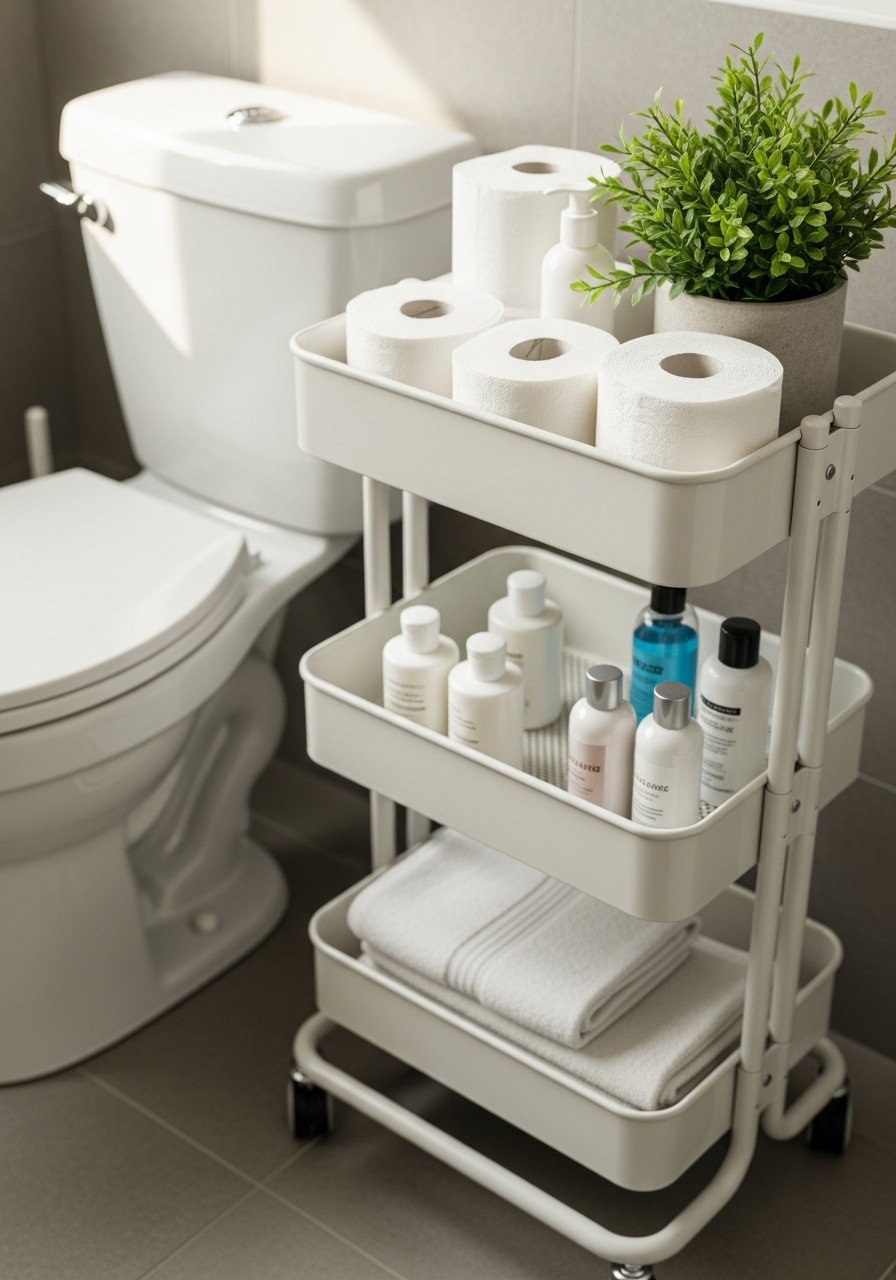
    3. Narrow Rolling Cart That Fits Between Fixtures

    I tucked a 10" rolling cart between the sink and vanity and it felt like cheating. It holds hair tools, lotions, and a daily basket.

    My first cart had flimsy wheels that stuck on tile. Replace the wheels or buy one with lockable casters. The locks keep it from moving during use.

    When guests come I wheel it into a closet. The mobility is everything in a tight bathroom.

    What You’ll Need for This Look

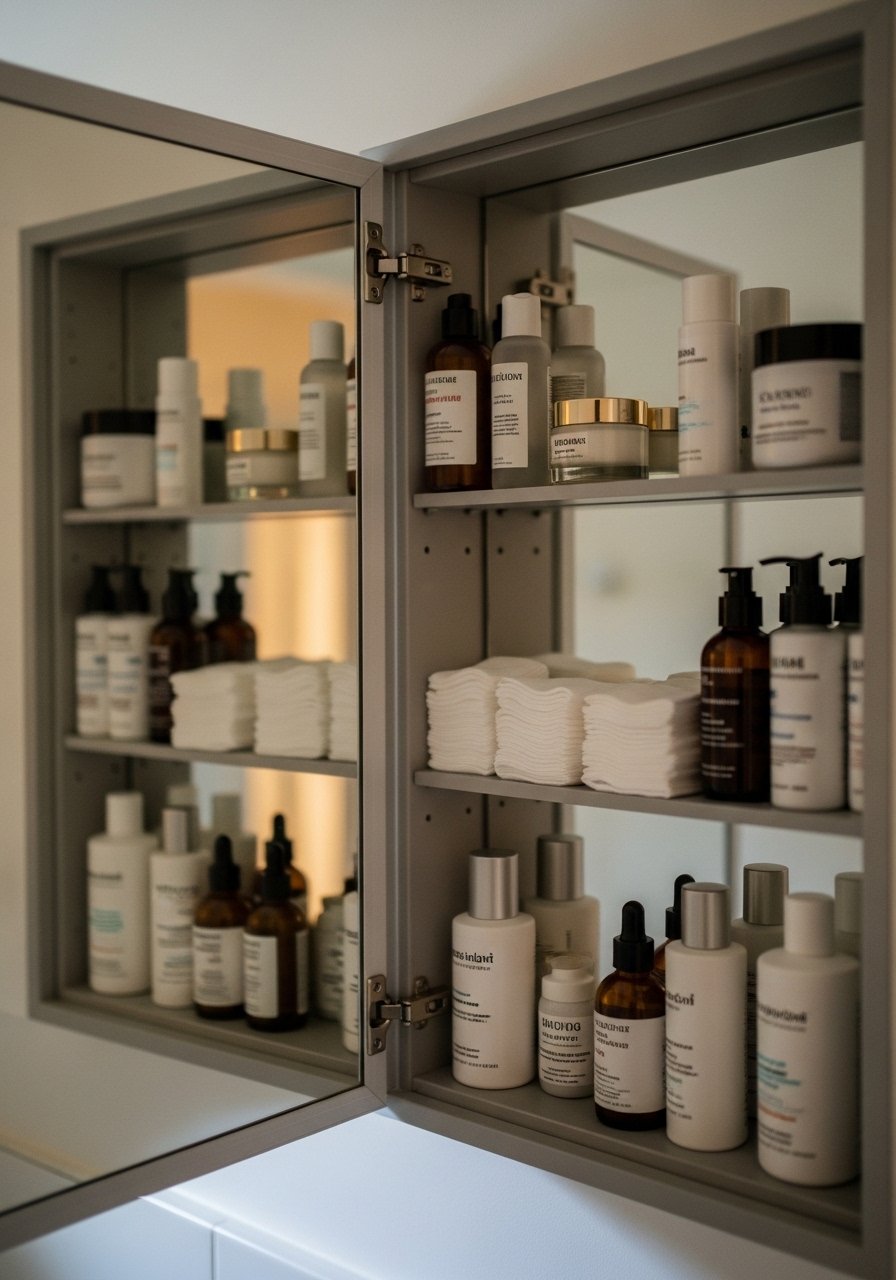
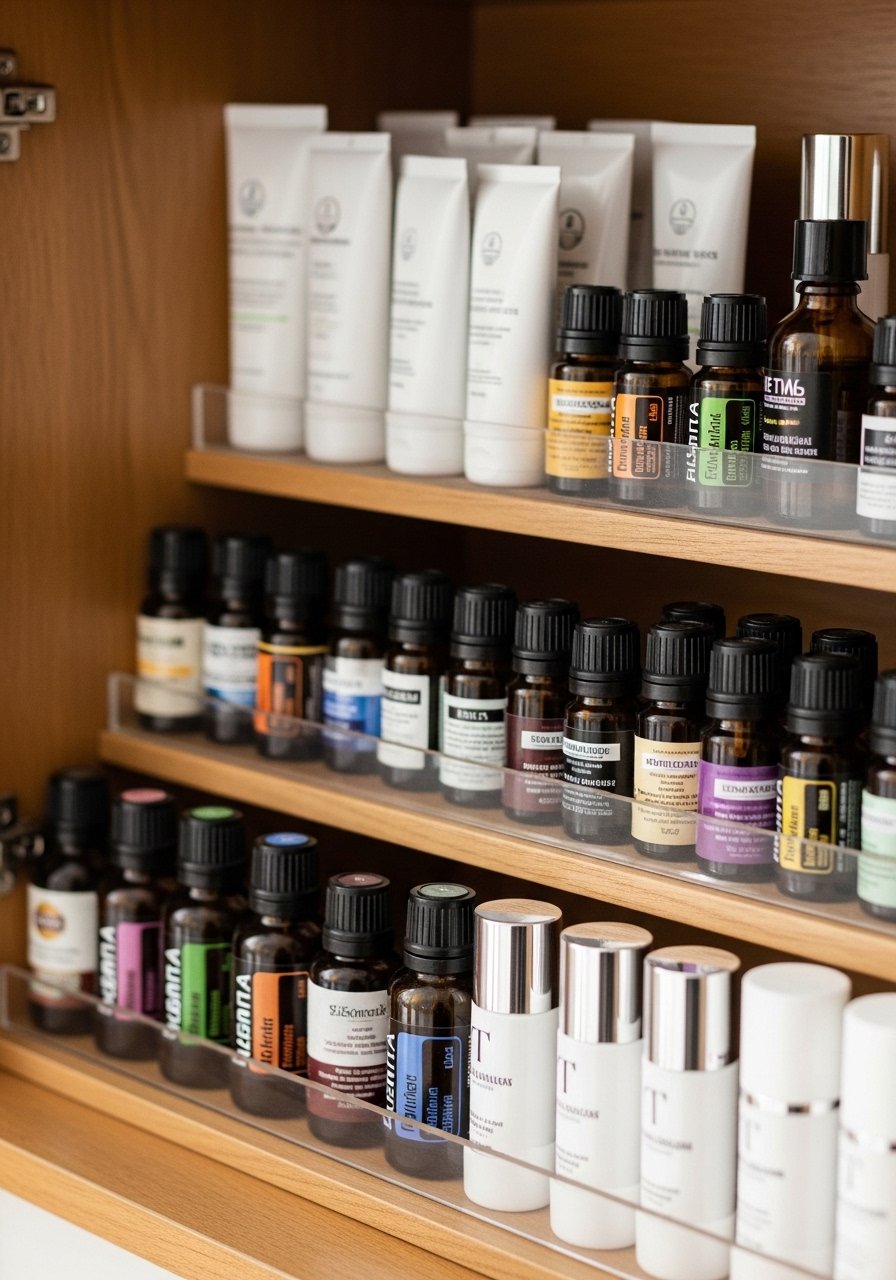
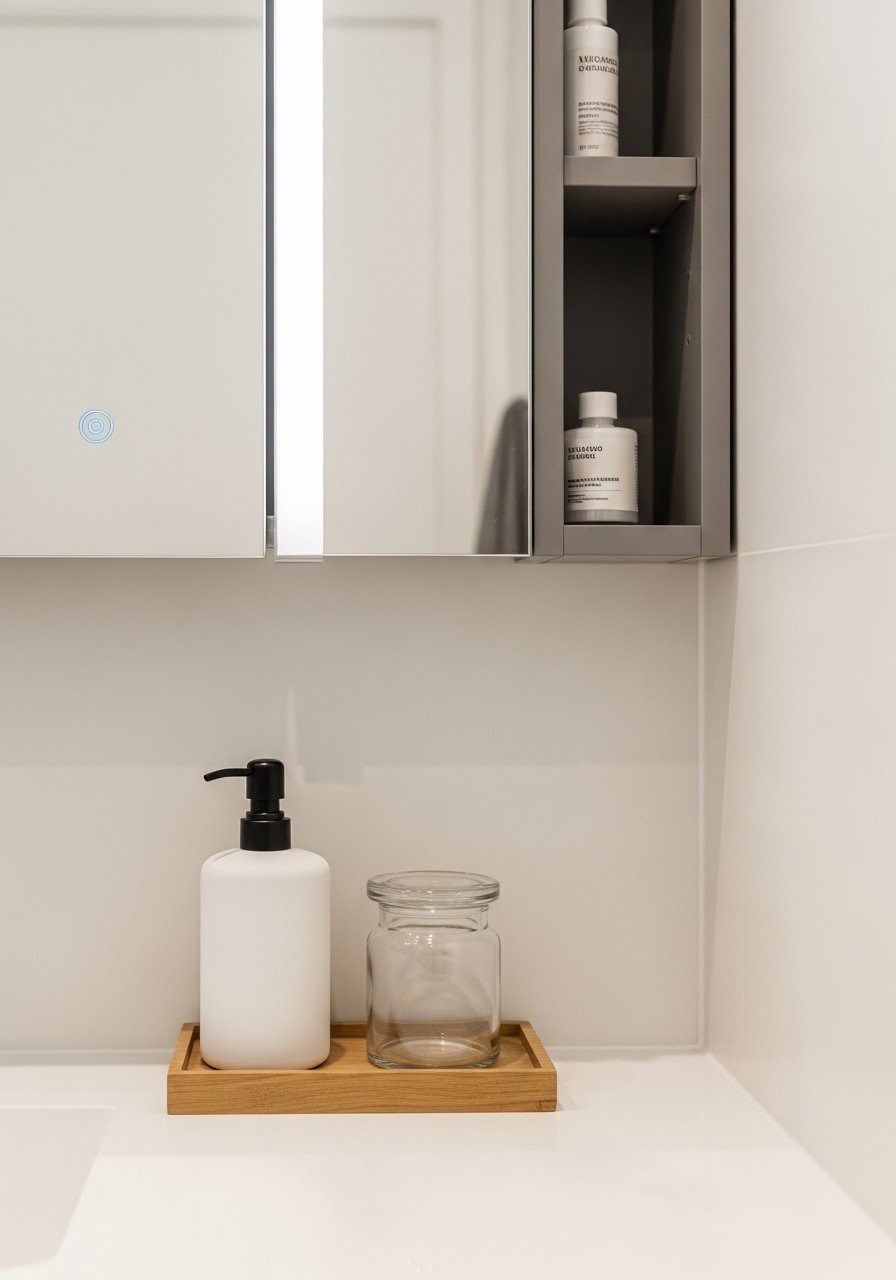
    4. Recessed Medicine Cabinet with Mirror for Streamlined Storage

    Installing a recessed cabinet was the biggest visual upgrade. The mirror keeps the room feeling open, and shelves hide the clutter.

    I misjudged shelf height the first time—tall bottles didn’t fit. I fixed it by moving a shelf and now everything sits upright without leaning.

    Leave a small gap between items so you can see what’s there. Add labels inside for quick mornings.

    What You’ll Need for This Look

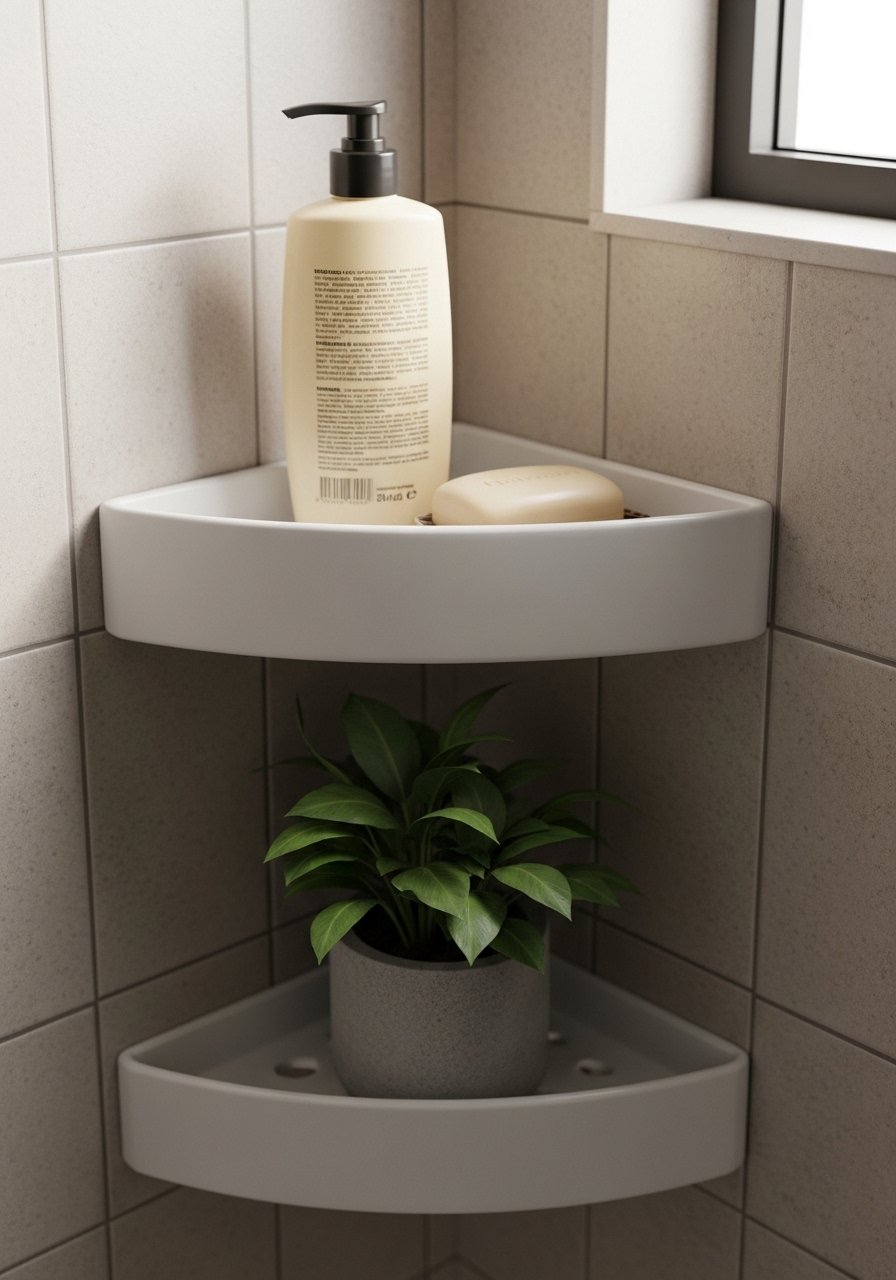
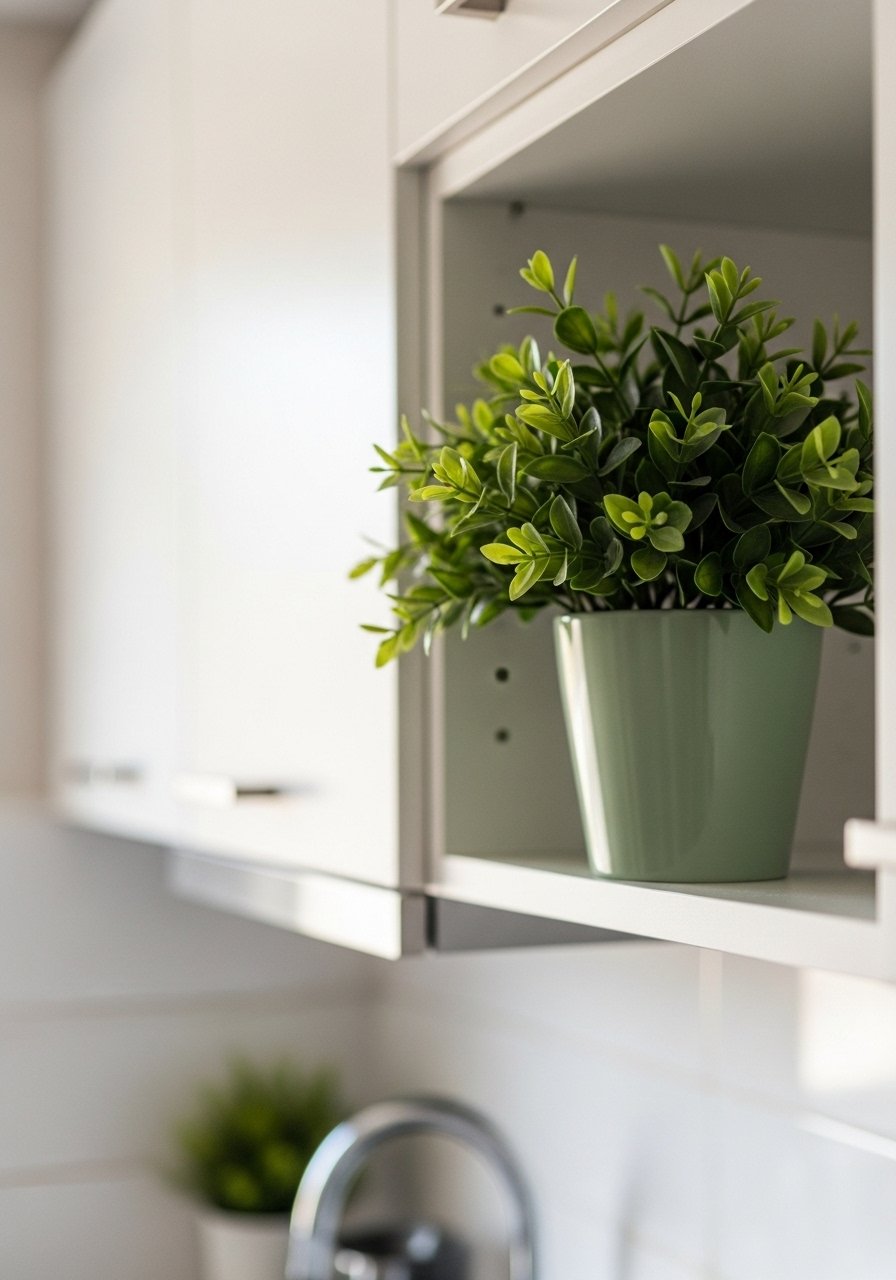
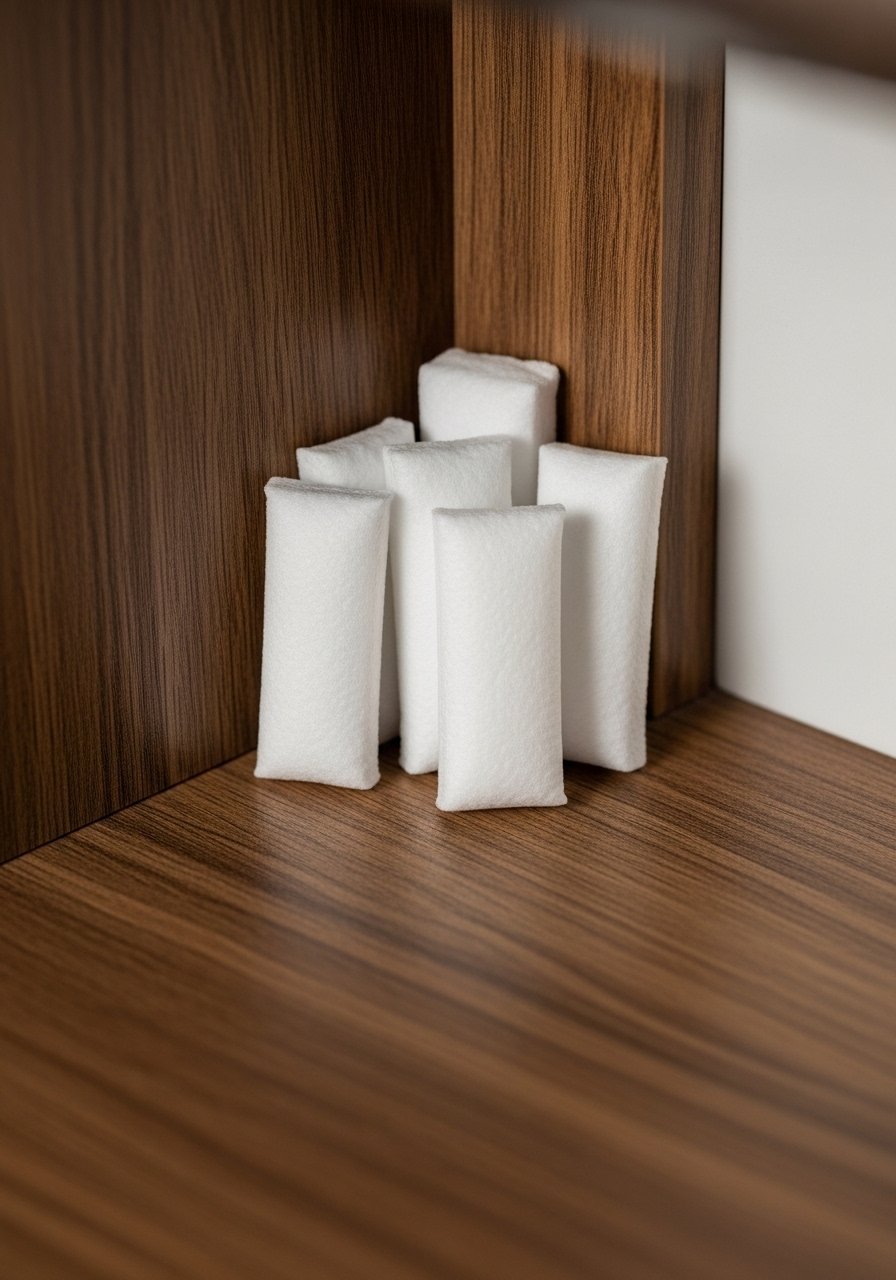
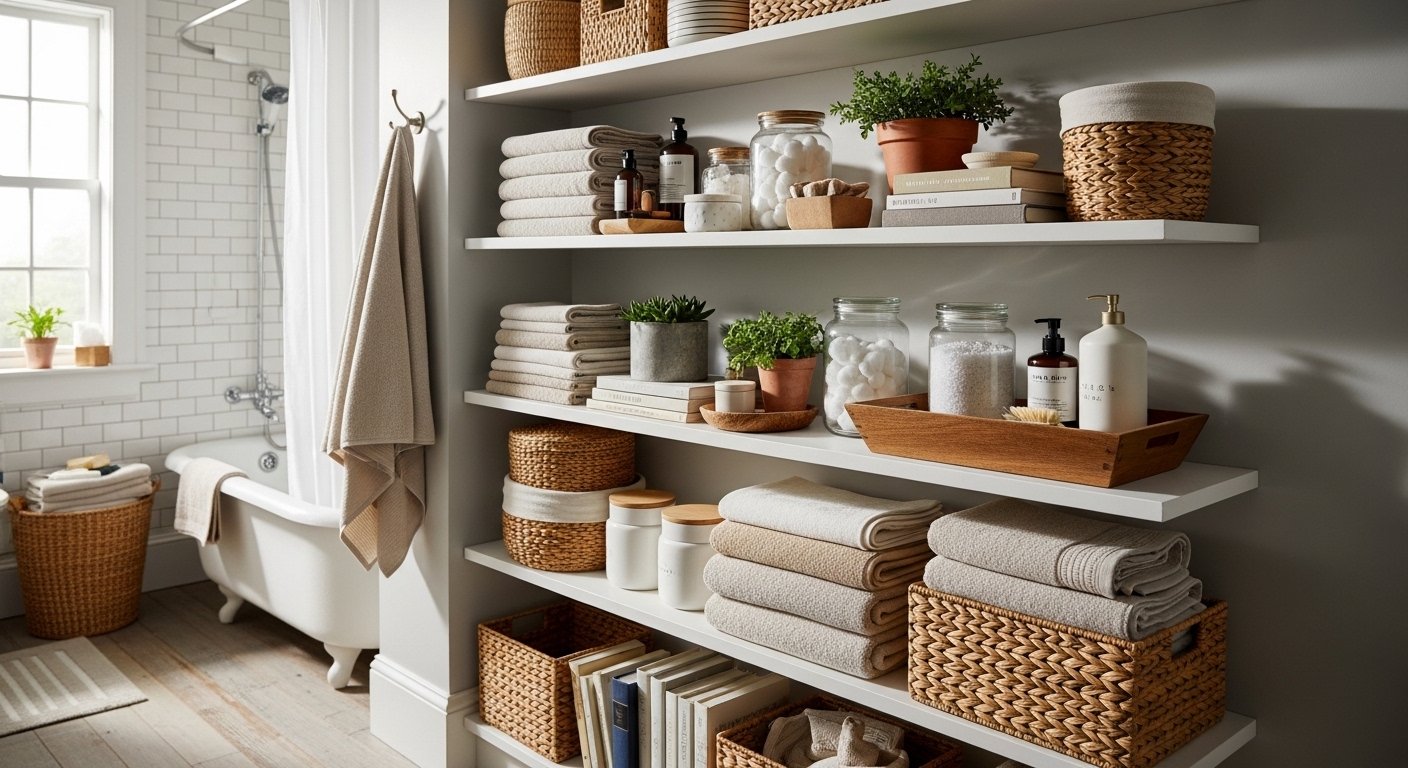
    5. Triangular Corner Shelves to Use Dead Space

    I added corner shelves to a useless dead space and suddenly had room for plants and extra soap. Corners are underused real estate.

    I once bought flimsy plastic shelves that bowed under weight. Choose metal or solid wood brackets and avoid overloading them.

    I like alternating closed baskets and open displays to keep it tidy but not sterile. It feels intentional, not crowded.

    What You’ll Need for This Look

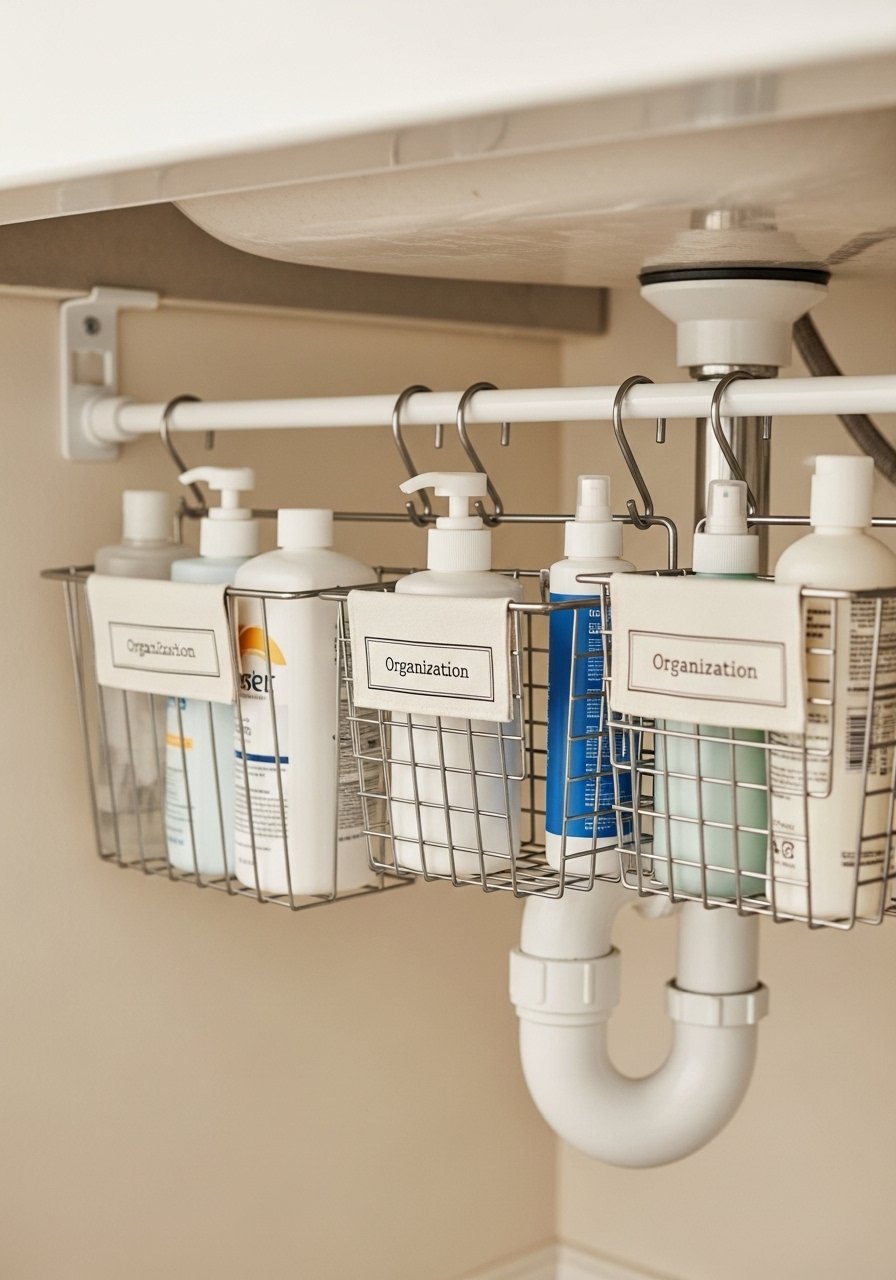
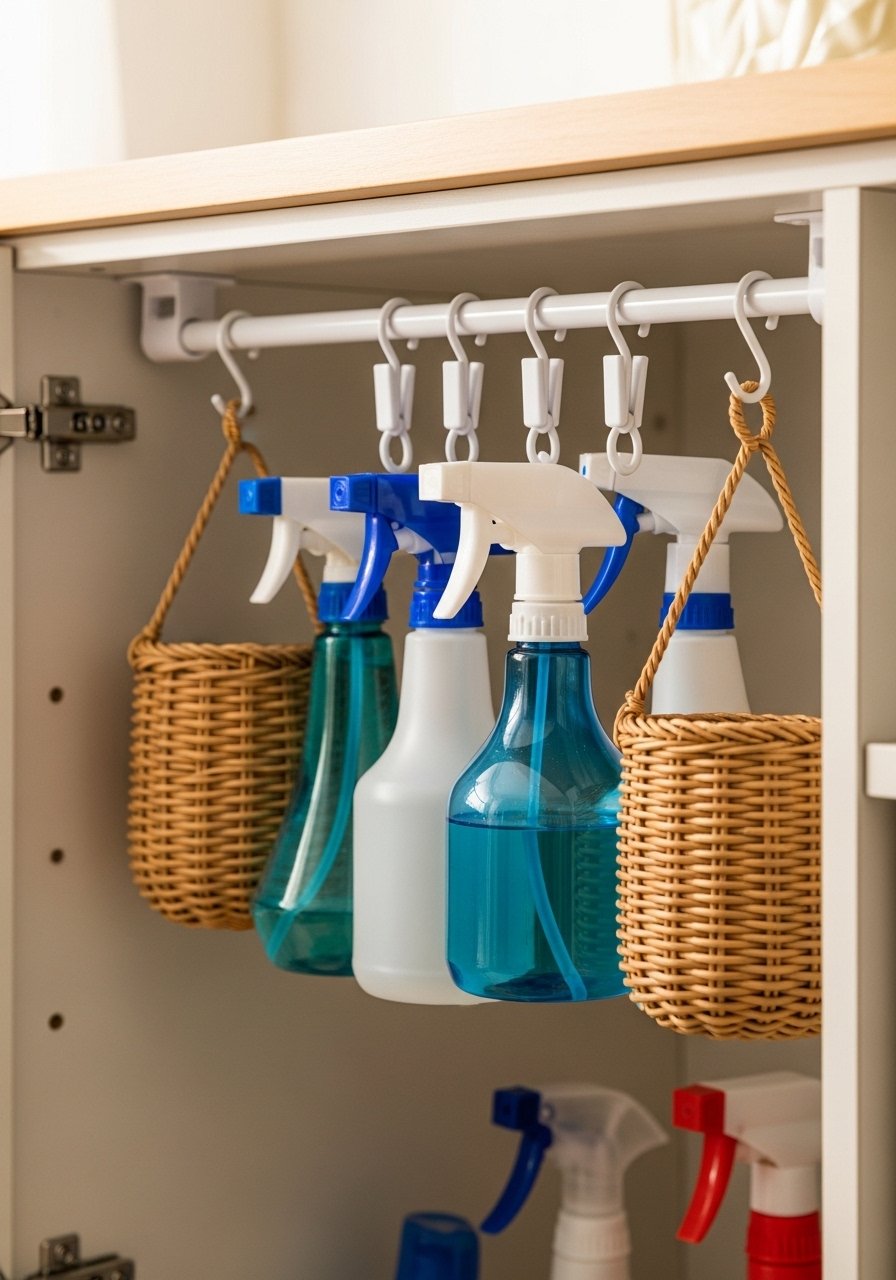
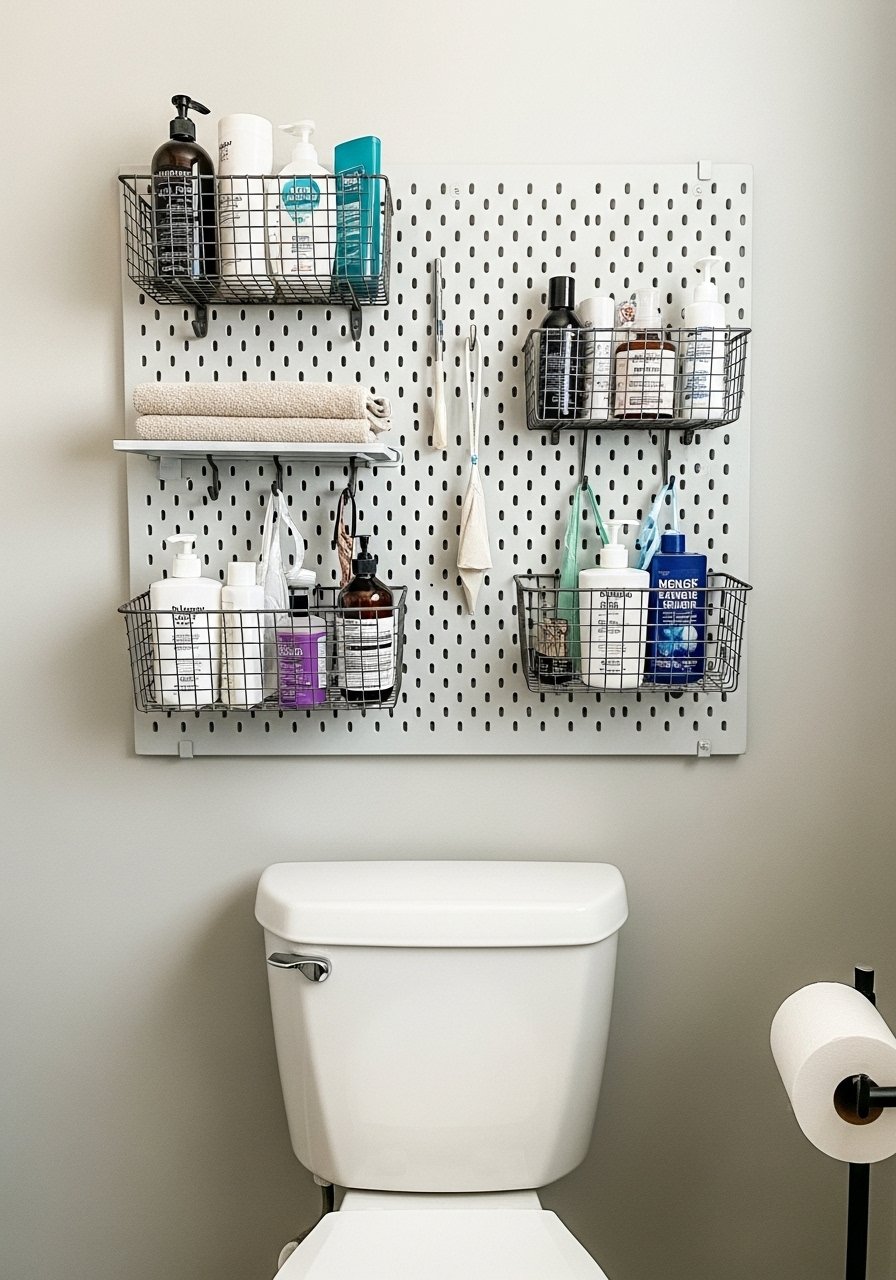
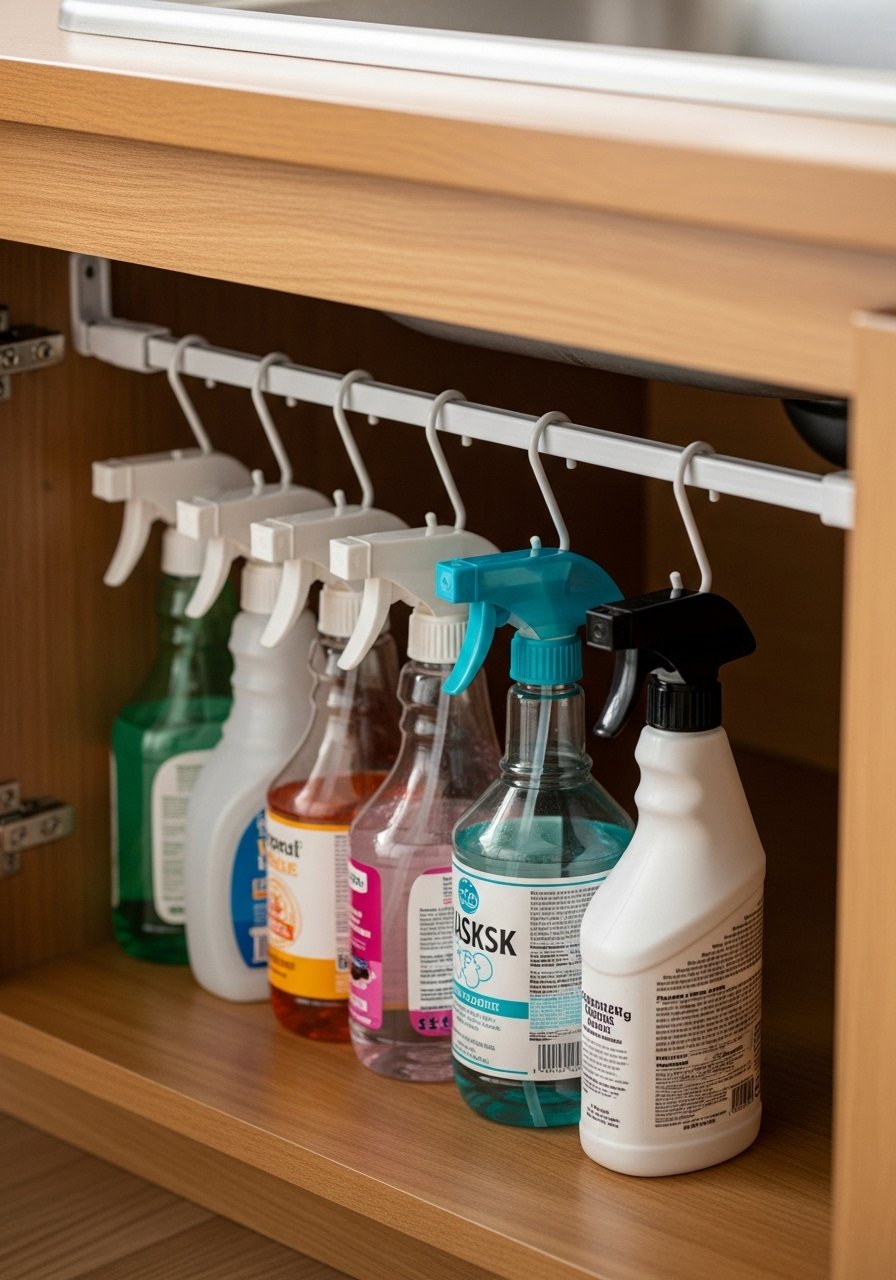
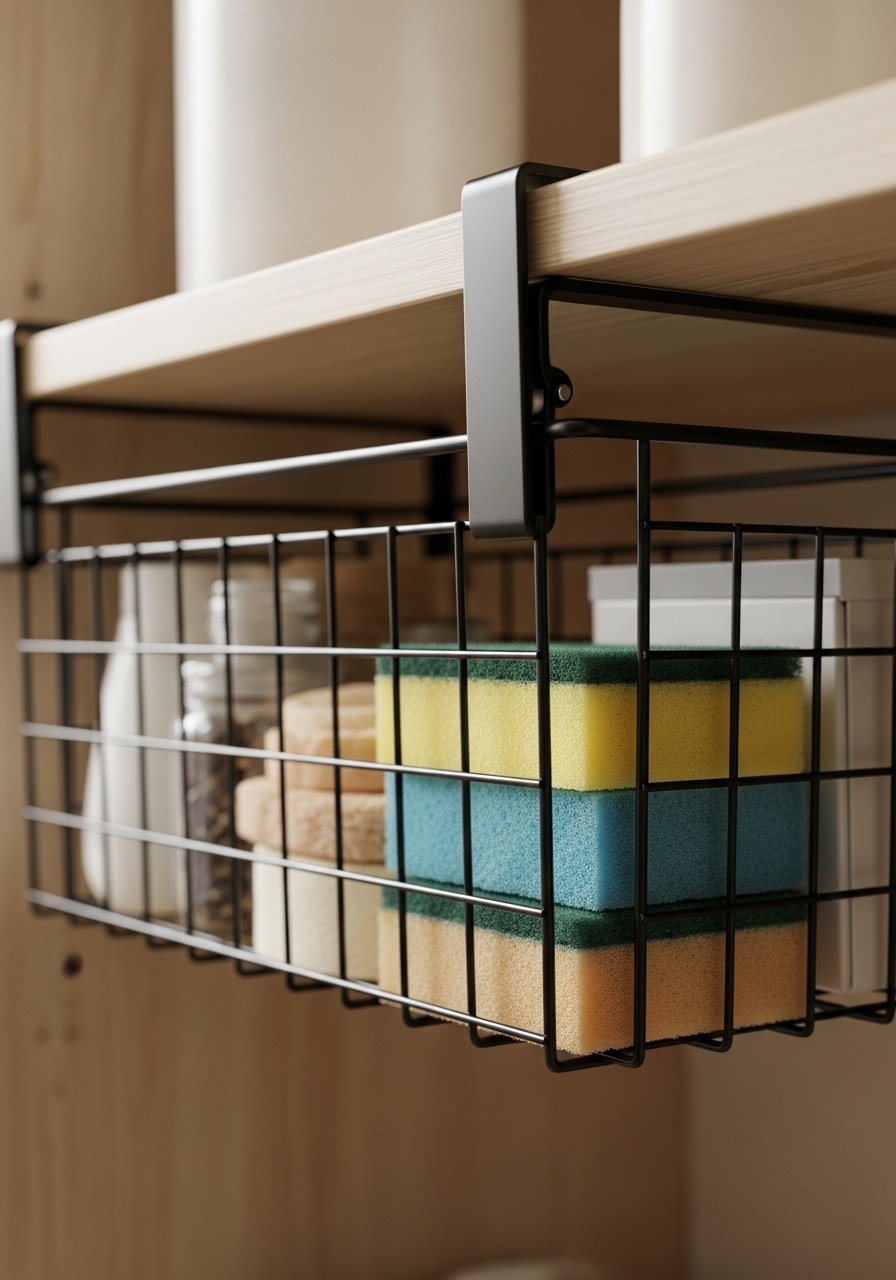
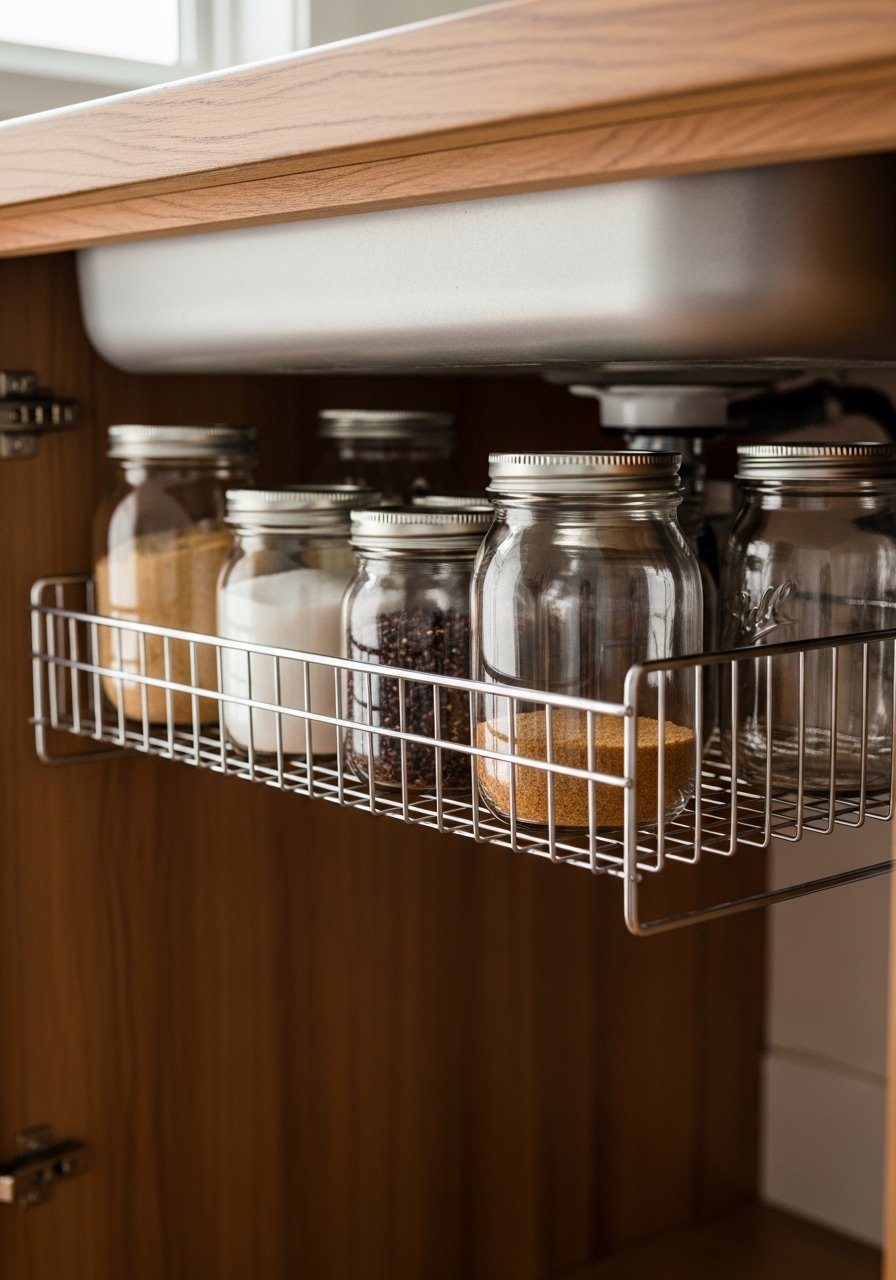
    6. Tension Rod Under Sink with Hanging Baskets

    Under my sink was a tangle until I put a tension rod across and clipped hanging baskets to it. Bottles hang, brushes sit, the floor is clear.

    I initially overfilled the baskets and the rod slipped. I swapped to higher-quality tension rods and balanced the weight across two baskets.

    It’s cheap, reversible, and makes cleaning under the sink far less gross.

    What You’ll Need for This Look

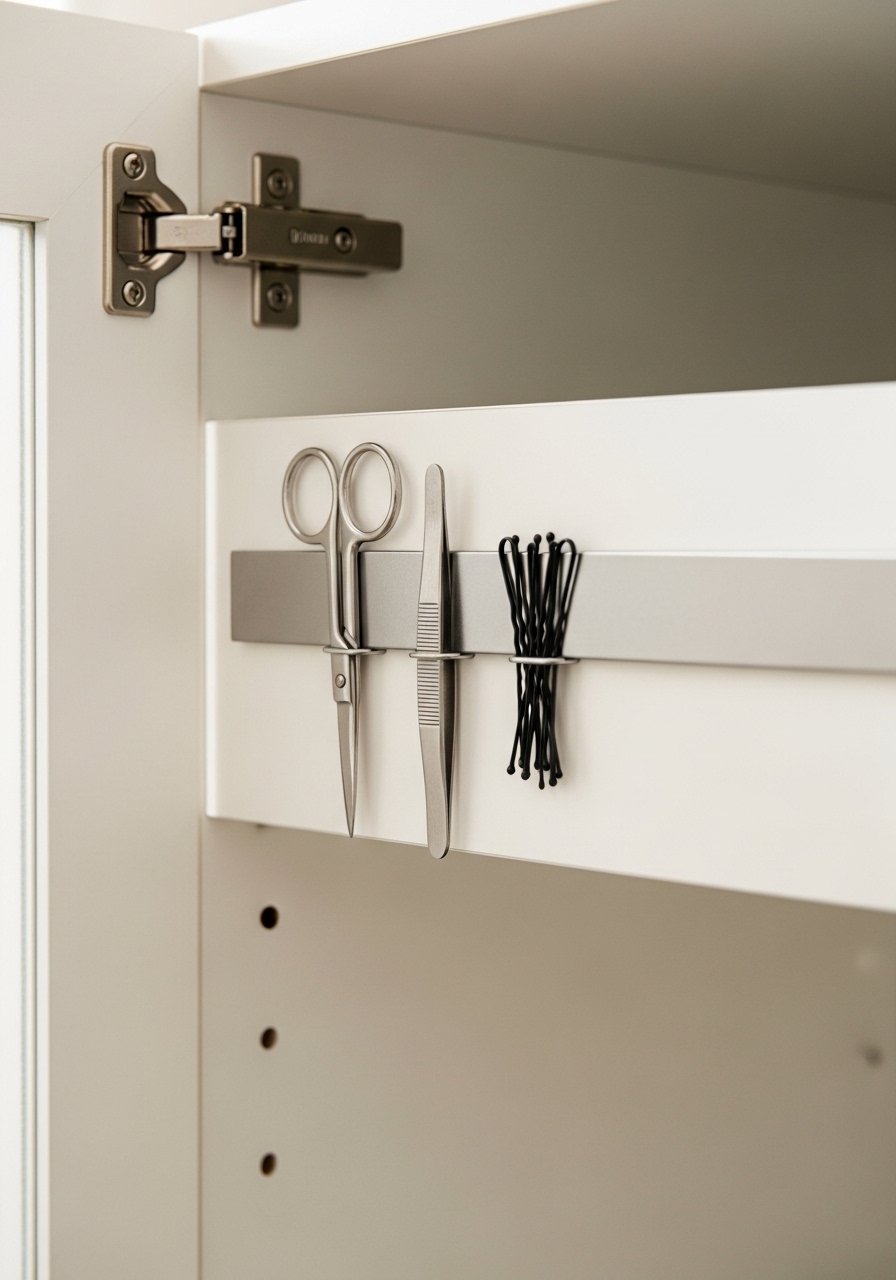
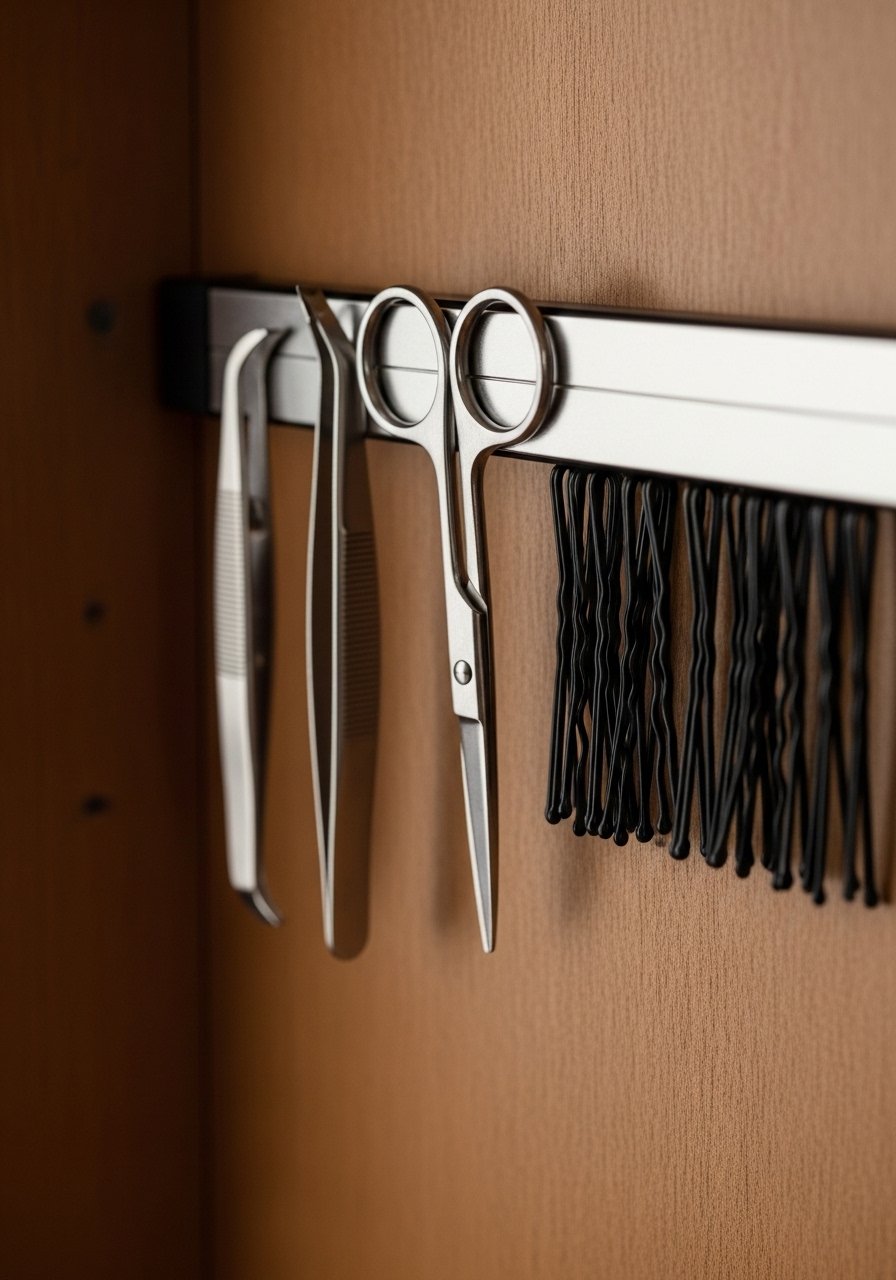
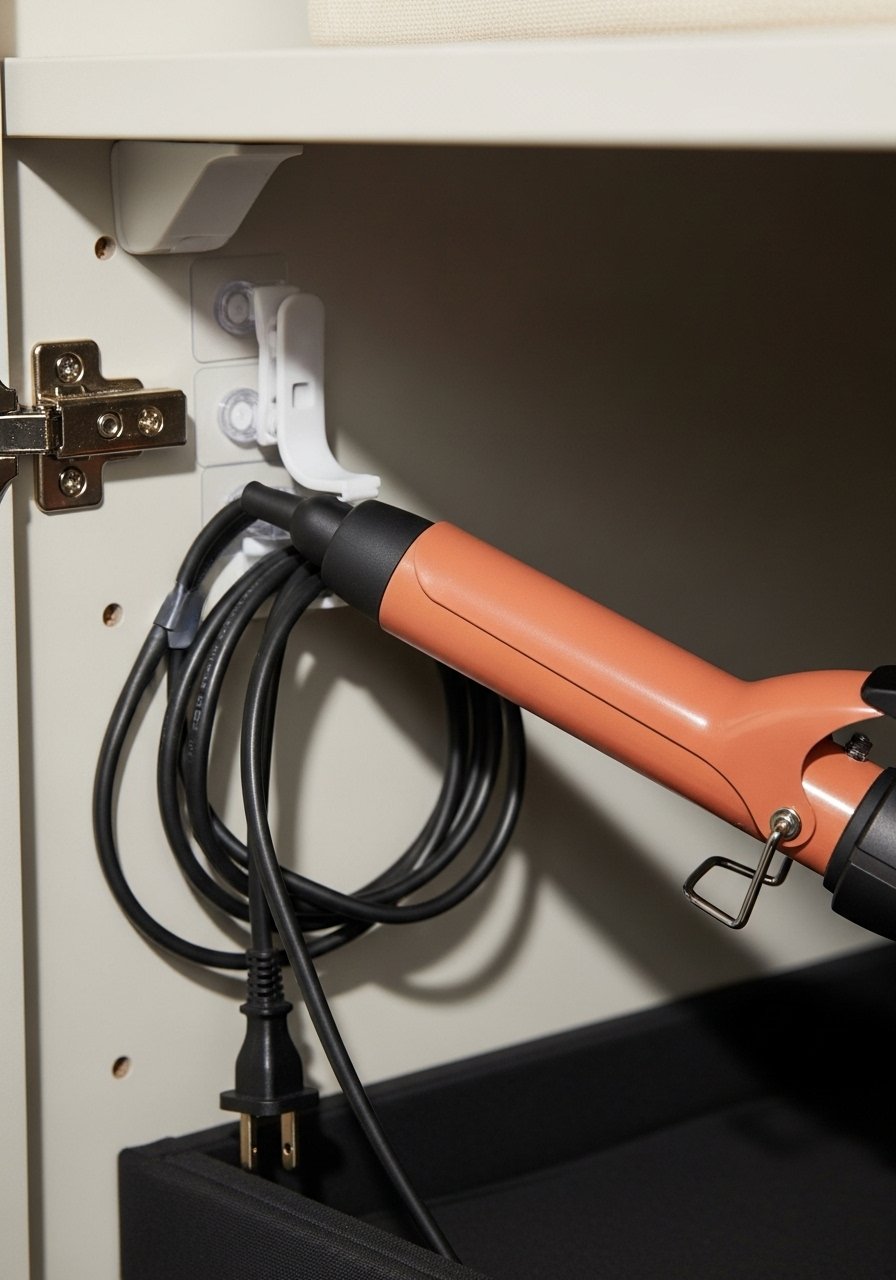
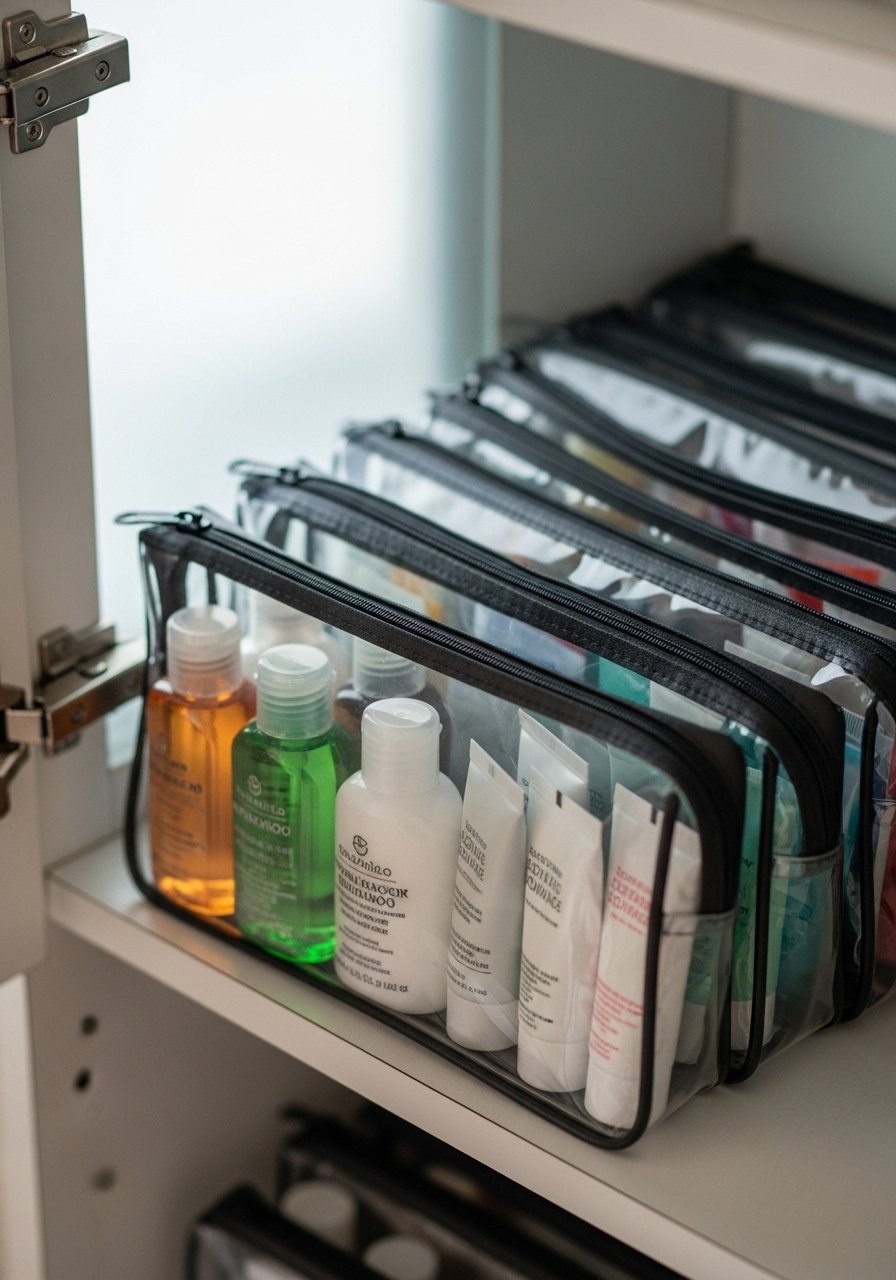
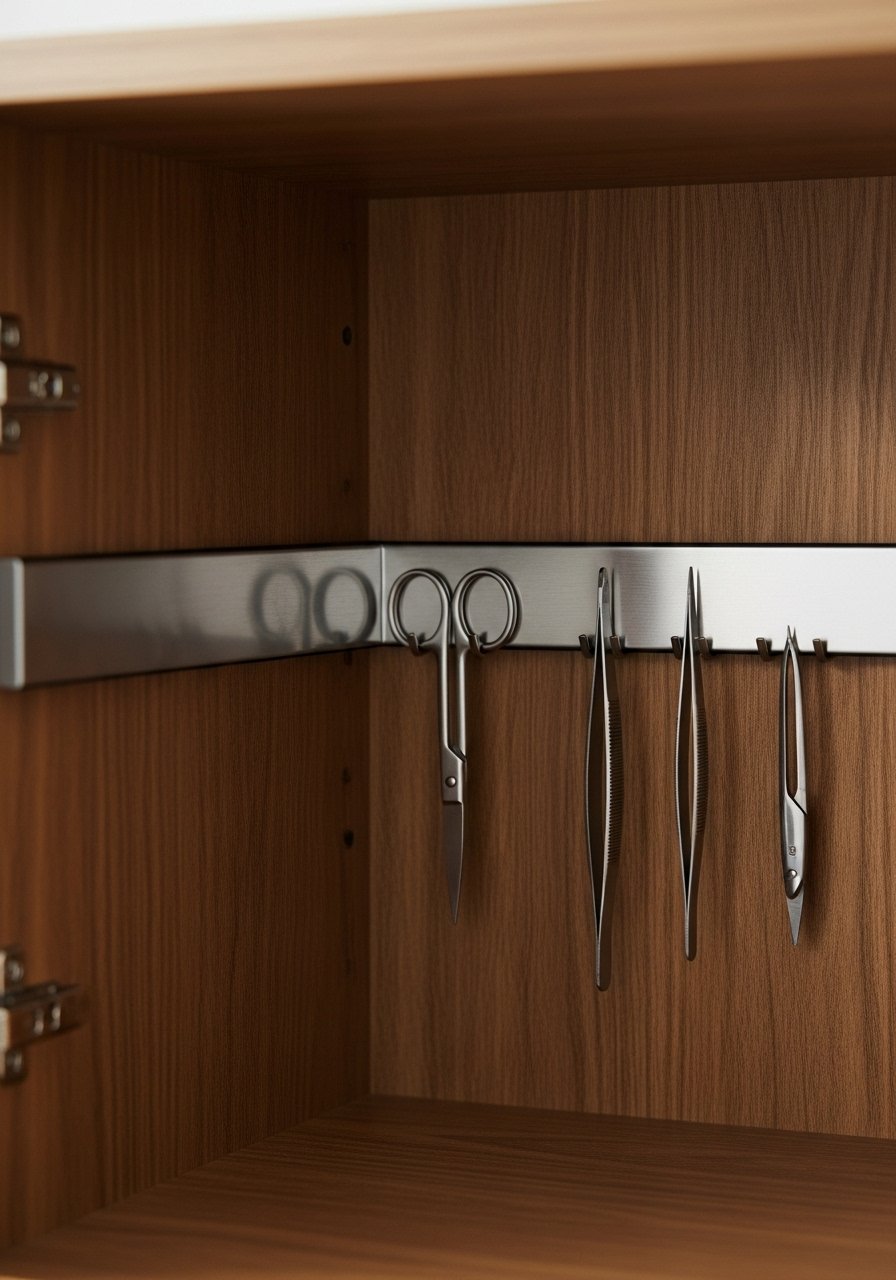
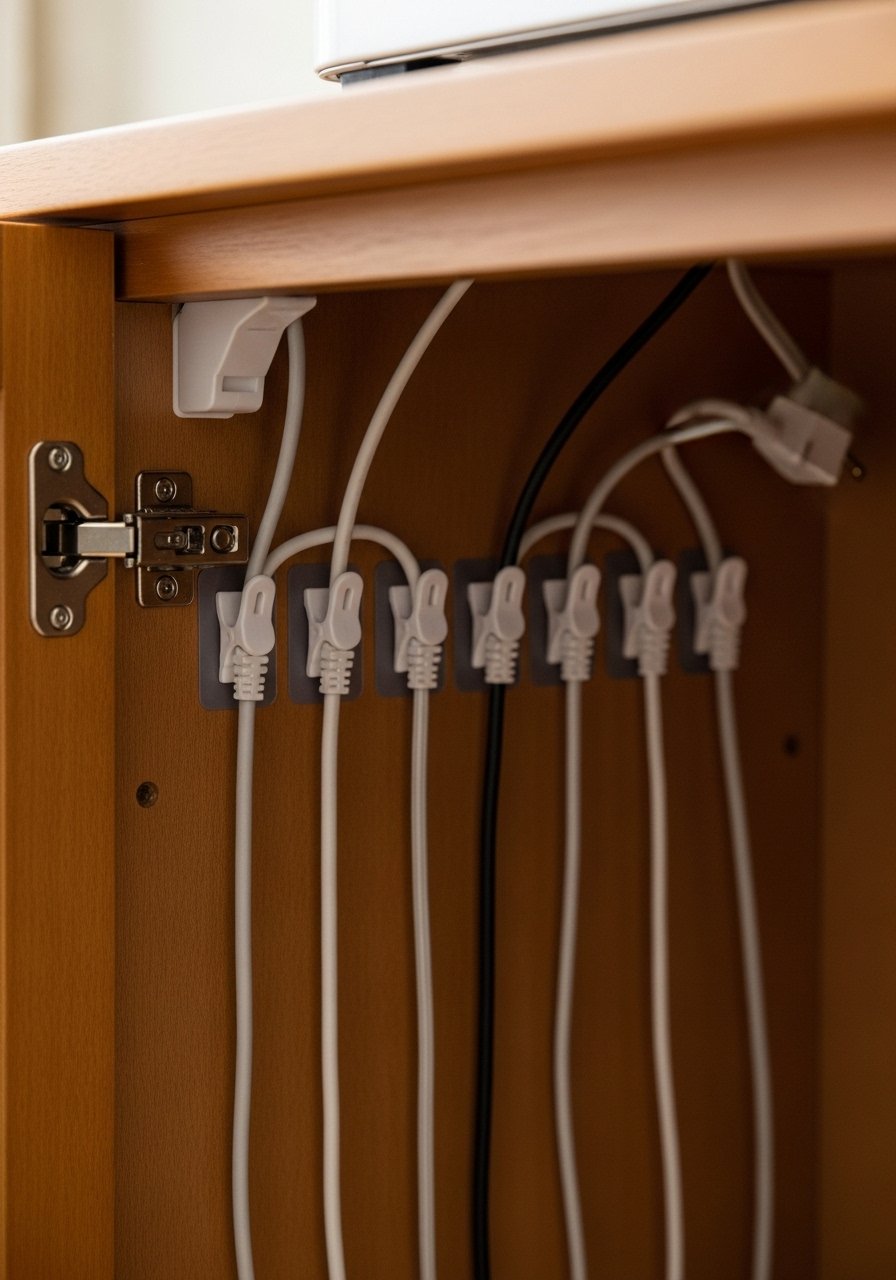
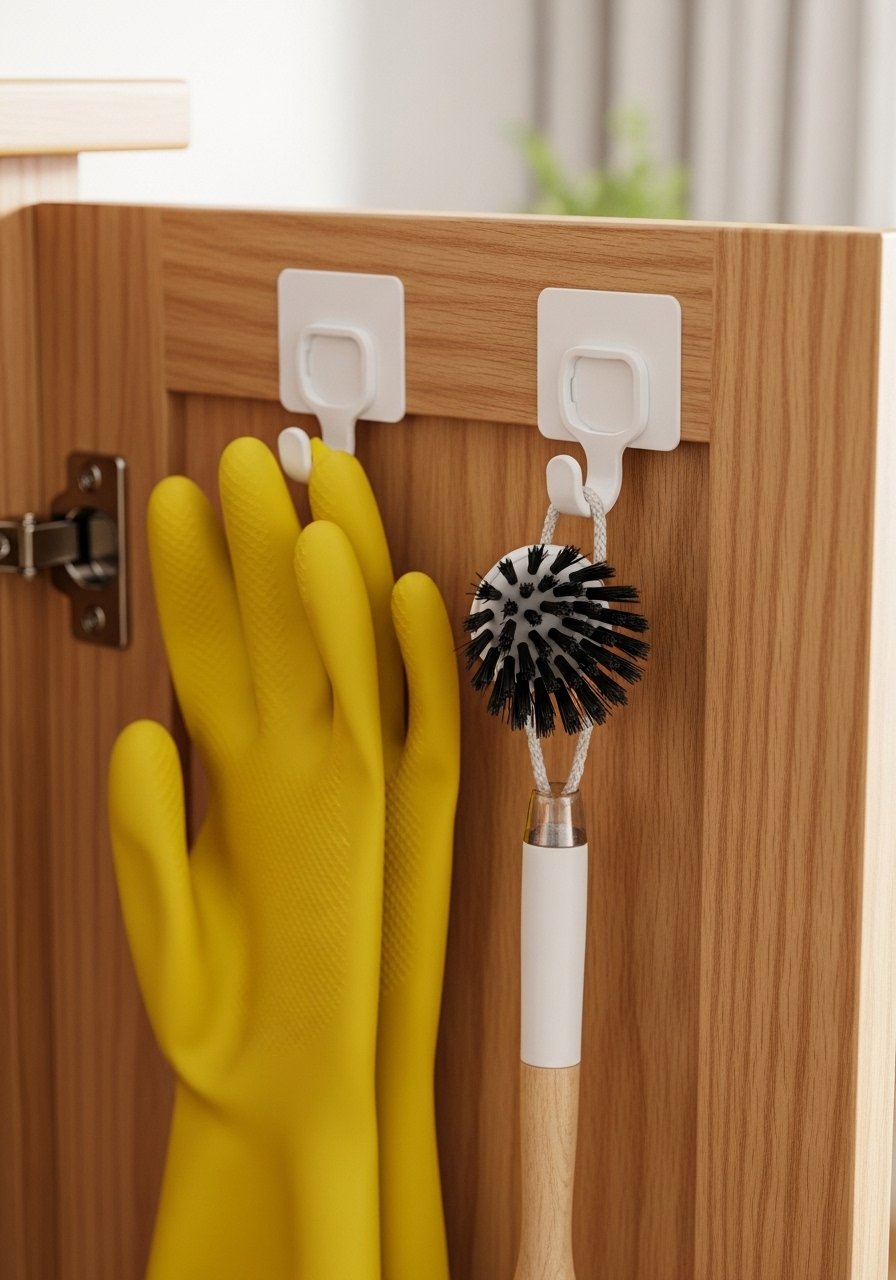
    7. Magnetic Strip Inside Cabinet Door for Small Tools

    A magnetic strip inside the cabinet door saved me from digging through drawers for tweezers and nail clippers. Everything is visible and easy to grab.

    I glued mine on crooked first. Use strong adhesive or small screws depending on door material. Test strength before arranging heavy tools.

    This tiny move made me stop losing things. It’s hands-down the easiest upgrade I’ve kept.

    What You’ll Need for This Look

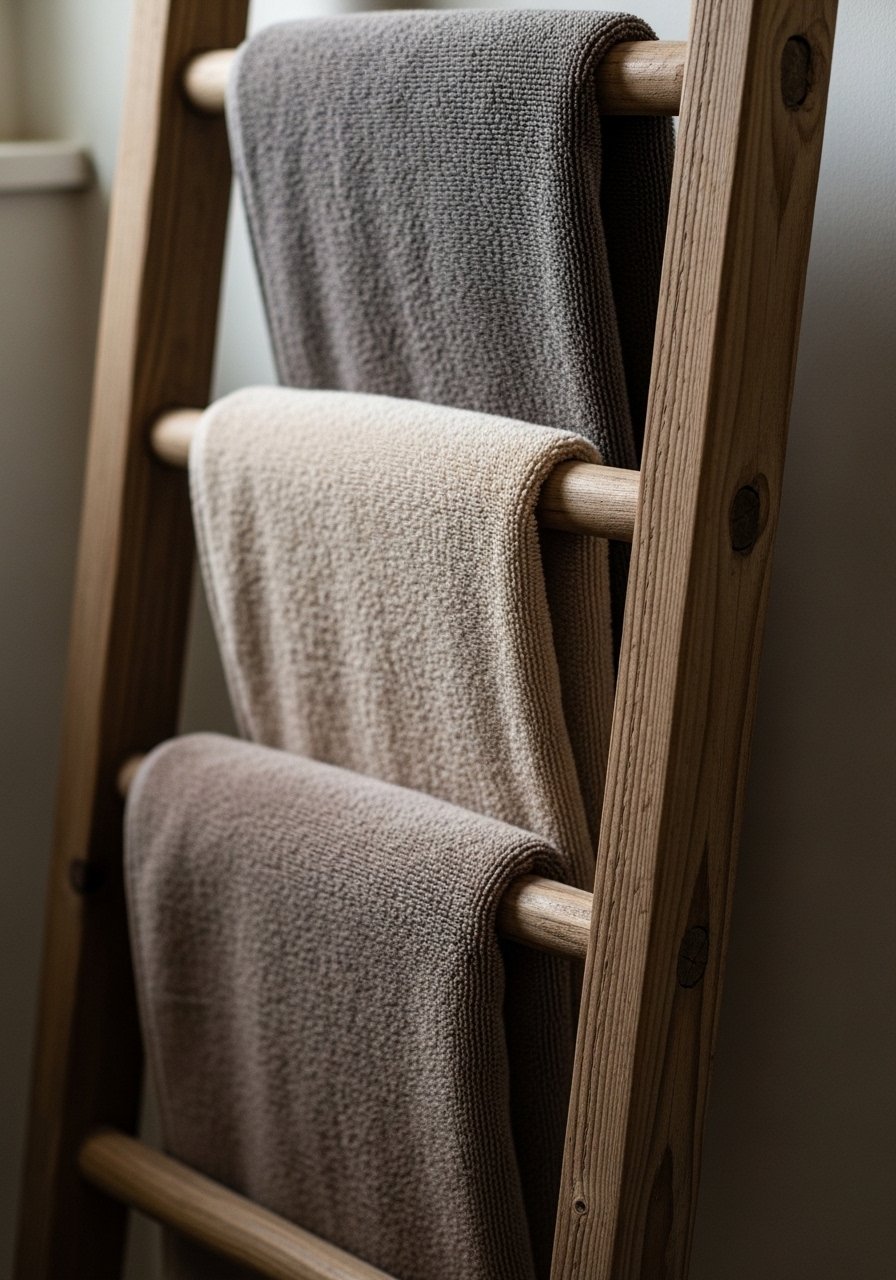
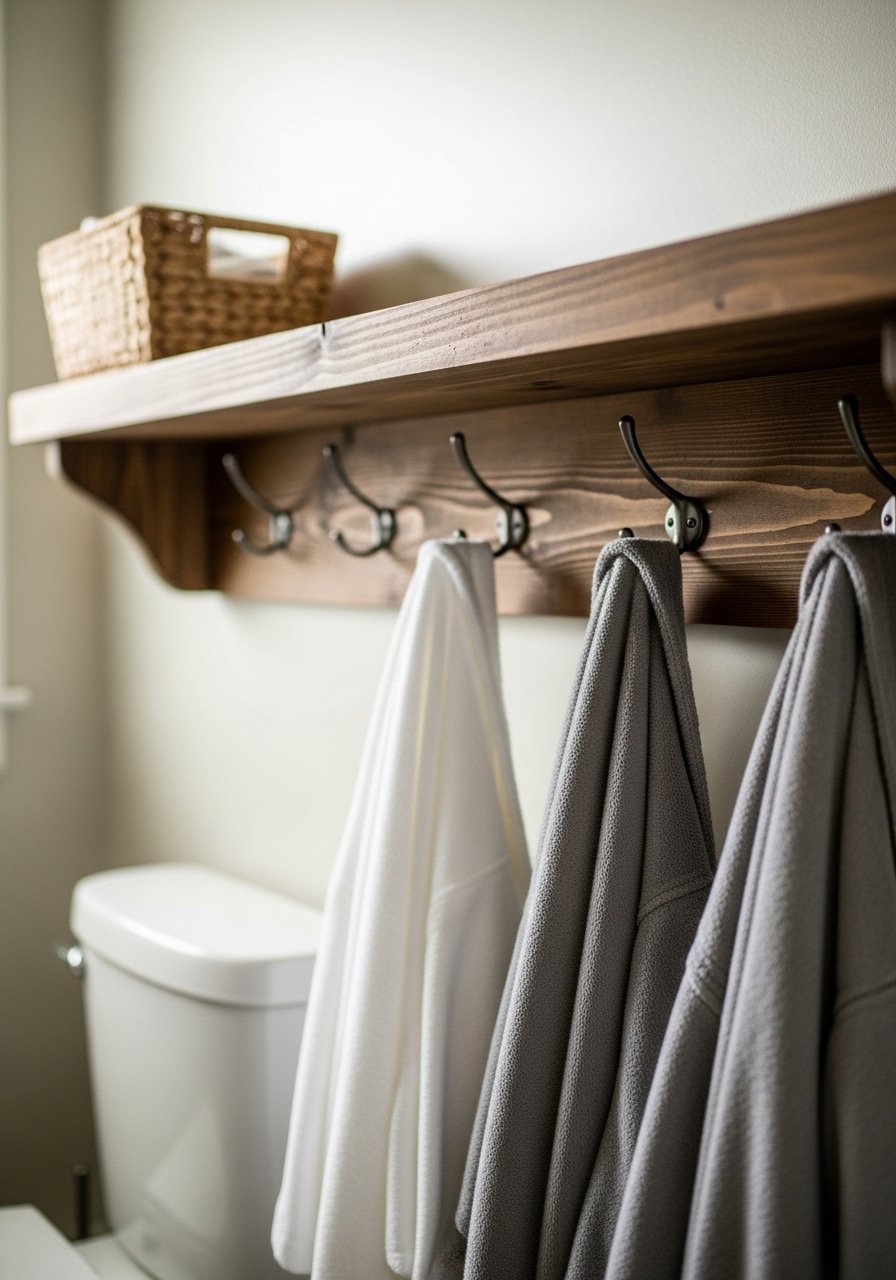
    8. Wall-Mounted Towel Ladder for Vertical Drying

    I swapped a bulky towel bar for a slim ladder leaning against the wall. It holds multiple towels without crowding the wall.

    At first I leaned it too steep and towels slid off. Now I angle it gently and secure the top to the wall for safety.

    It reads decorative and functional. Towels dry better and the room feels layered—not cluttered.

    What You’ll Need for This Look

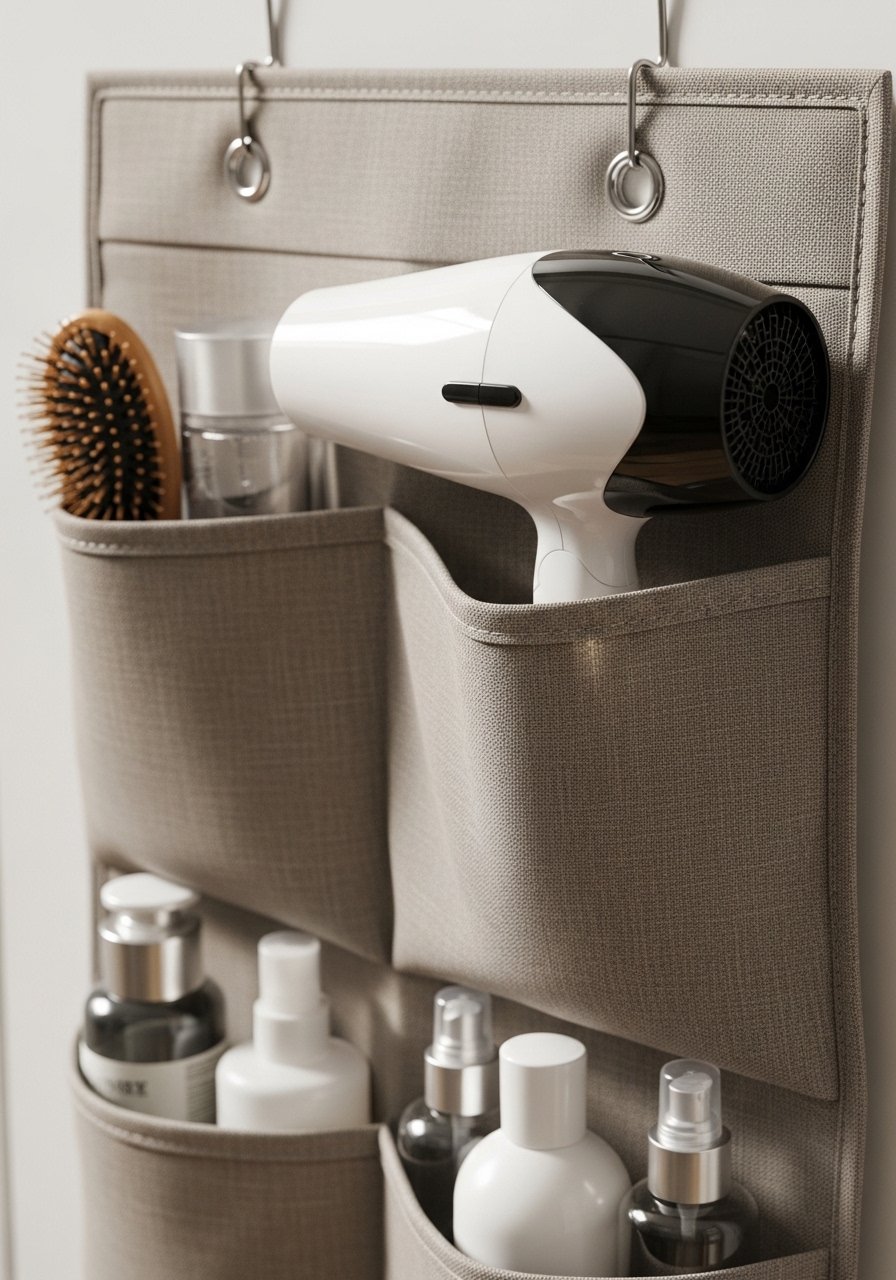
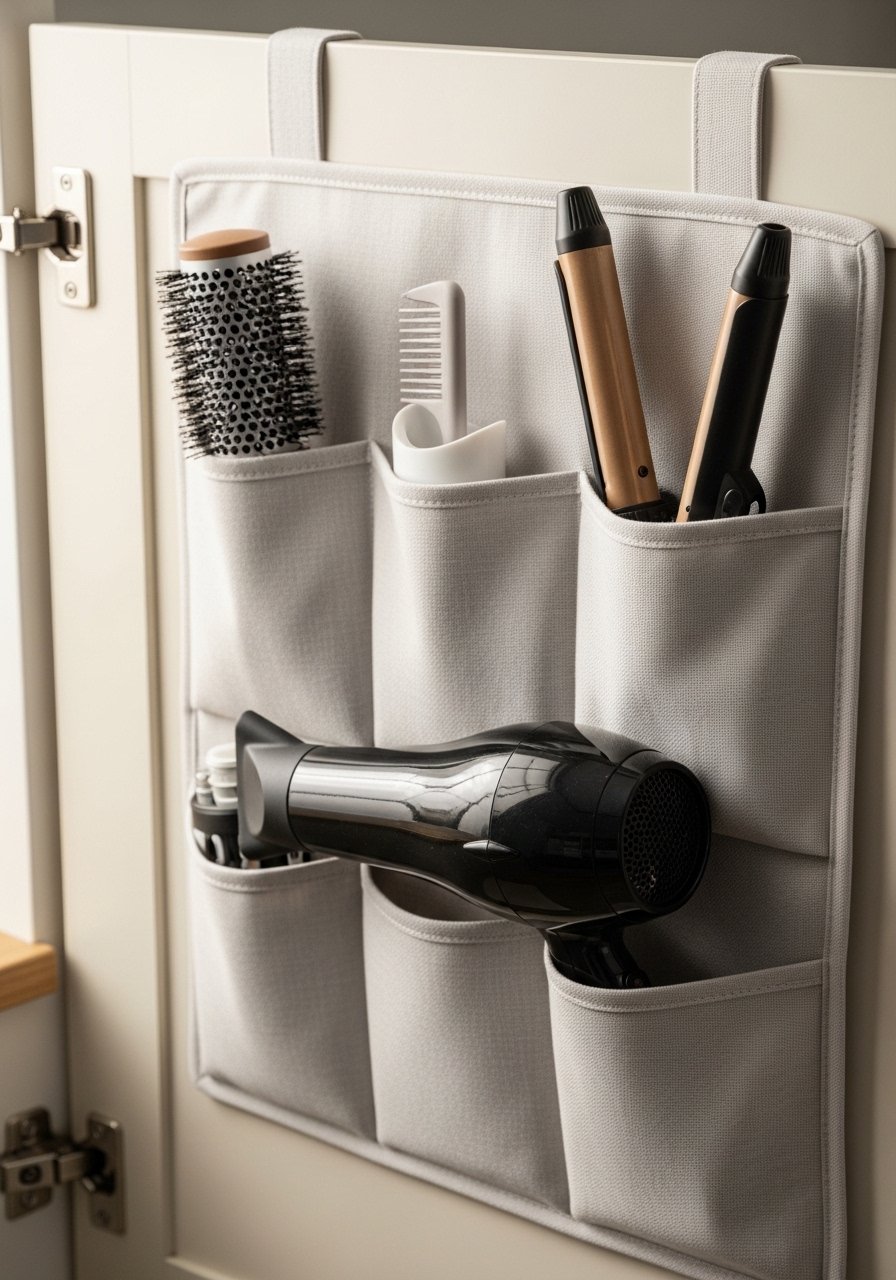
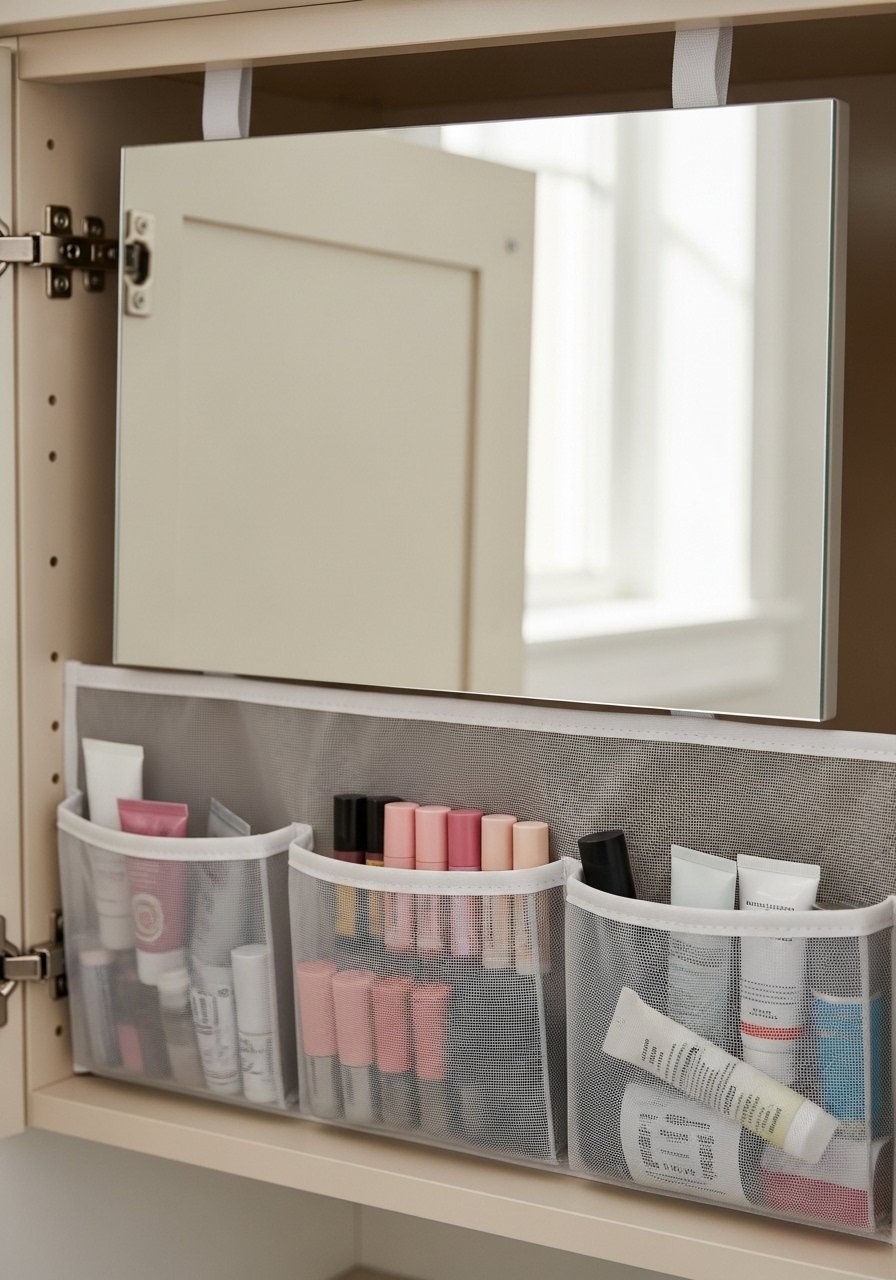
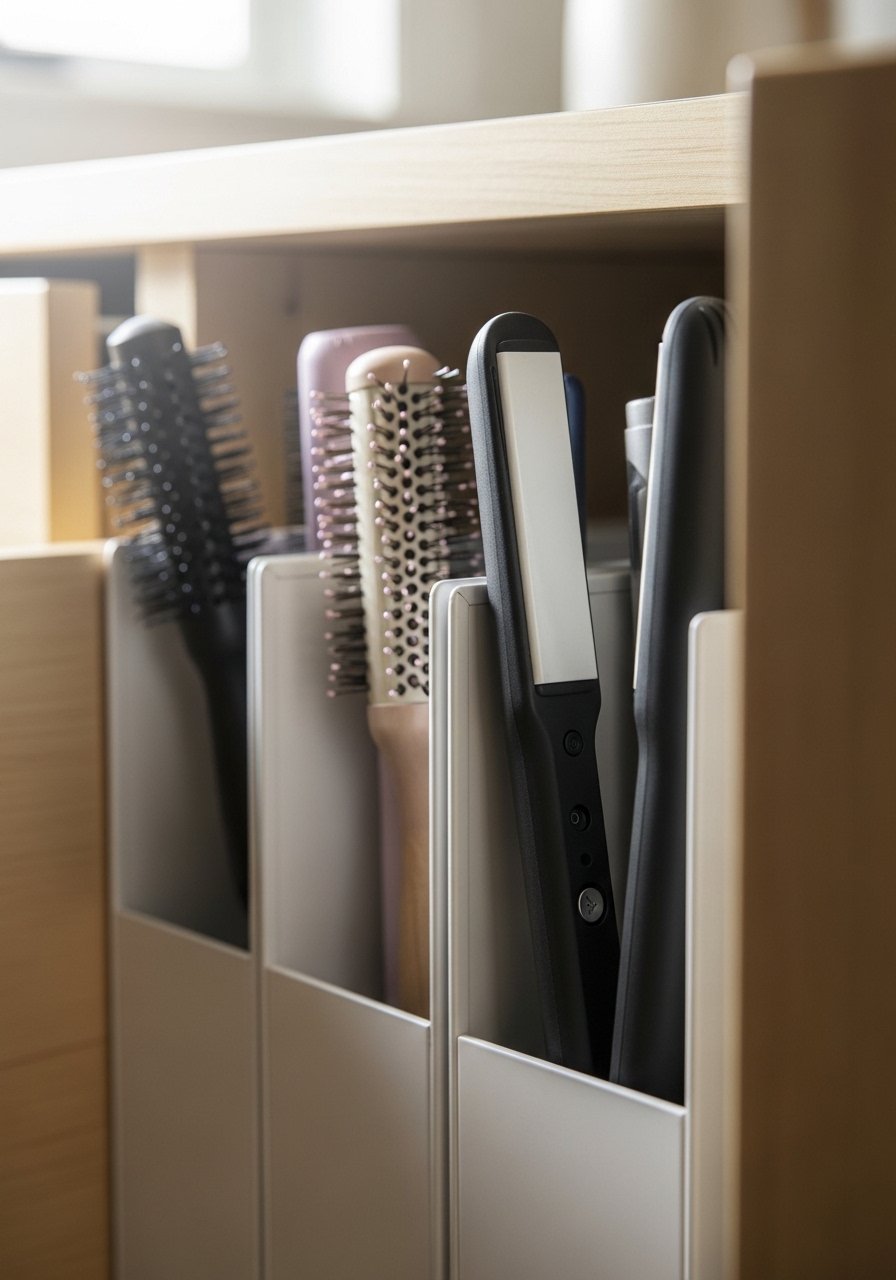
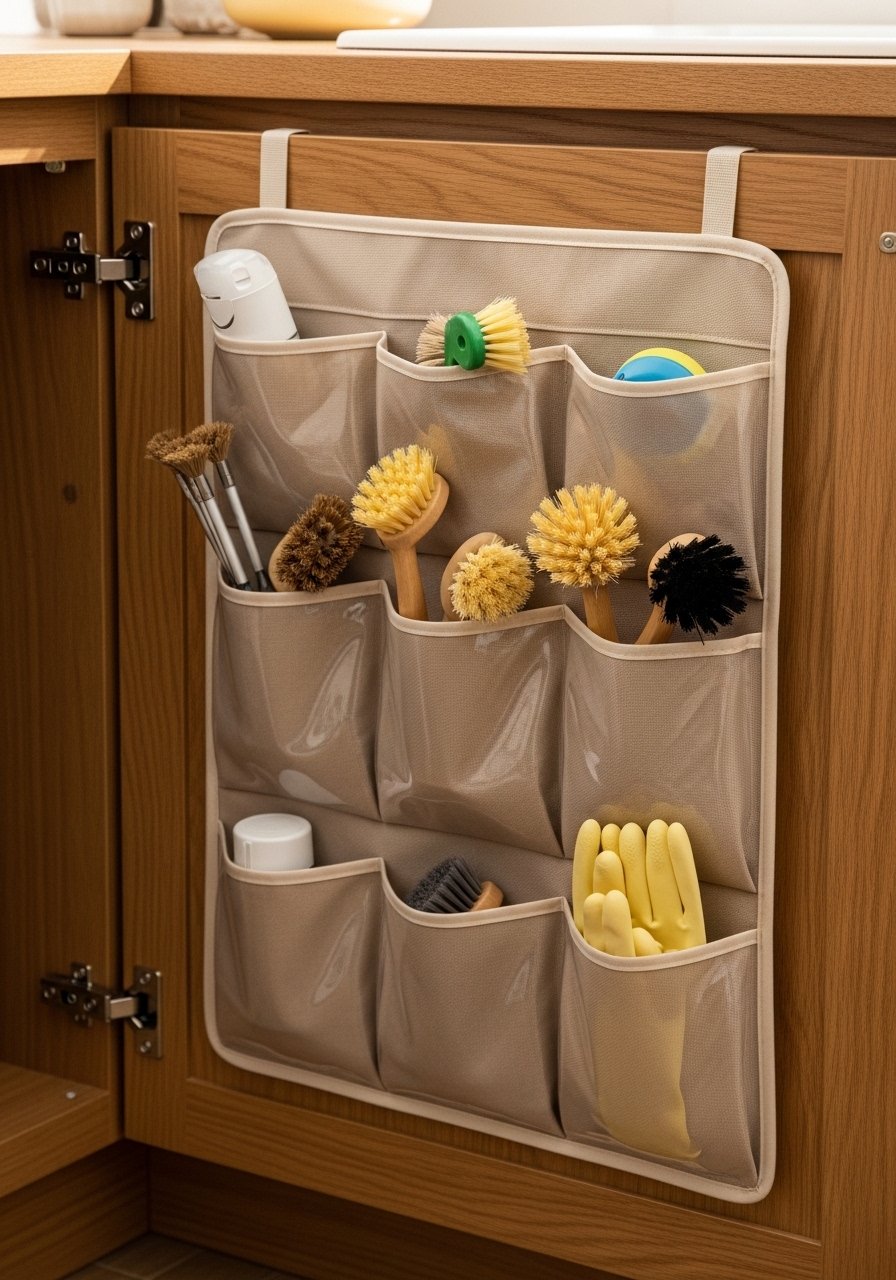
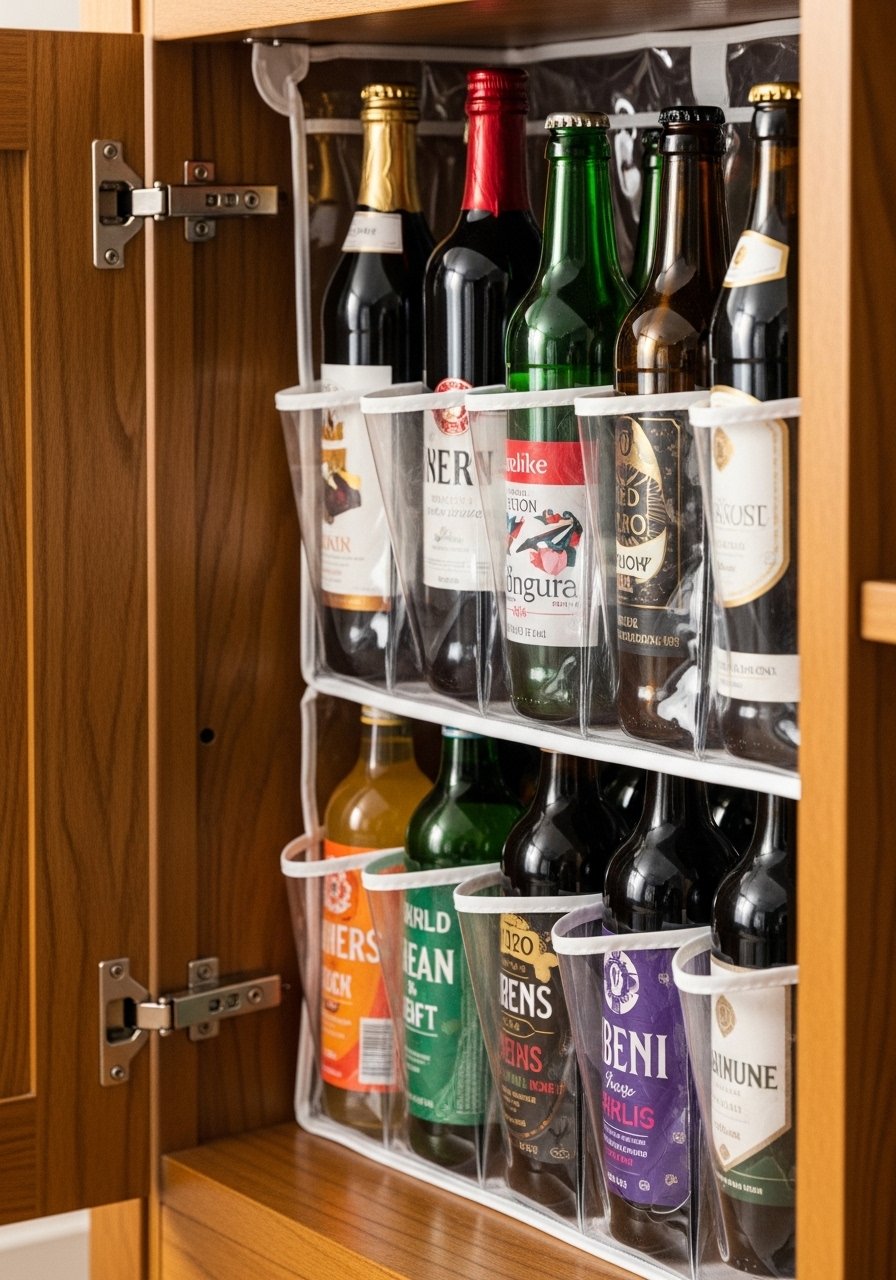
    9. Back-of-Door Fabric Organizer for Hair Tools

    I used an over-the-door fabric organizer for hair tools and saved drawer space. It keeps cords untangled and tools ventilated.

    I learned the hard way that cheap fabric tears. I upgraded to a reinforced organizer and it’s lasted years. Look for pockets sized for your tools.

    This is a low-cost swap but high payoff. It makes the door work for me, not against me.

    What You’ll Need for This Look

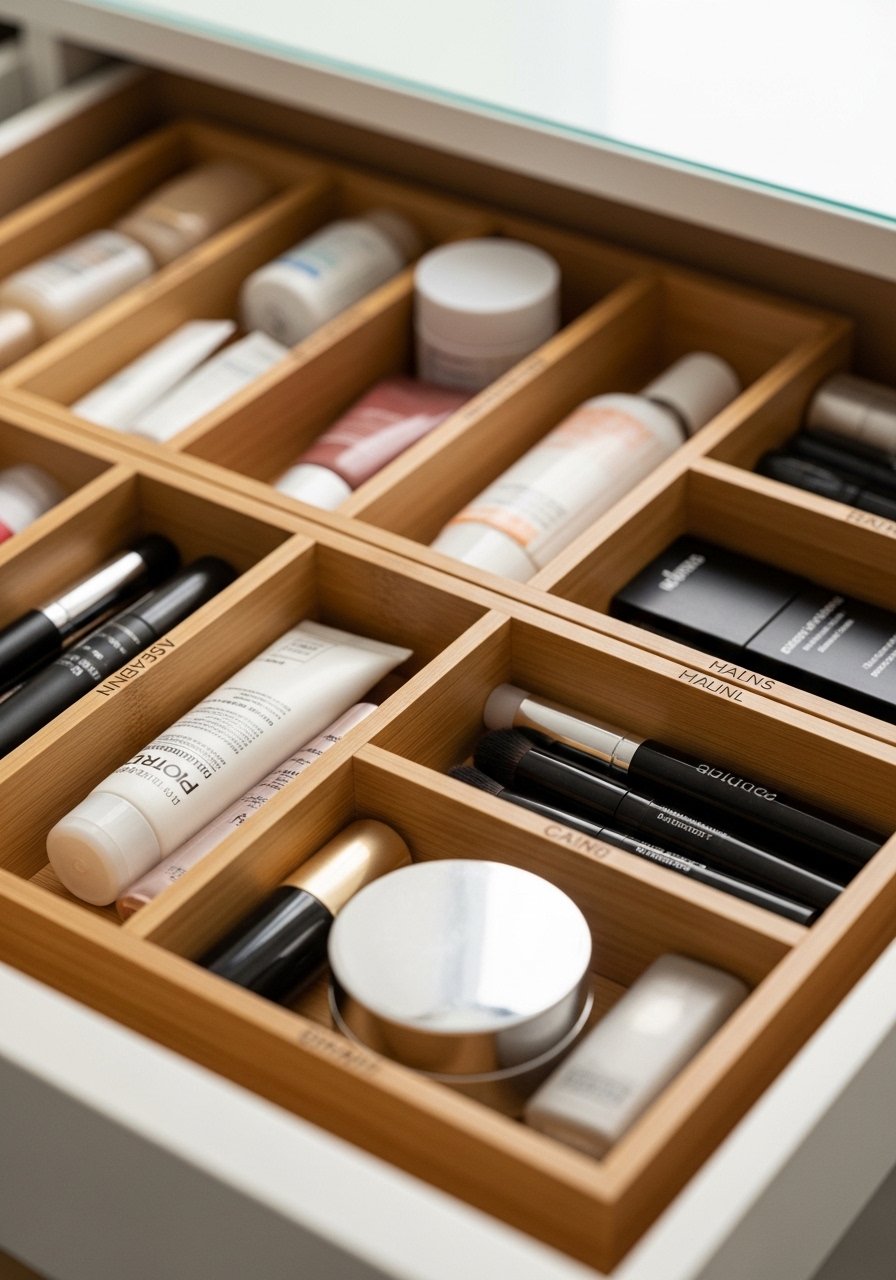
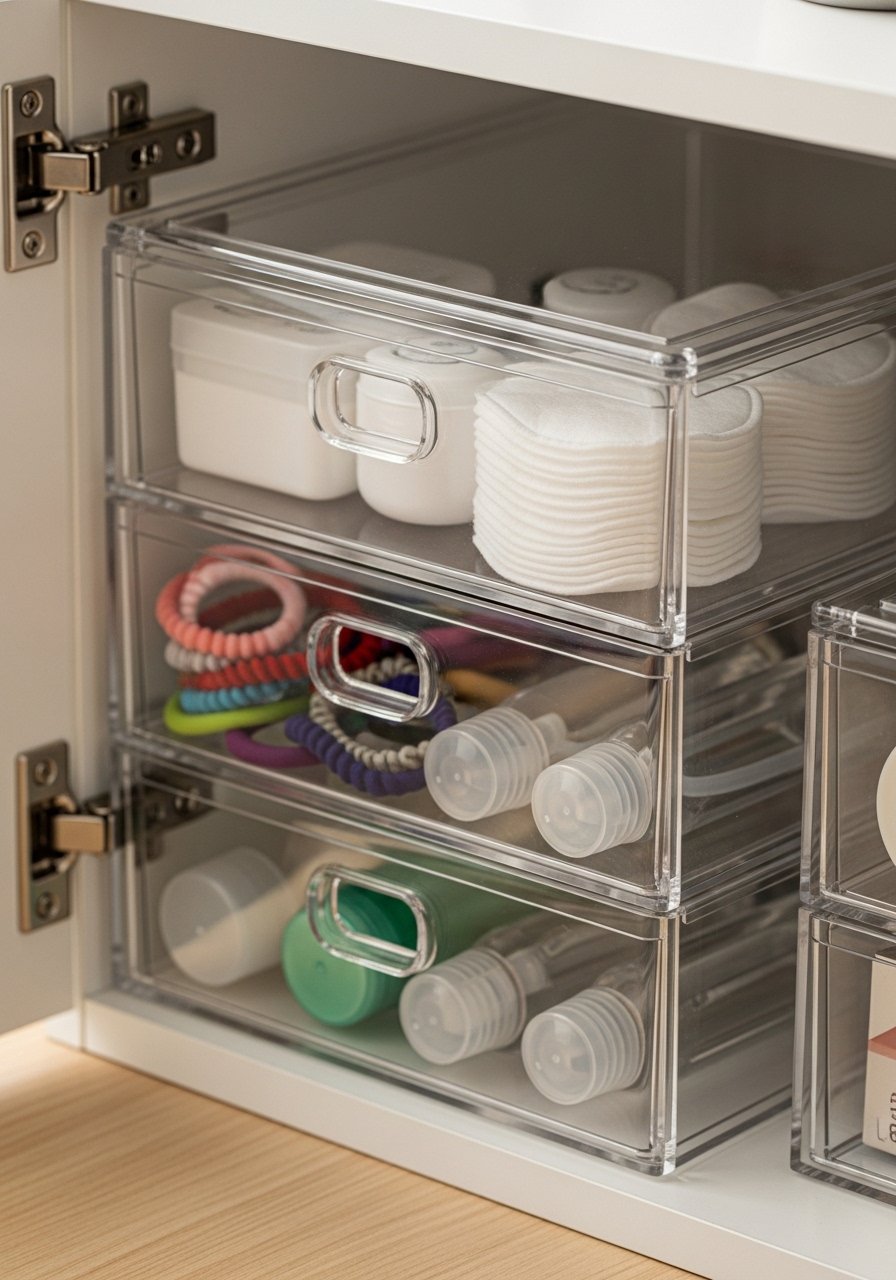
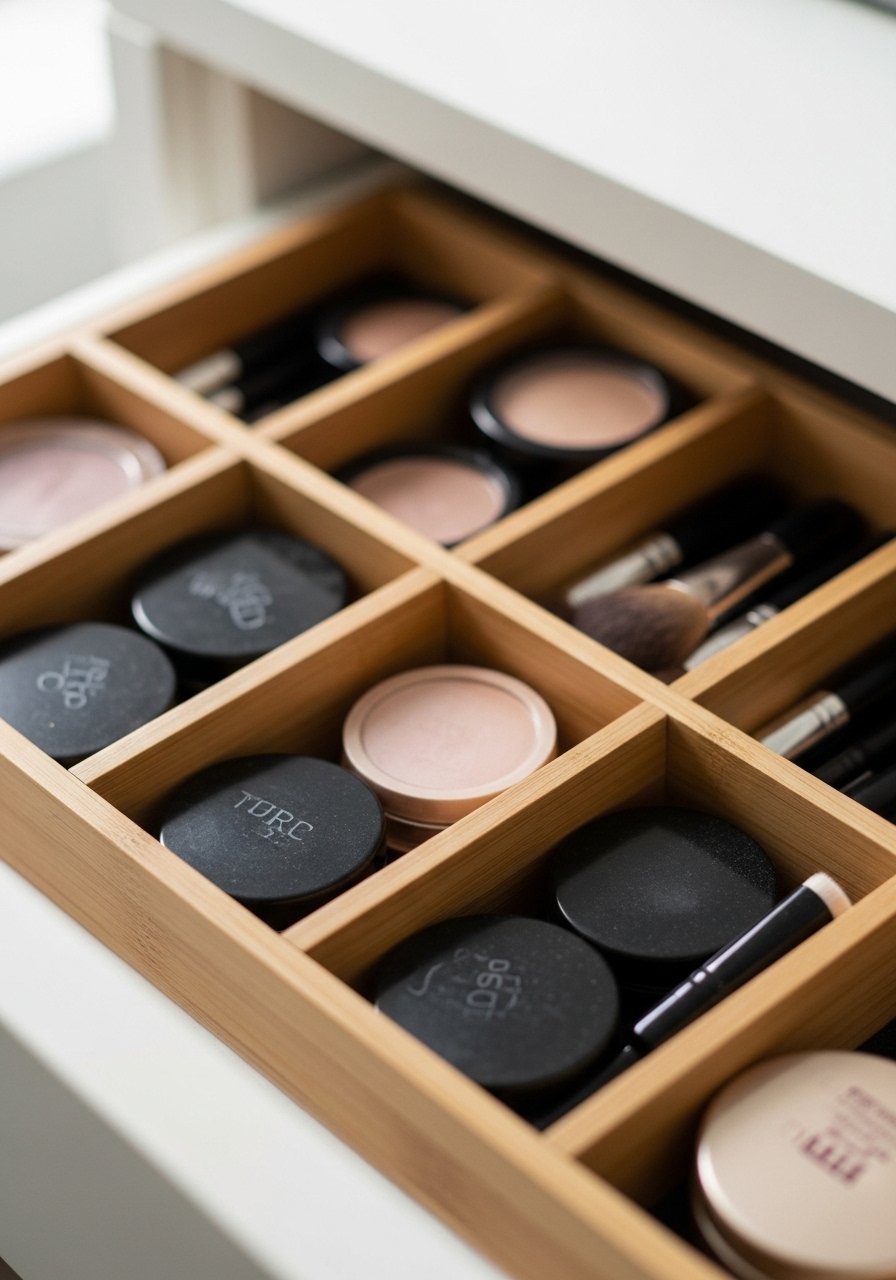
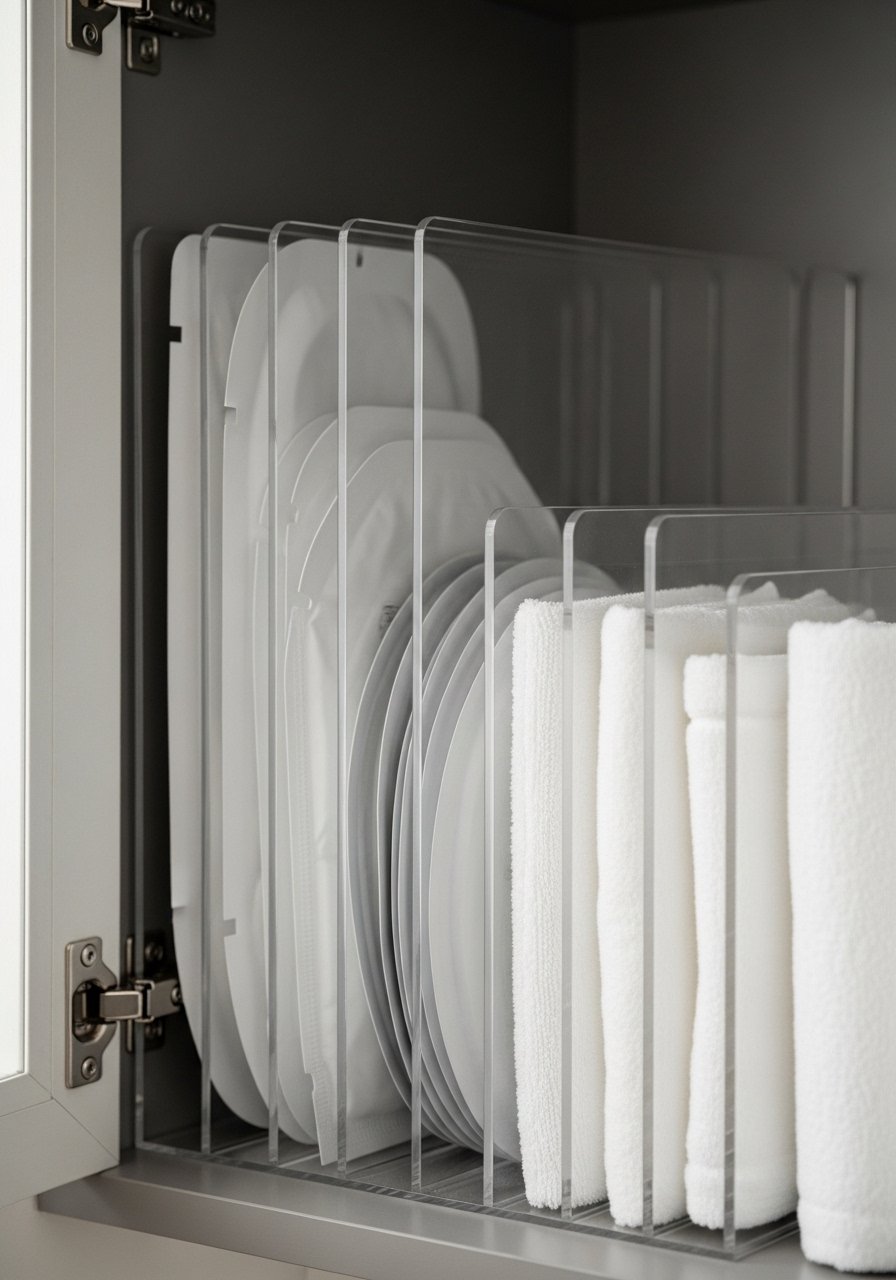
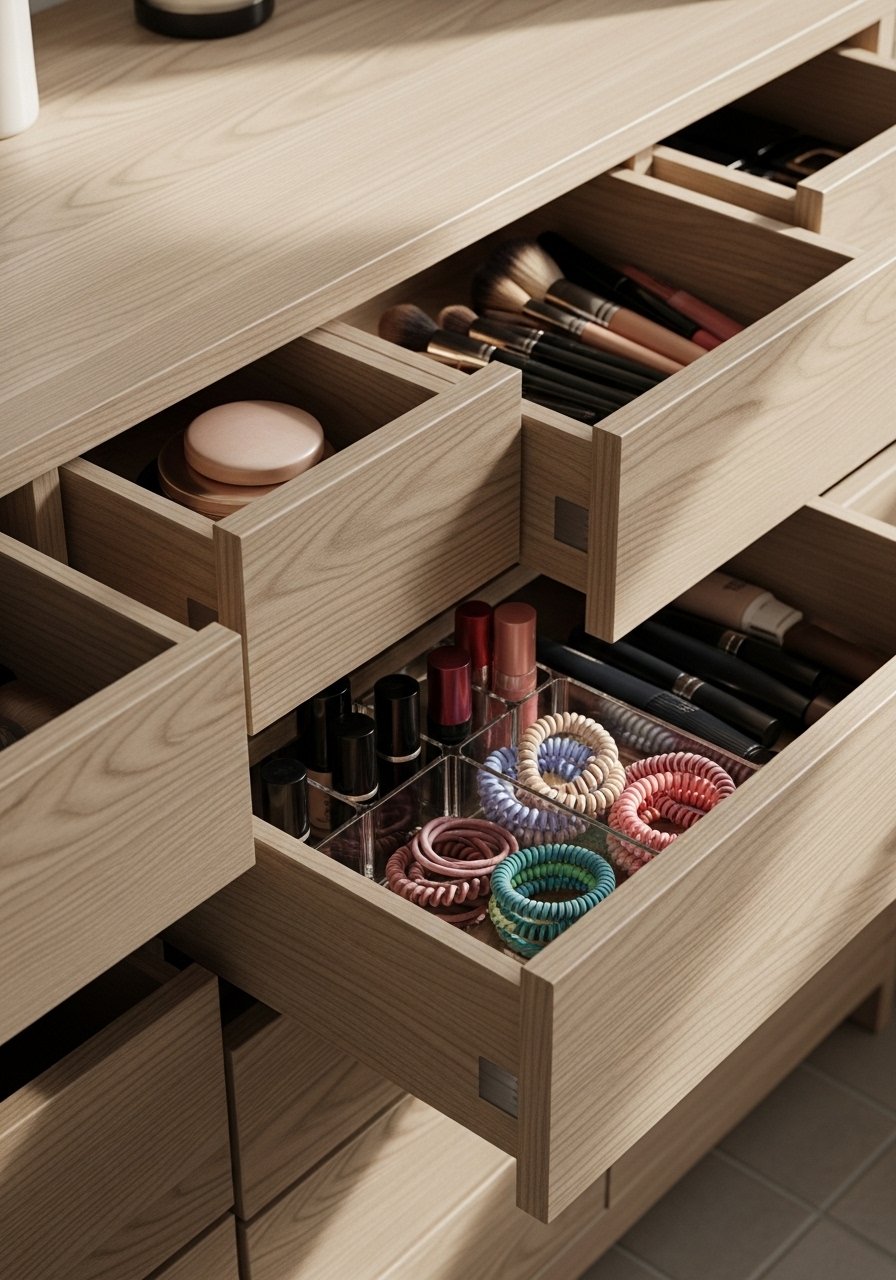
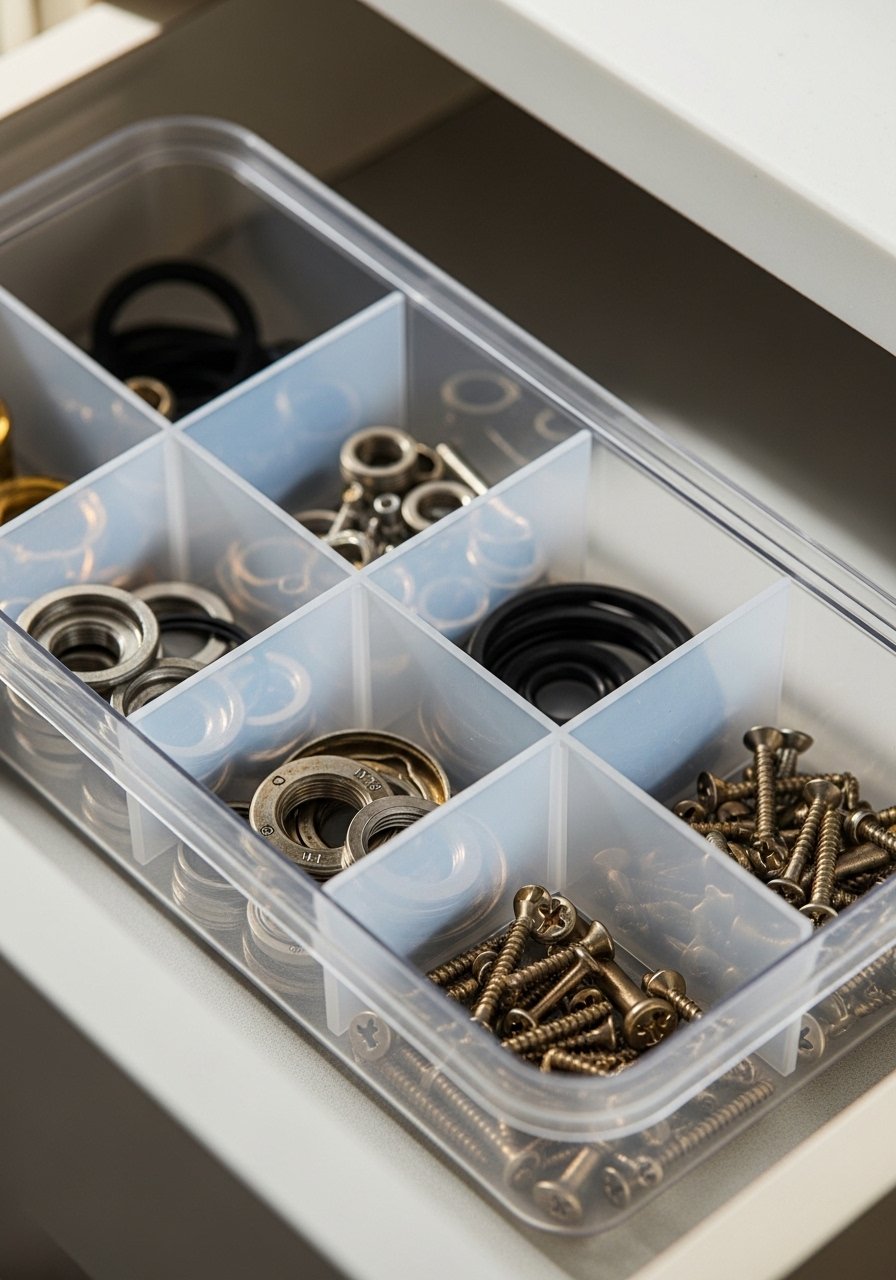
    10. Vanity Drawer Dividers for Small Items

    I ruined many mornings rifling through my vanity until I added dividers. Now every lip balm and serum has its place.

    I once tried corrugated cardboard and it looked sad. Bamboo or plastic dividers are sturdier and easier to clean.

    Measure your drawer depth before buying. A few focused compartments make the whole drawer function like a small cabinet.

    What You’ll Need for This Look

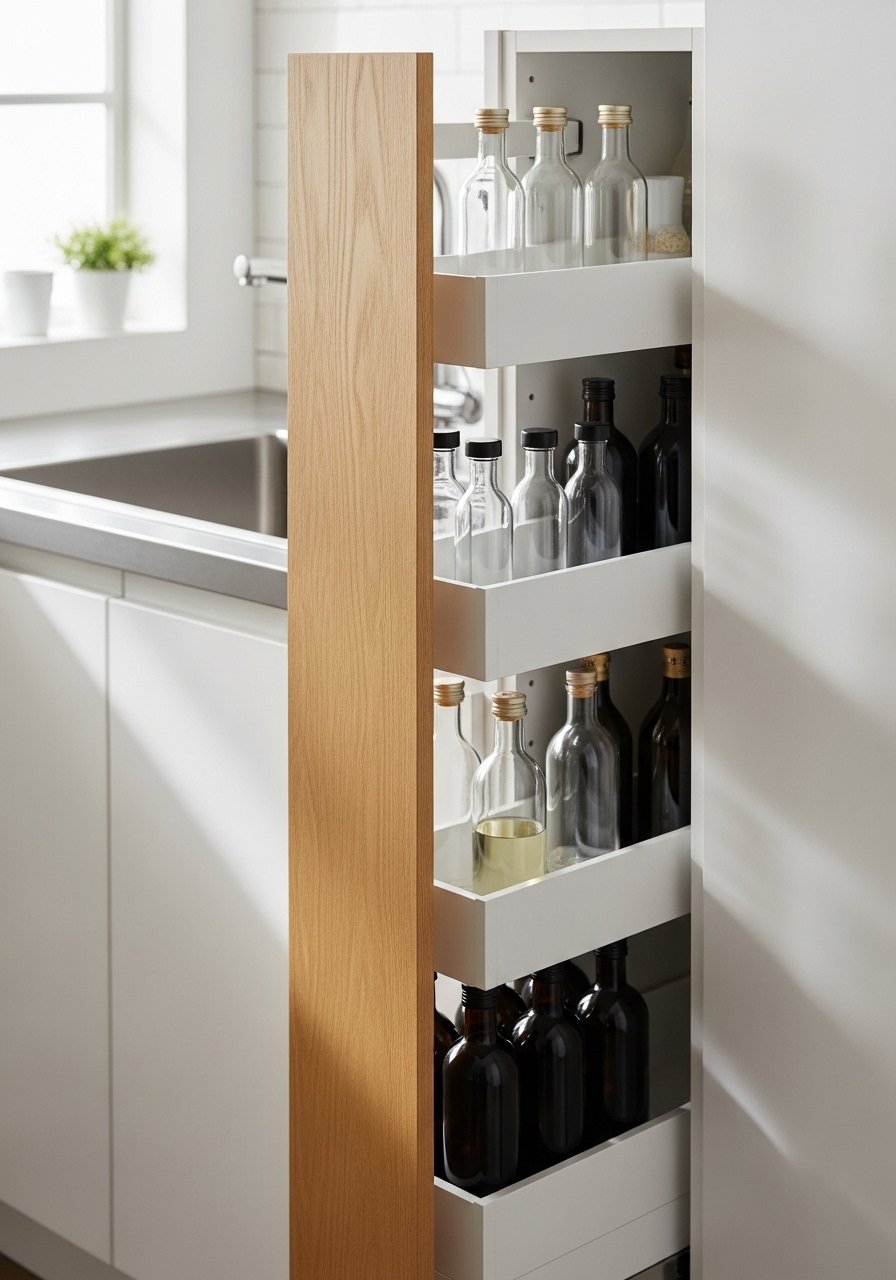
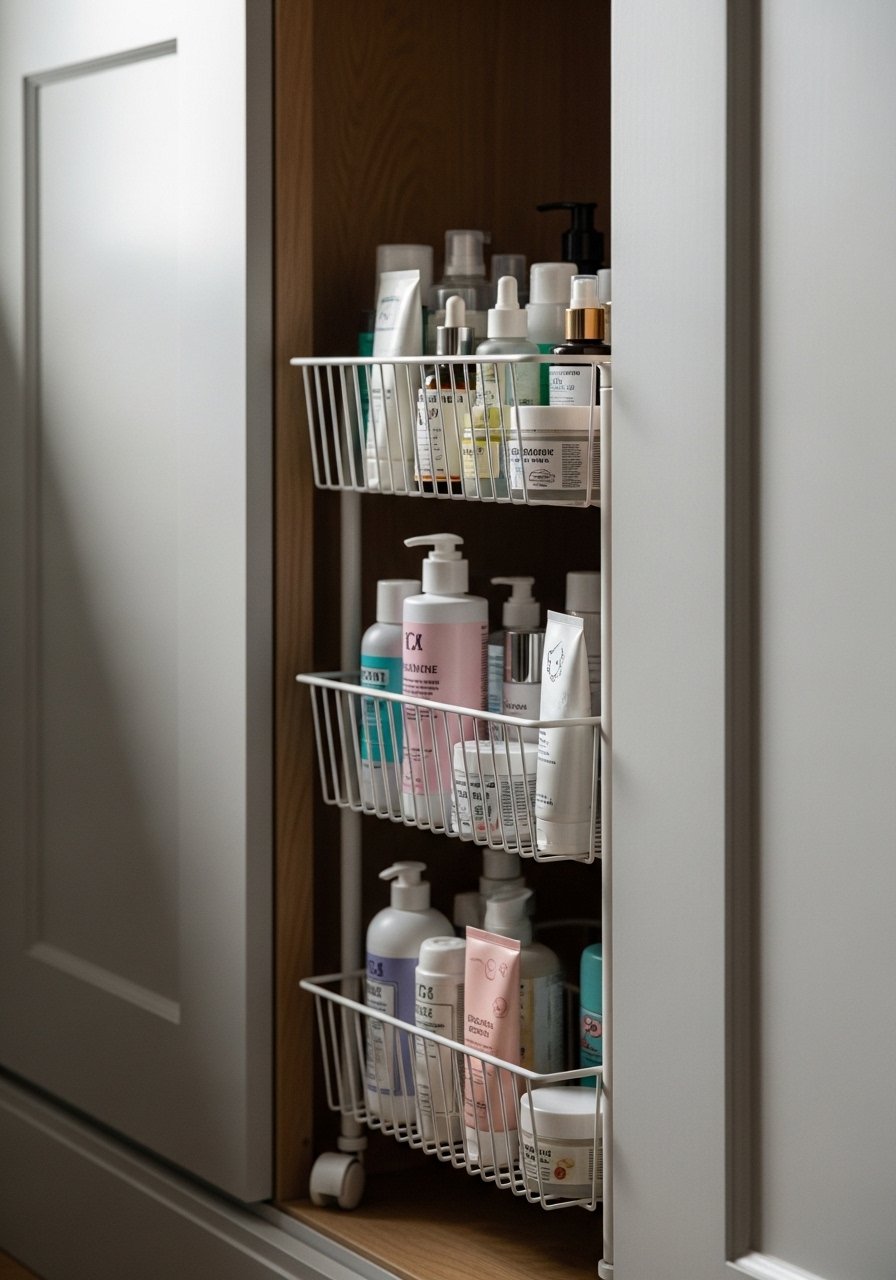
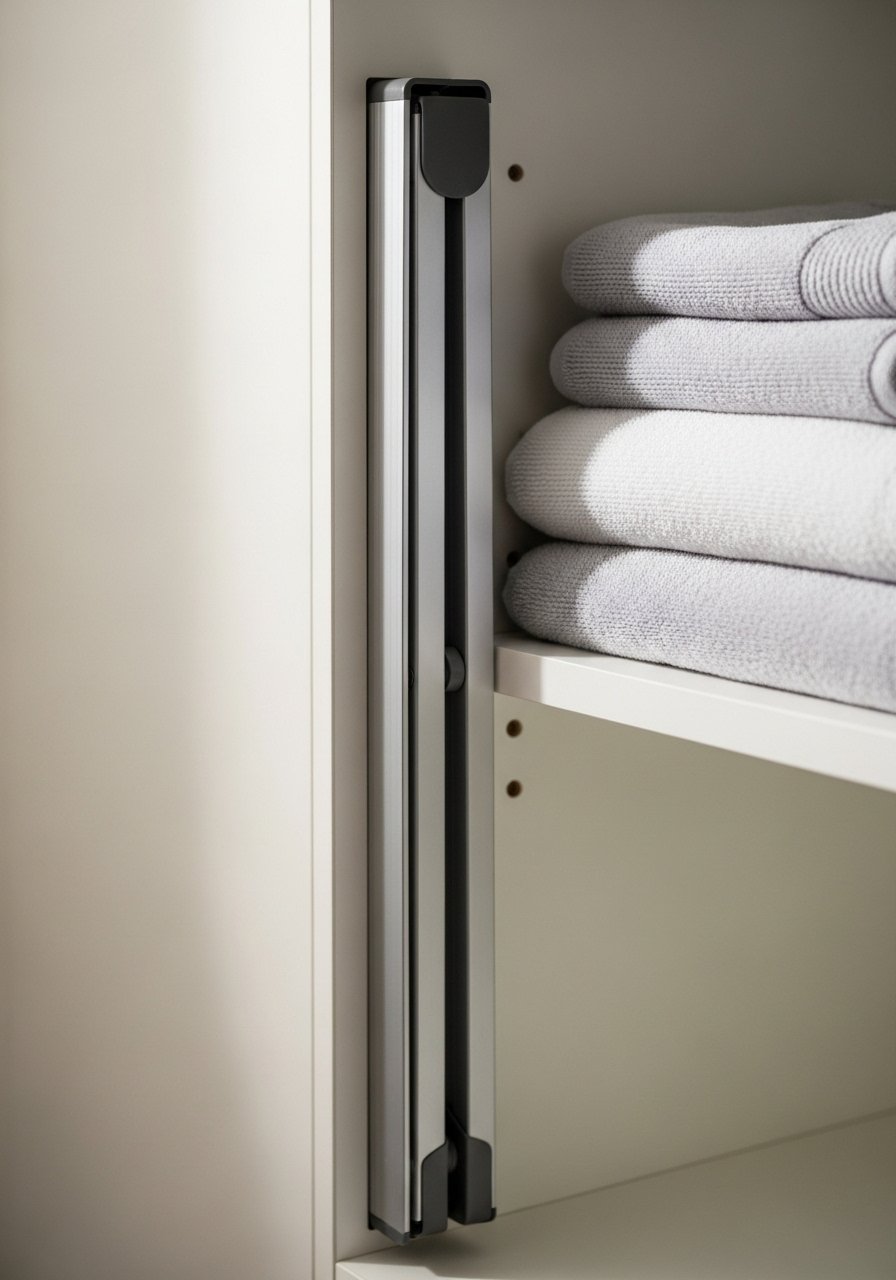
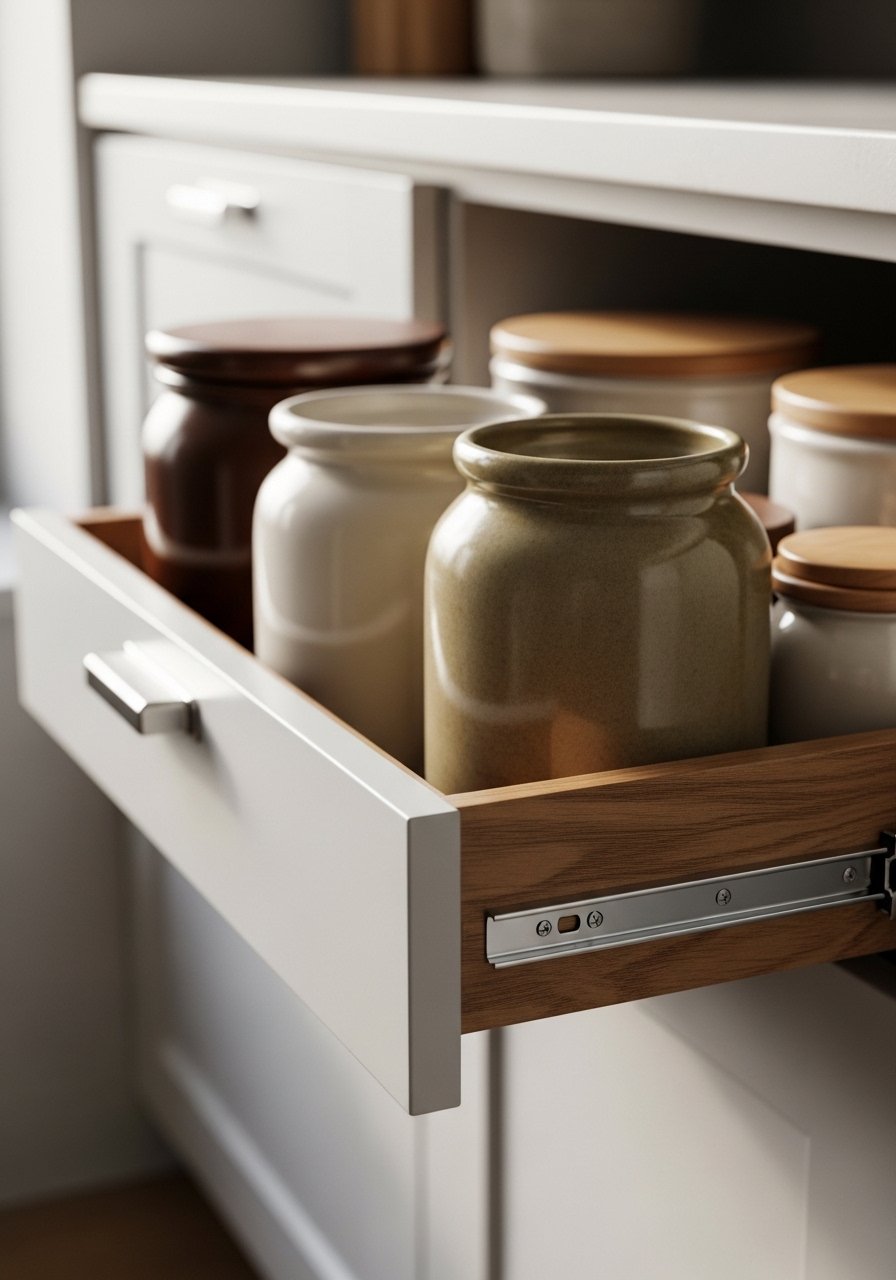
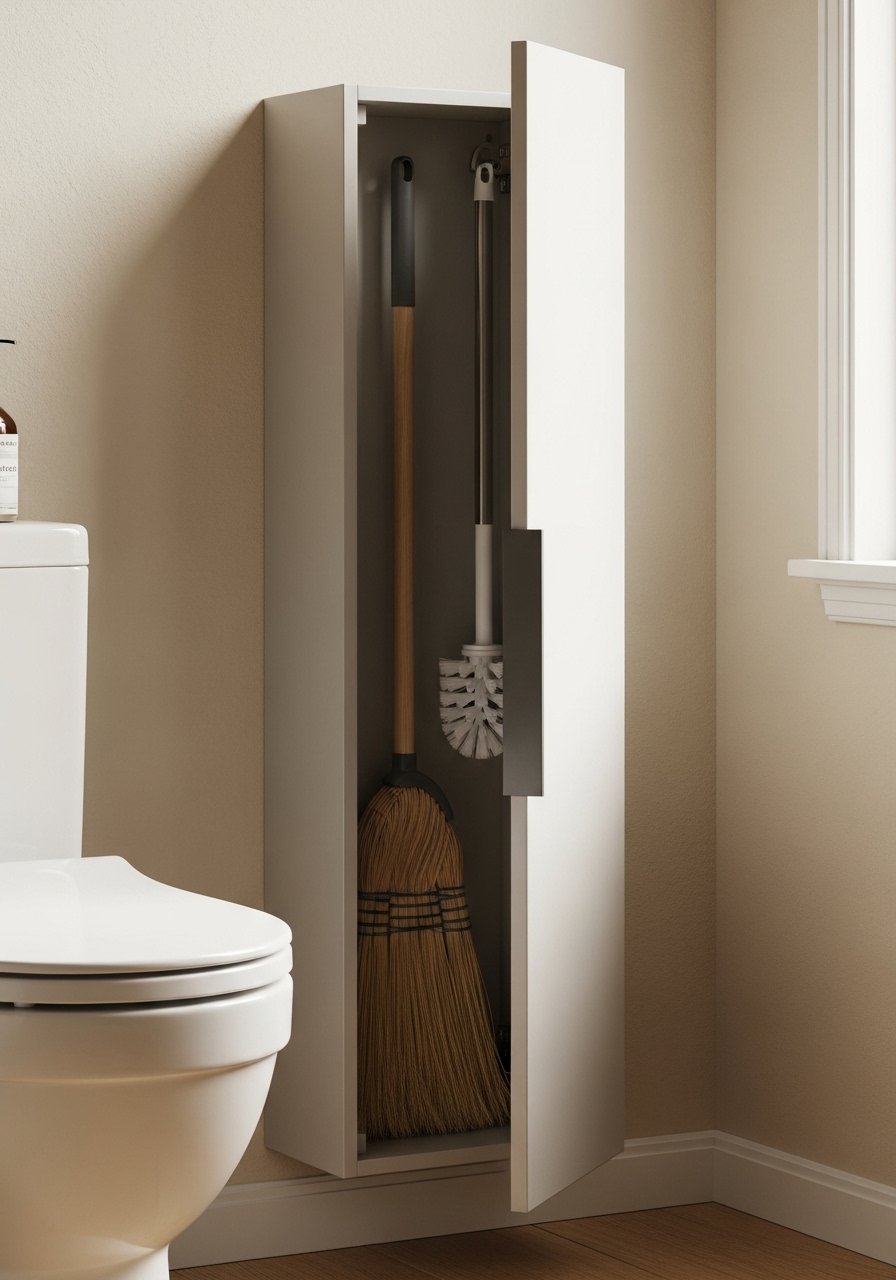
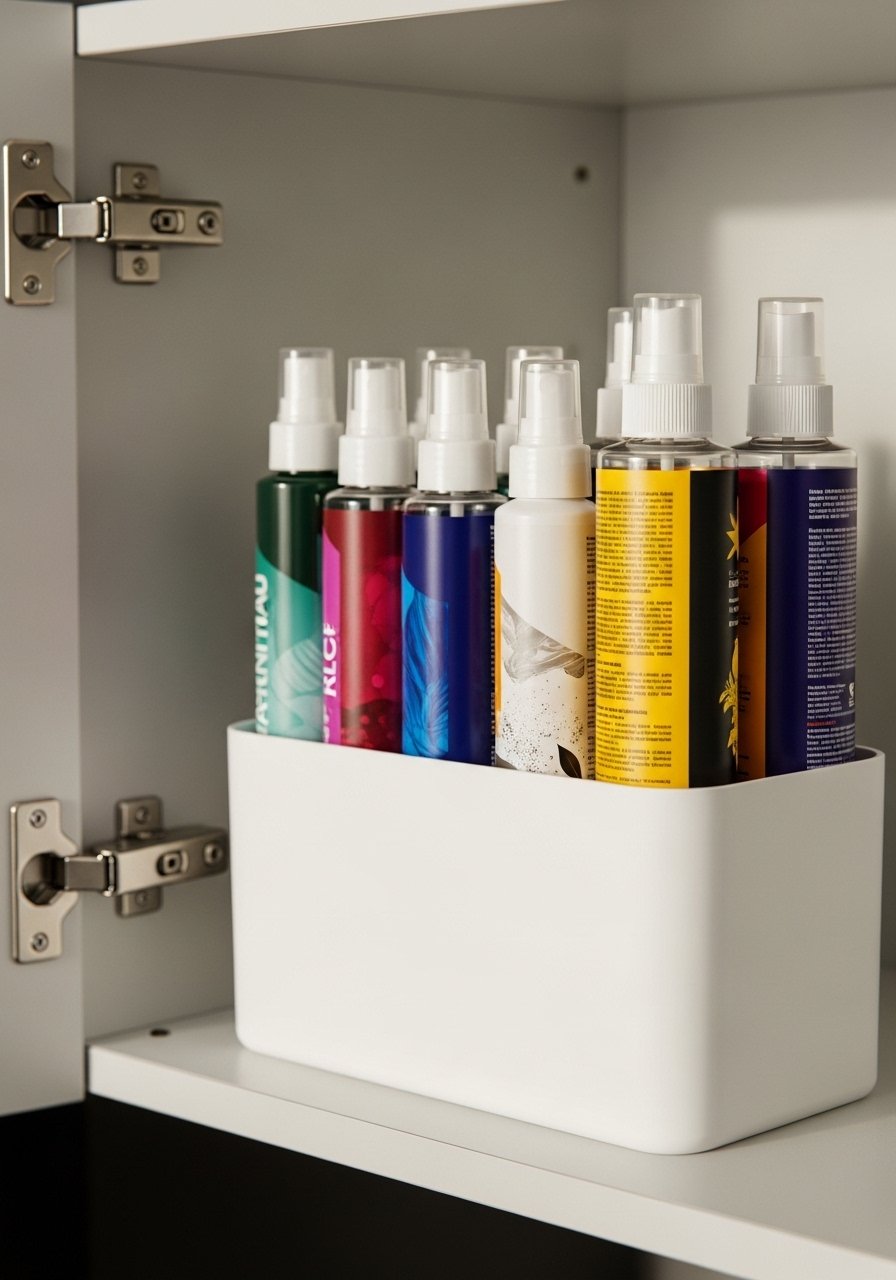
    11. Vertical Pull-Out Cabinet Between Fixtures

    I installed a vertical pull-out cabinet between my vanity and wall. It stores extra shampoos, cleaning sprays, and keptables without taking floor space.

    My first version stuck because the track wasn’t robust. Upgrade to metal glides for smooth use. Weight the shelves evenly.

    The pull-out acts like a secret pantry—perfect for narrow spaces where nothing else fits.

    What You’ll Need for This Look

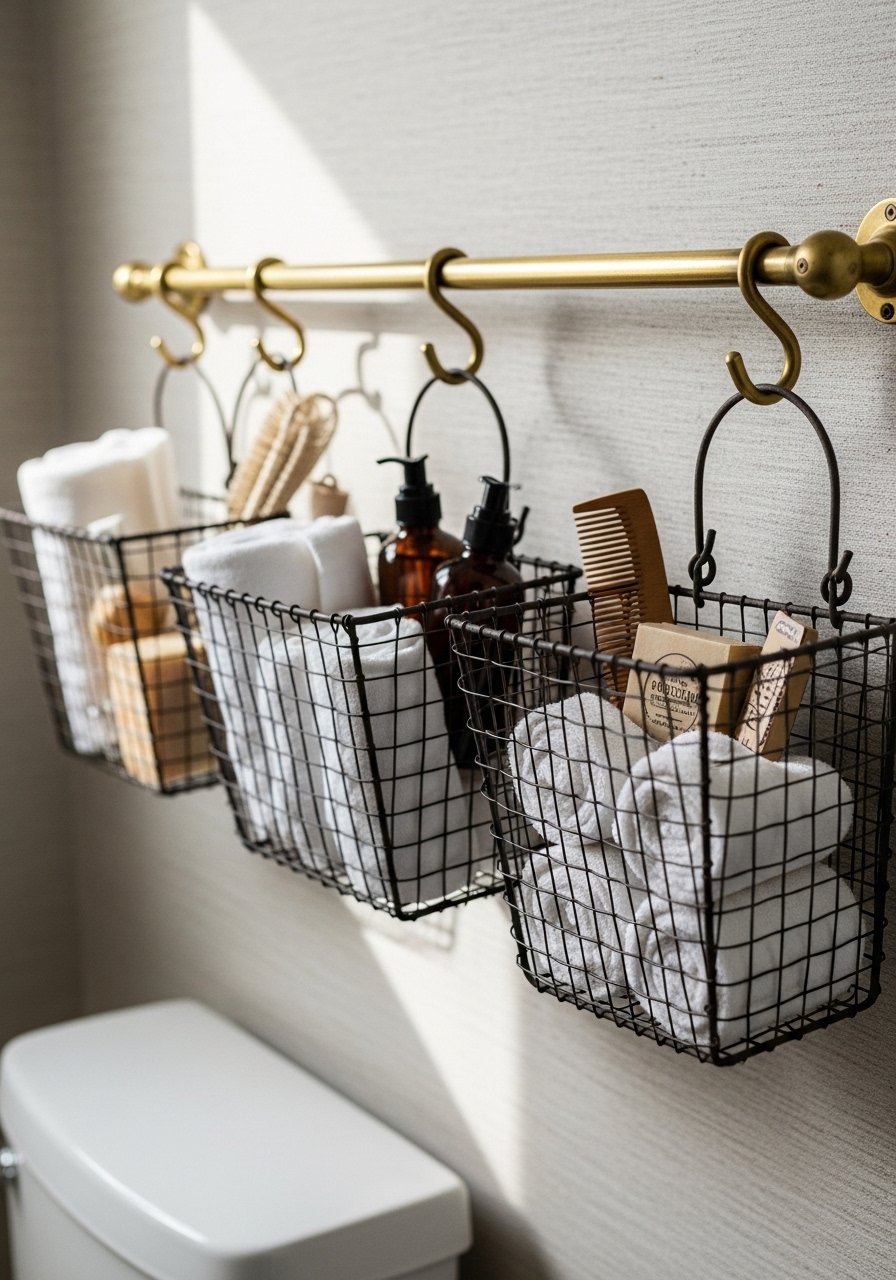
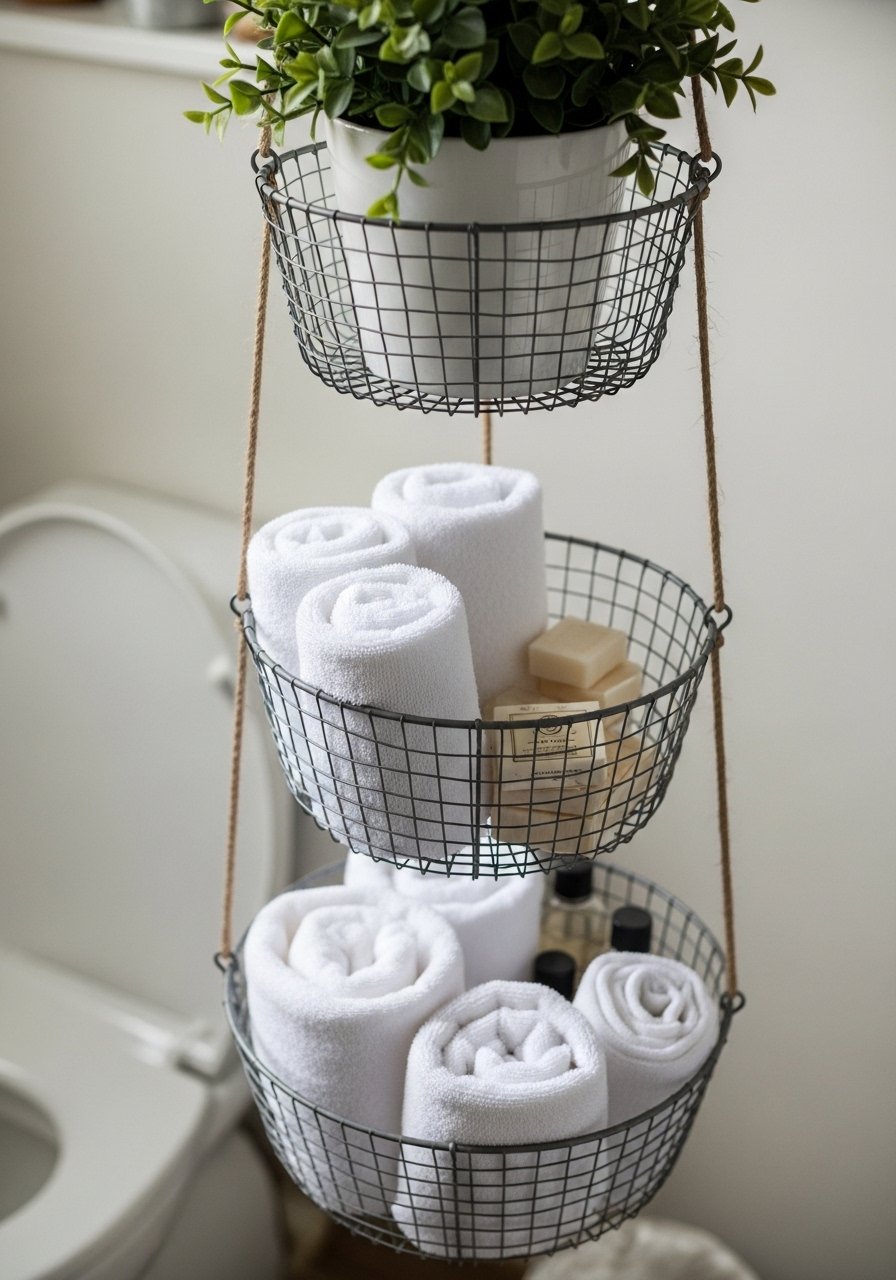
    12. Hanging Planter with Pockets for Small Toiletries

    I repurposed a hanging fabric planter into a pocketed organizer for toothbrushes and small tubes. It’s lightweight and adds texture.

    It wasn’t waterproof at first, and I had a damp mess. I now use a liner or water-resistant pockets to avoid mildew.

    The pockets force me to keep only daily items out. It’s cute, functional, and stops the counters from filling up.

    What You’ll Need for This Look

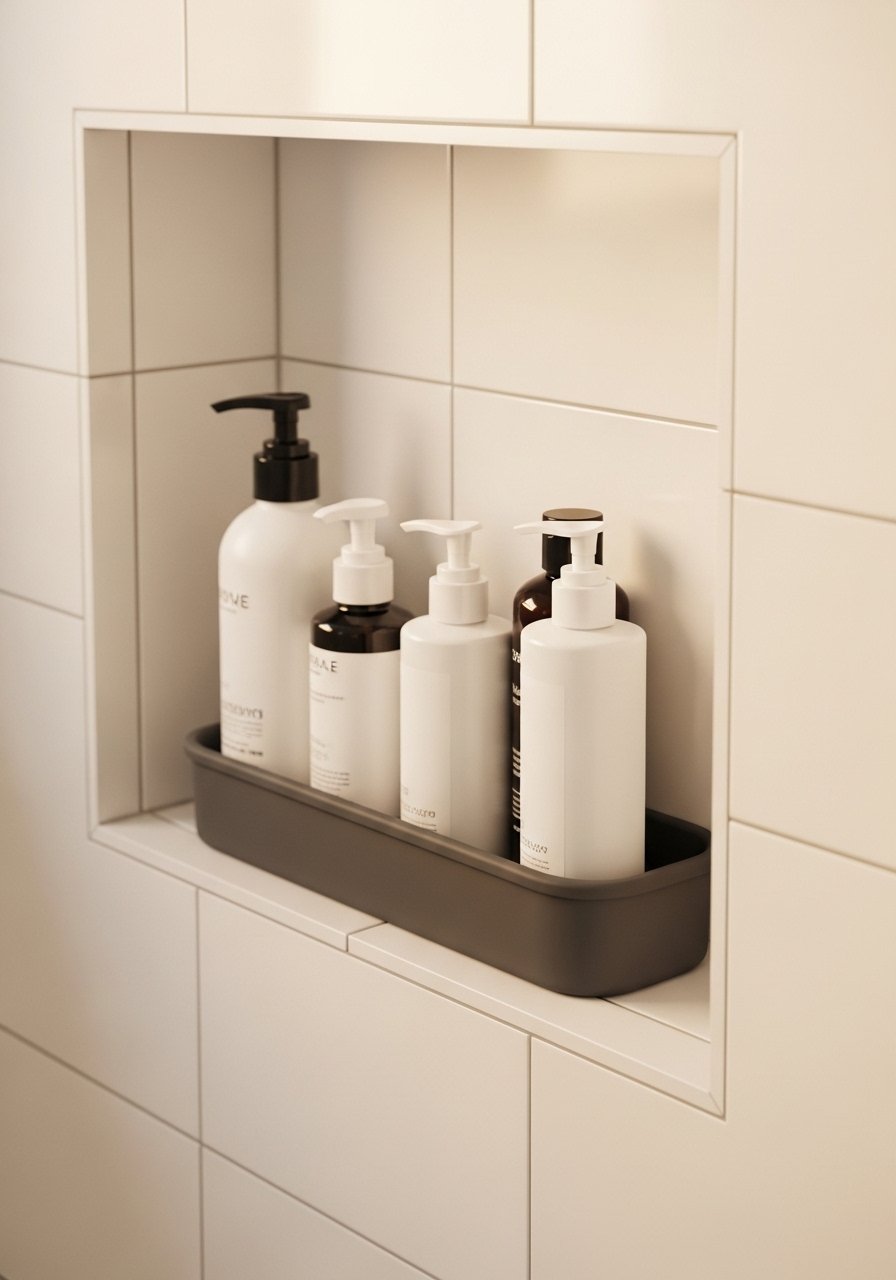
    13. Recessed Shower Niche with Removable Caddy

    Our shower niche was awkwardly deep until I added a removable caddy to separate bottles and brushes. It made rinsing and cleaning faster.

    I once stored too many oversized bottles and the shelf looked chaotic. Now I use same-size pump bottles and a low-profile caddy.

    If you don’t have a niche, consider stick-on caddies that mimic the look—same idea, less work.

    What You’ll Need for This Look

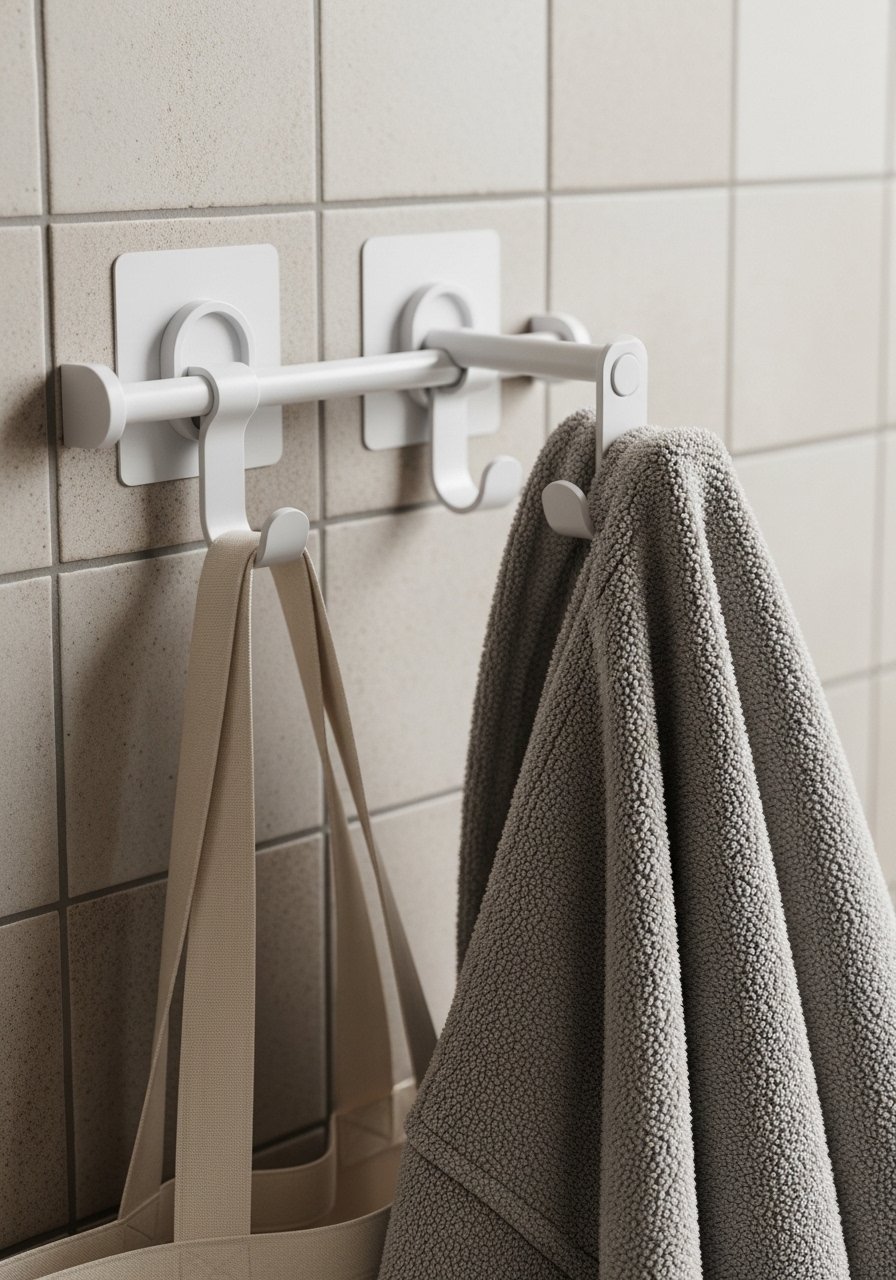
    14. Adhesive Hooks and Rails for Robes and Bags

    I went from sticky towel piles to a tidy row of hooks on the wall. Adhesive hooks saved me from drilling tile and hold surprisingly well.

    I did overload a hook once. The rule: match hook strength to item weight. Use a small rail for heavier robes and hooks for towels.

    Hooks make the room feel used, not staged. They’re cheap and instantly helpful.

    What You’ll Need for This Look

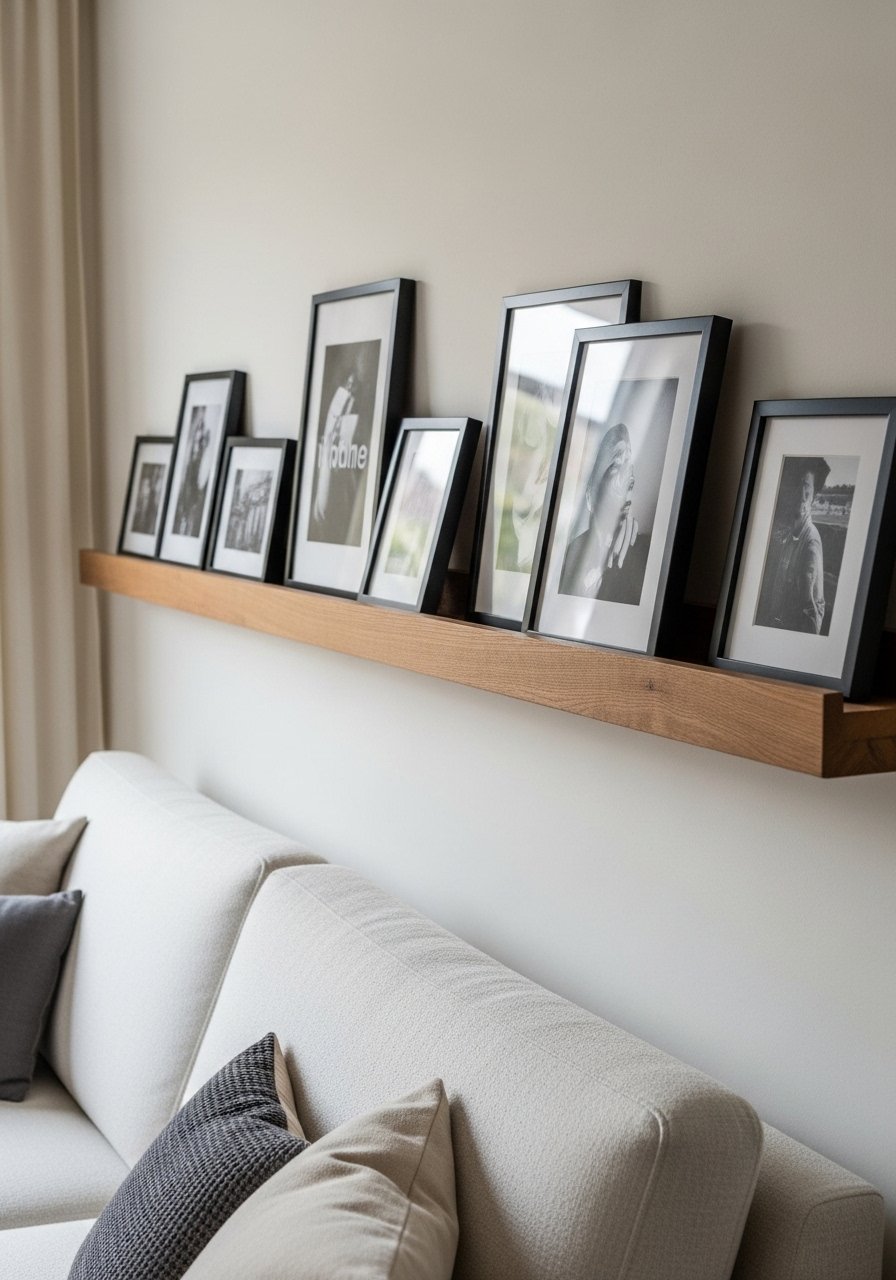
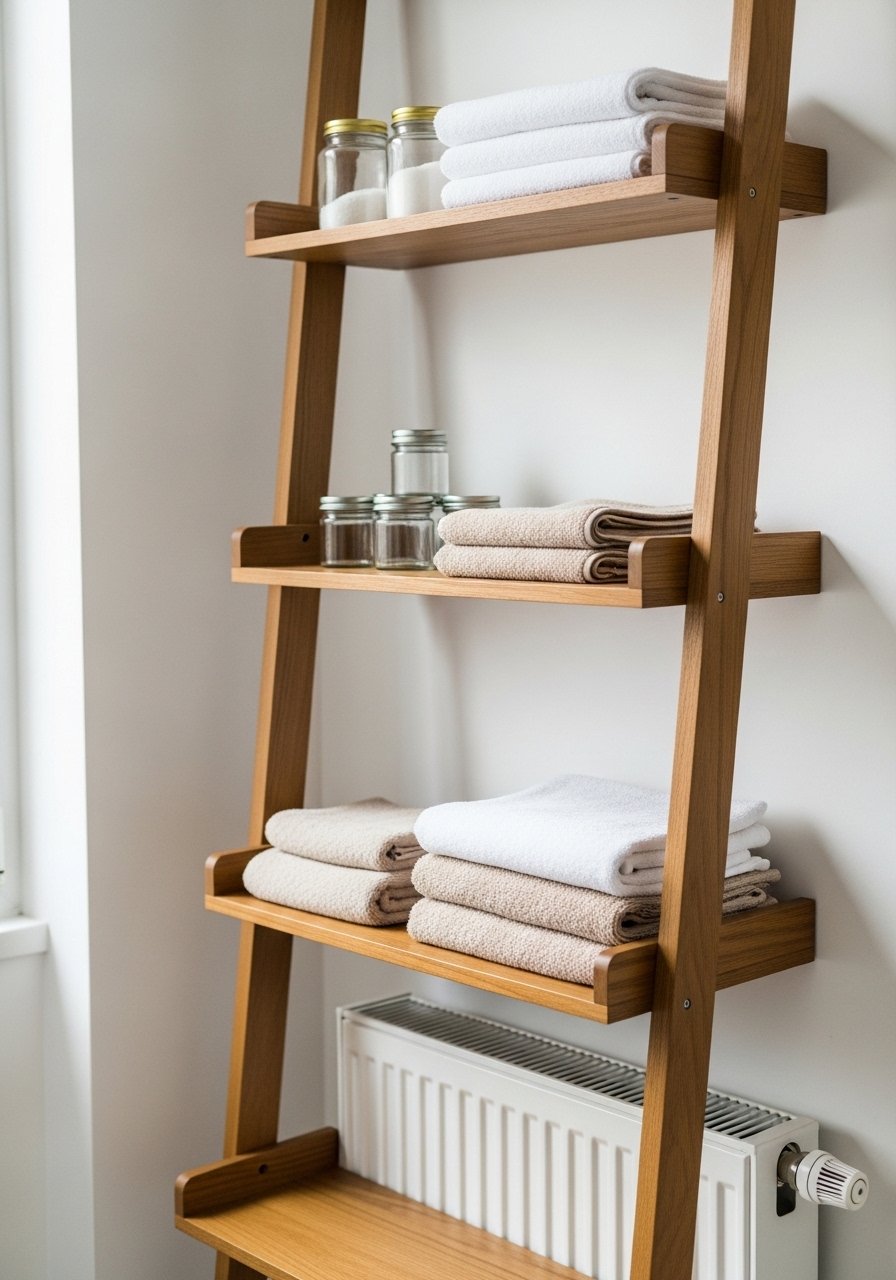
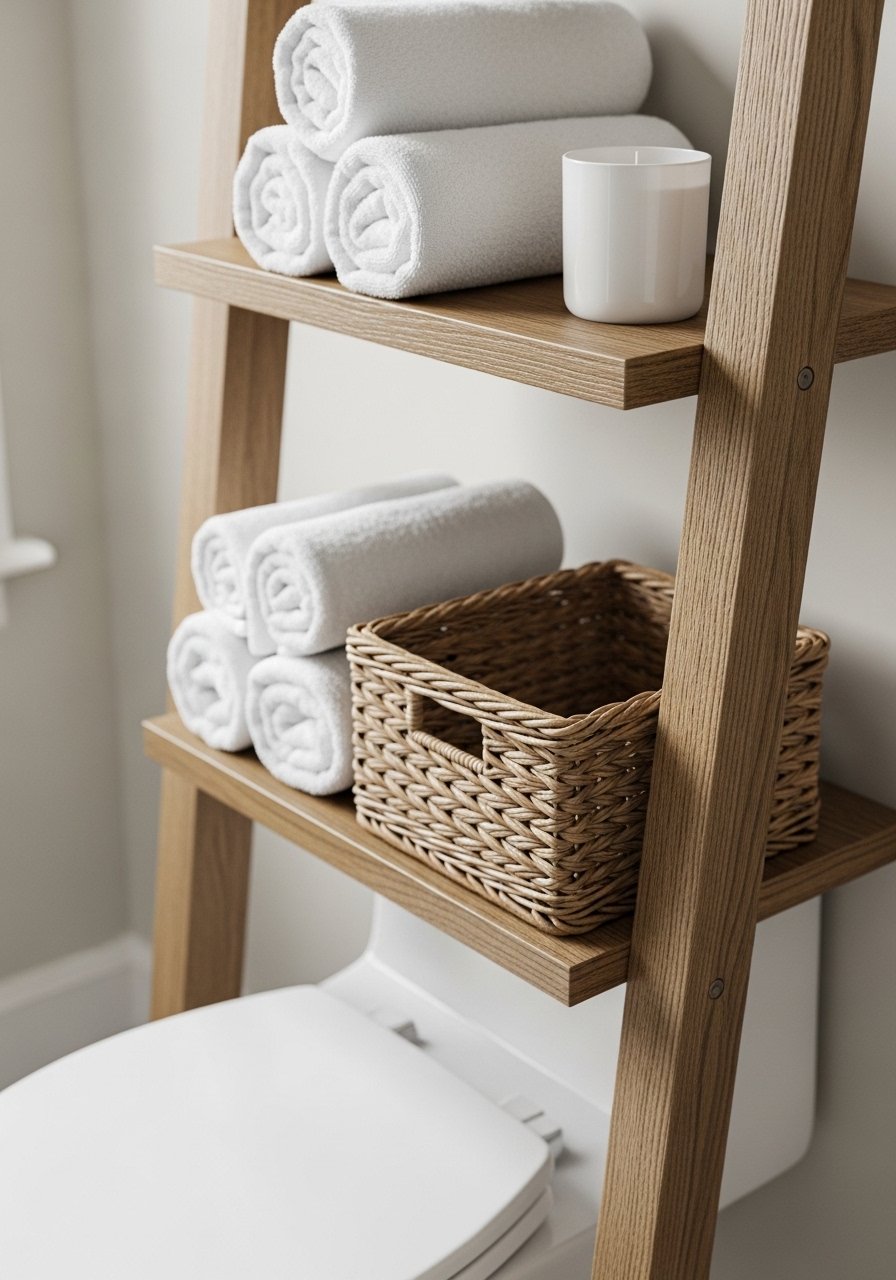
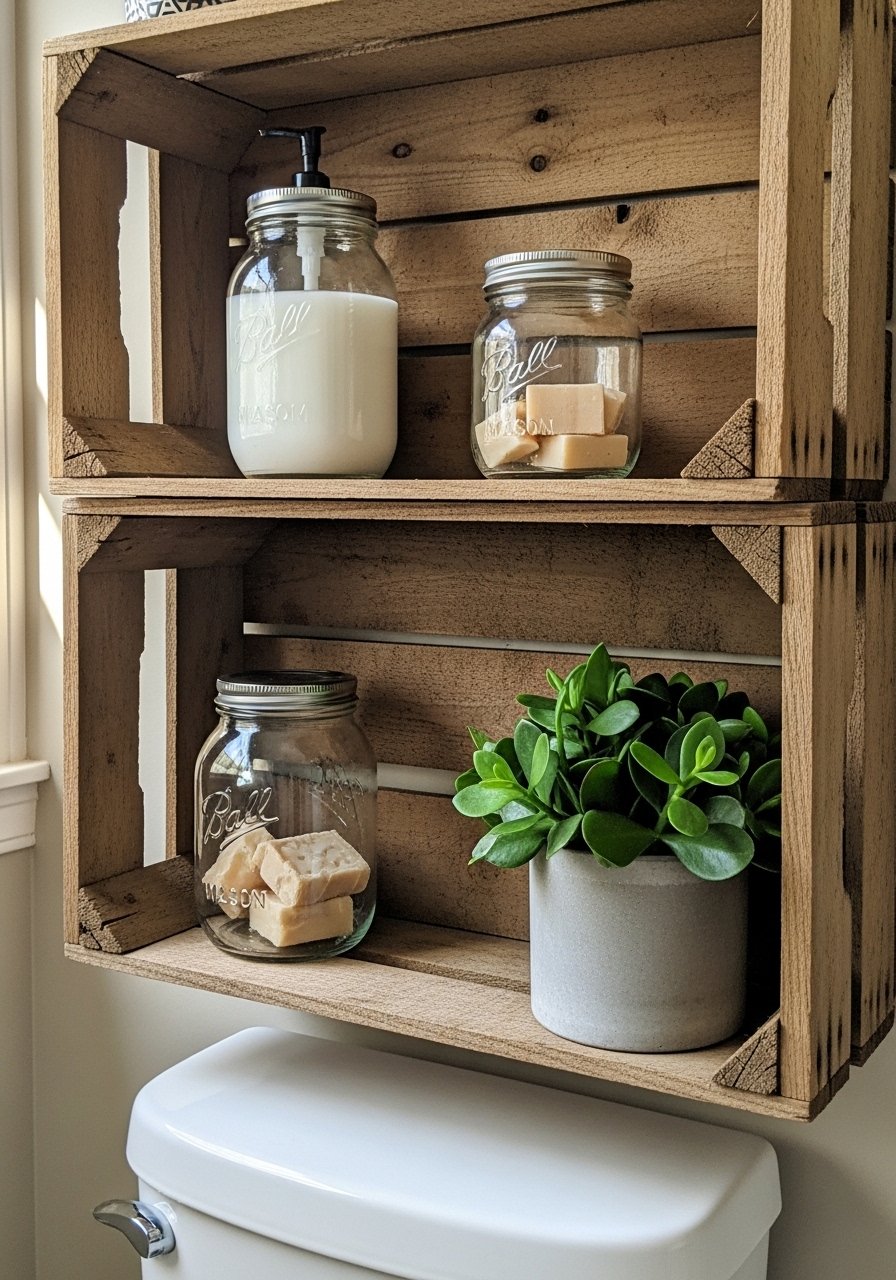
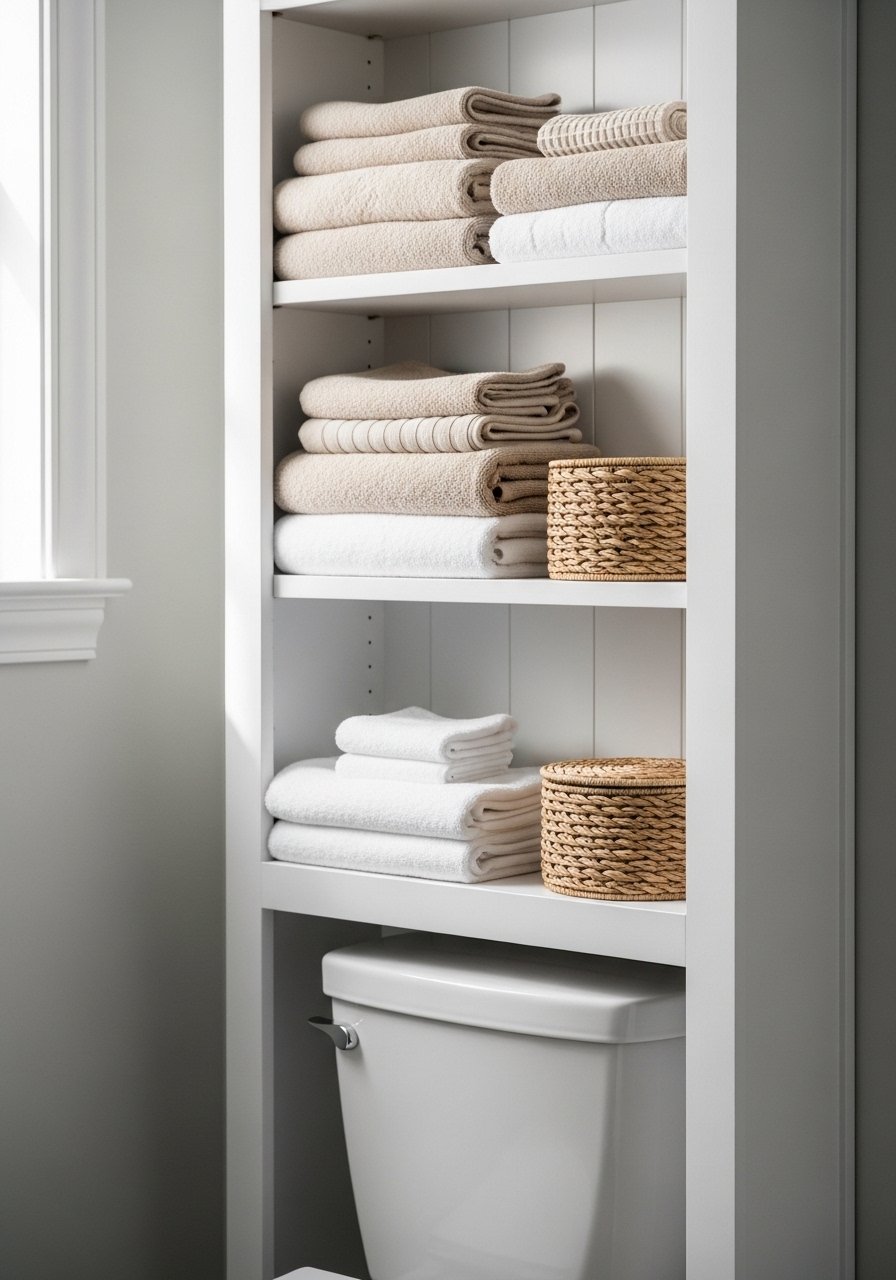
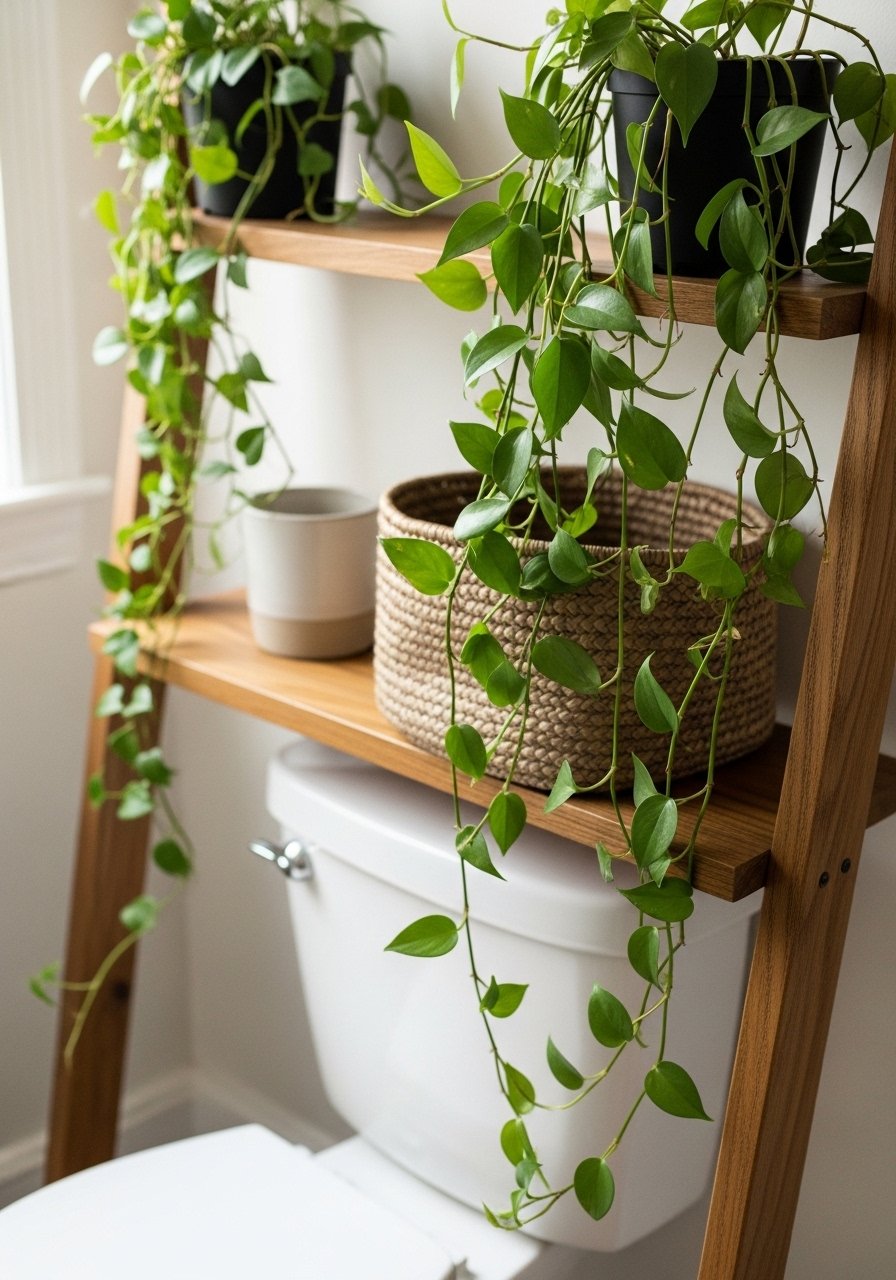
    15. Ladder-Style Narrow Shelving Above Radiator or Toilet

    I leaned a ladder-style narrow shelf above my radiator and it became a landing zone for towels and toiletries. It uses vertical space without bulky cabinetry.

    I learned the ladder needed a back brace to stop wobbling. Add brackets or anchor the top lightly to the wall if it feels unstable.

    It creates layers and gives me places to put pretty jars without sacrificing function.

    What You’ll Need for This Look

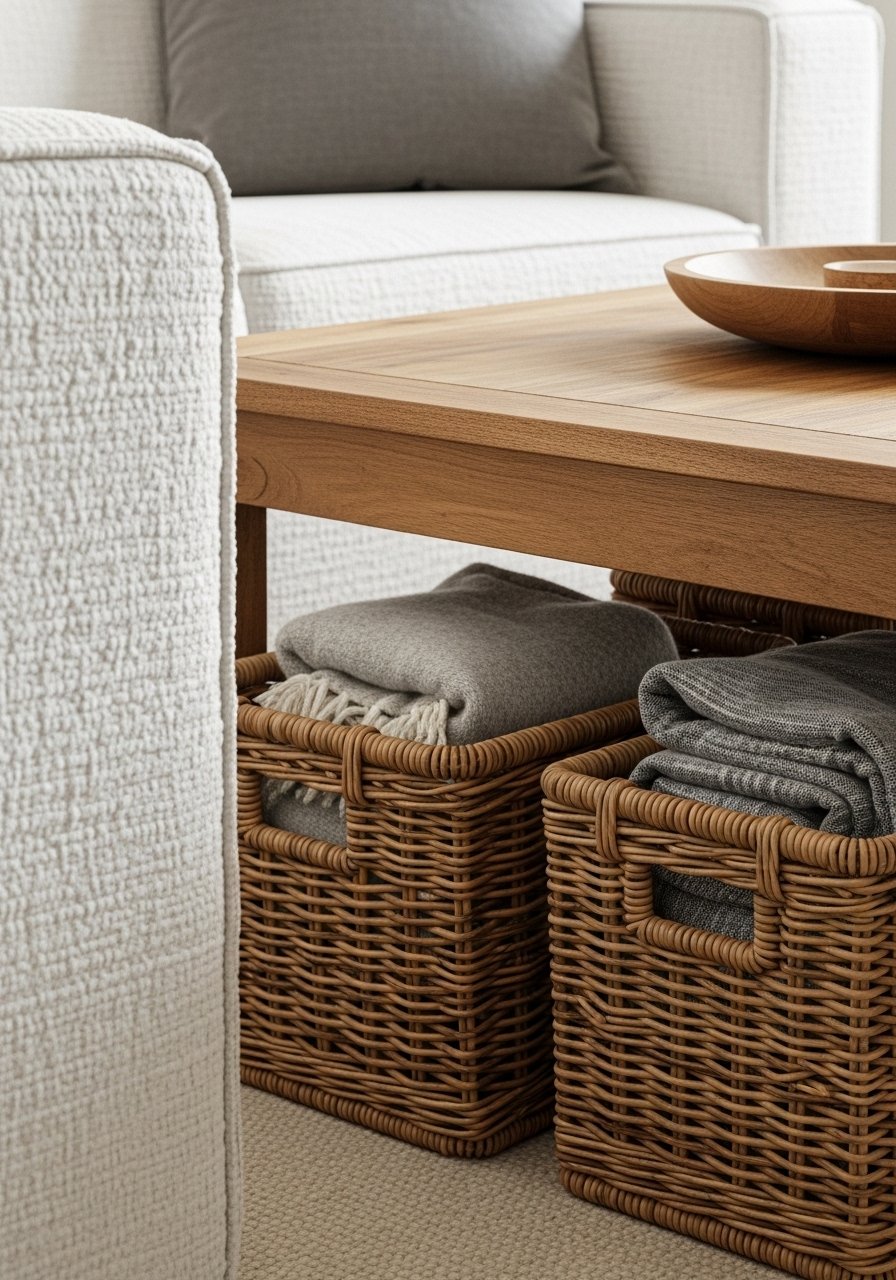
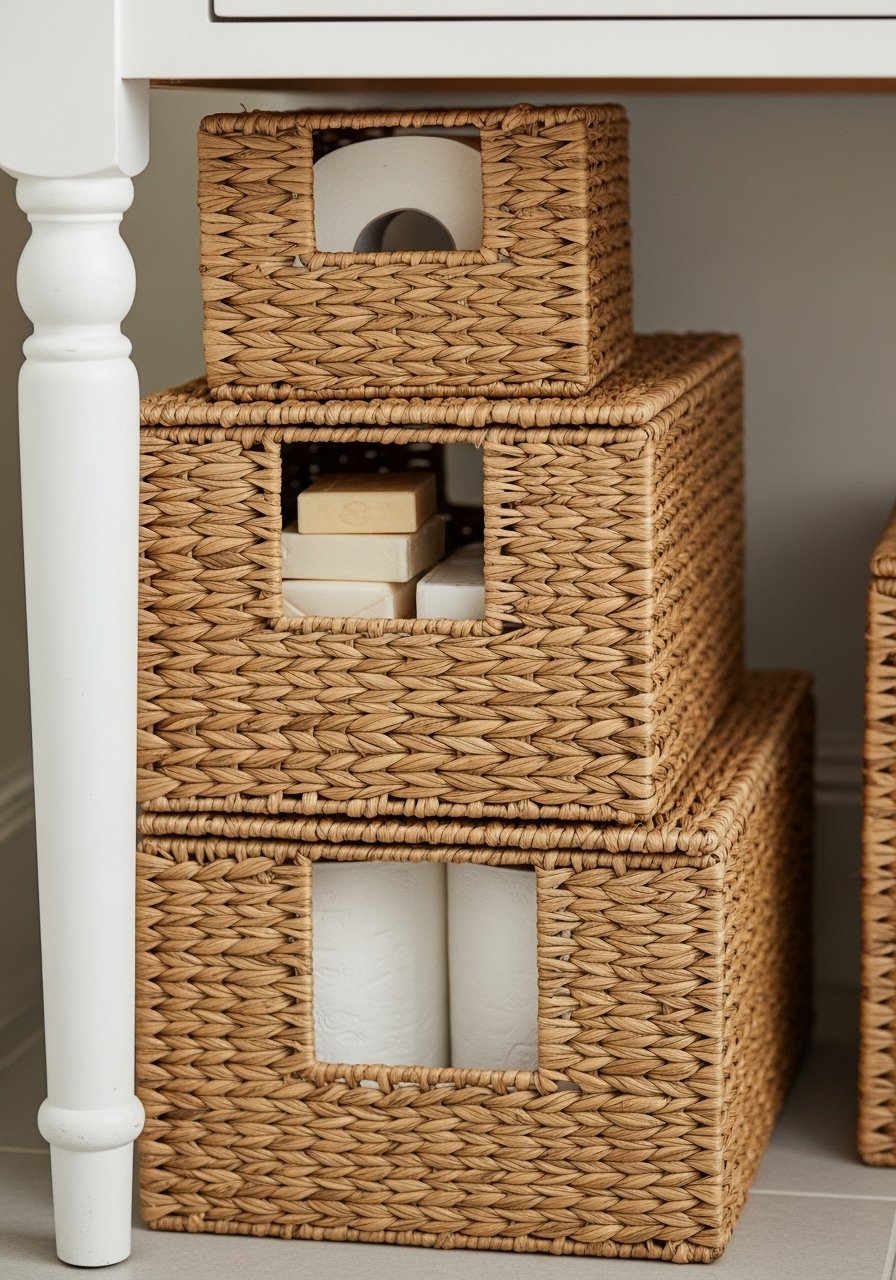
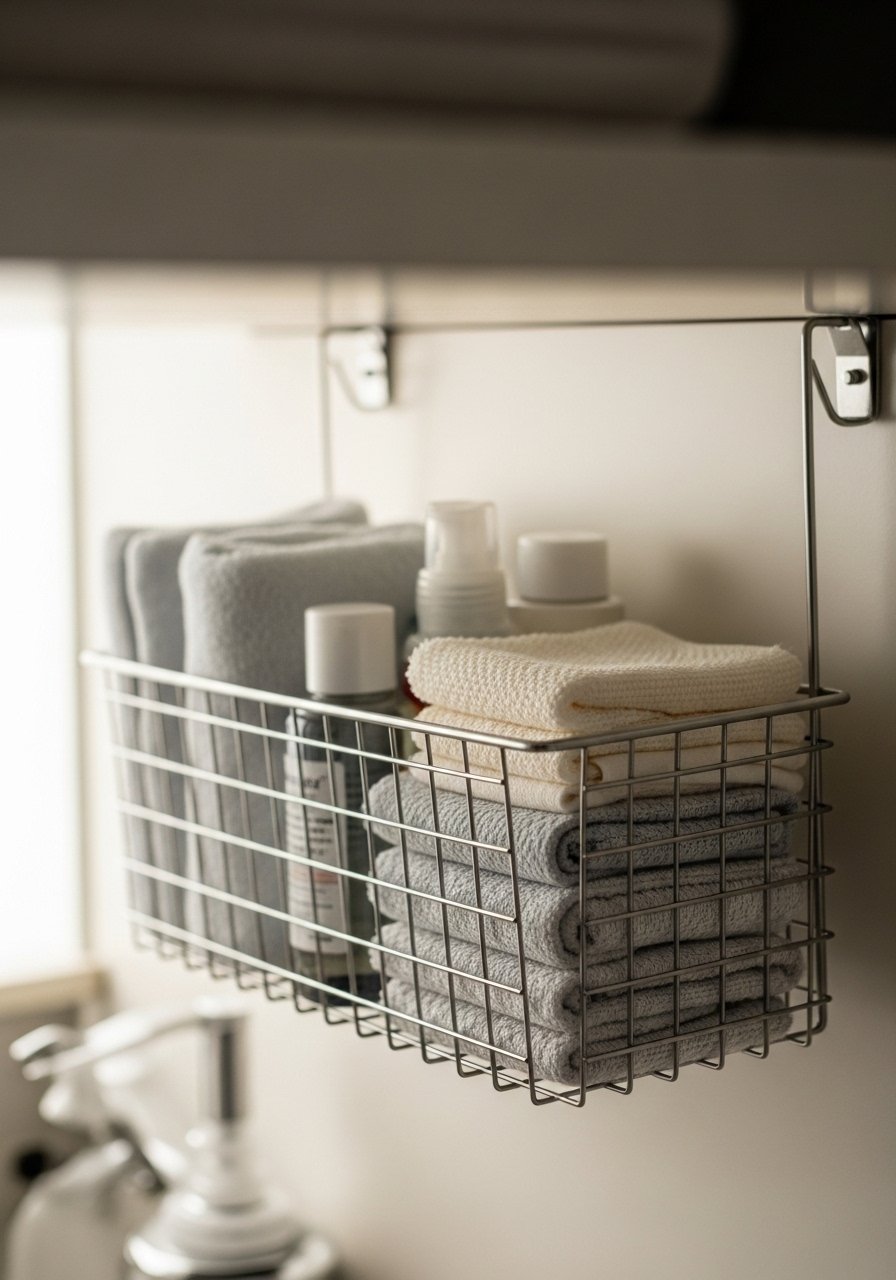
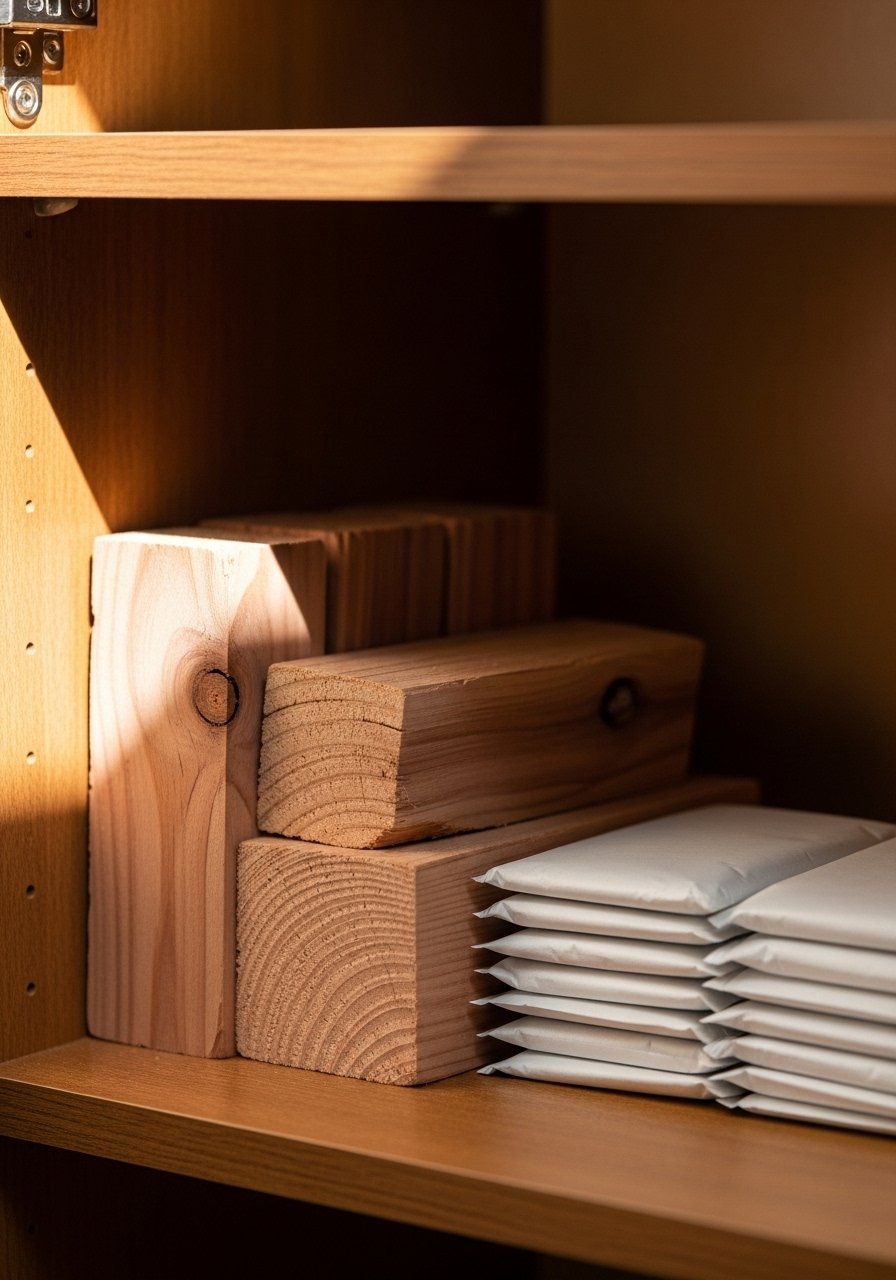
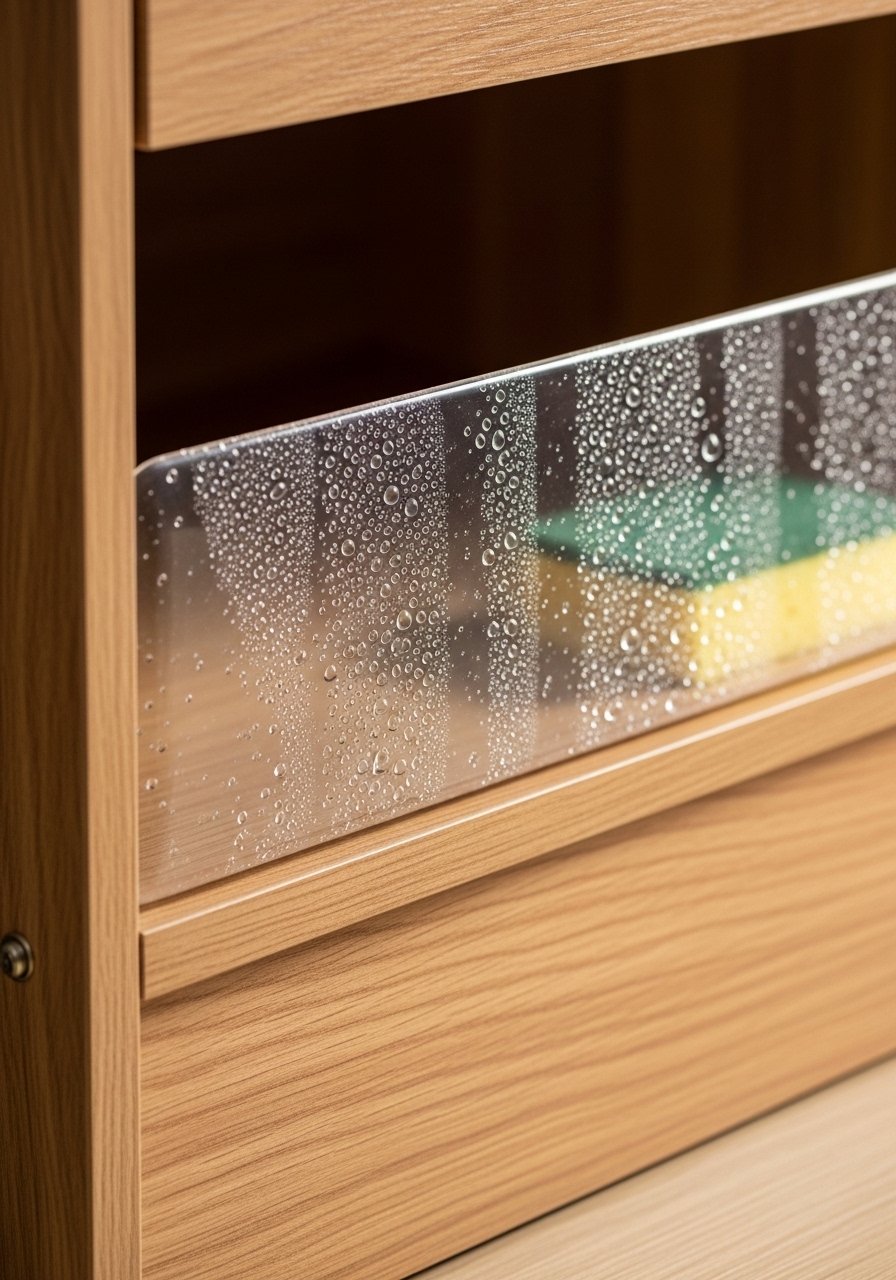
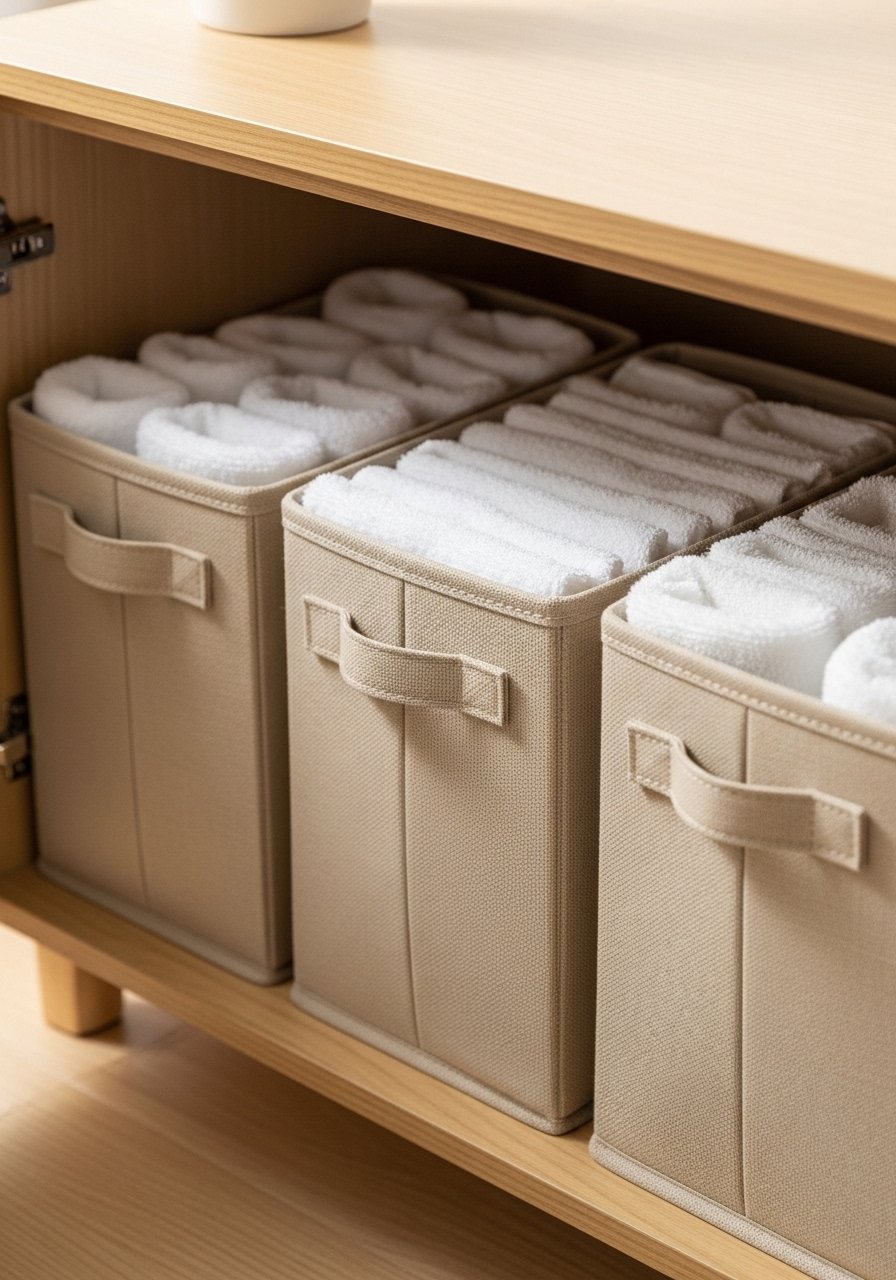
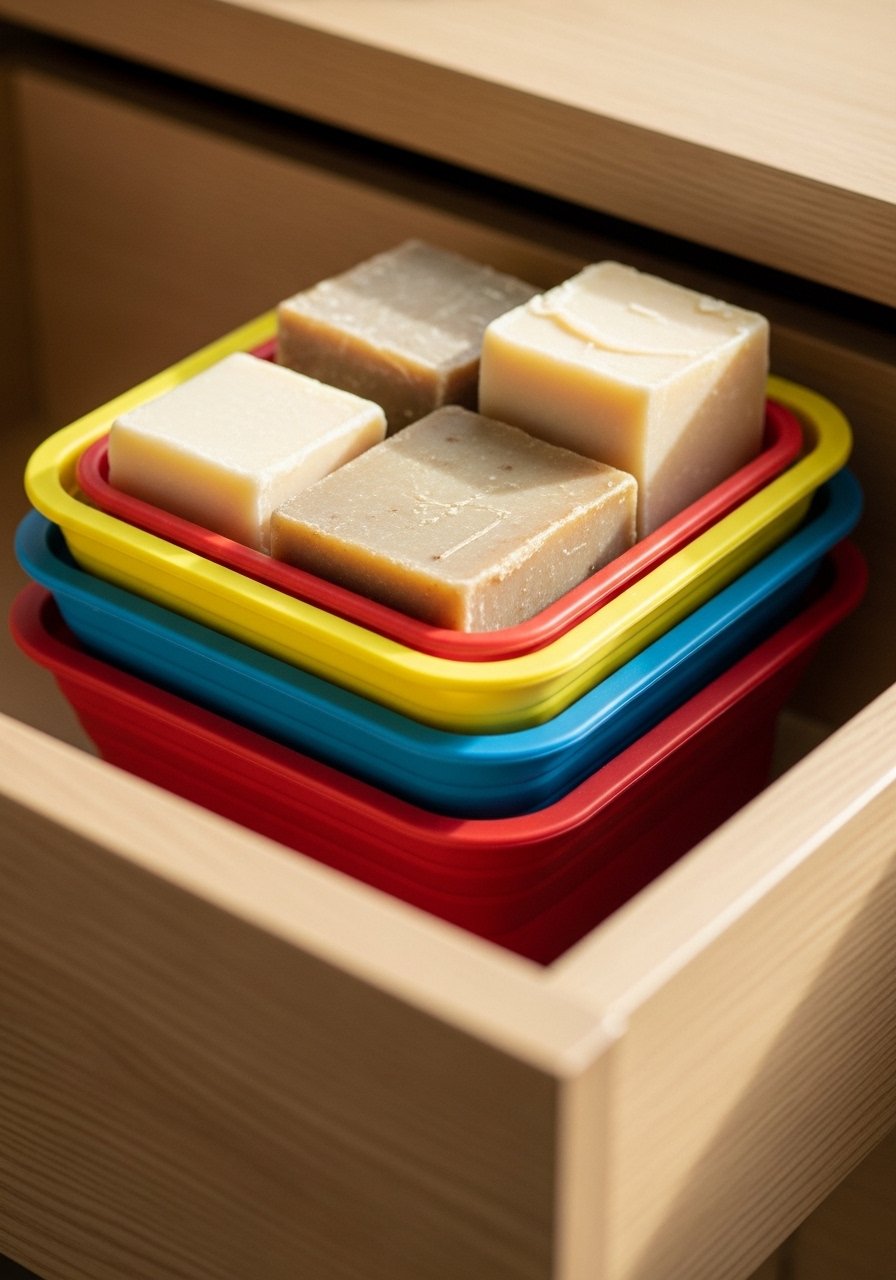
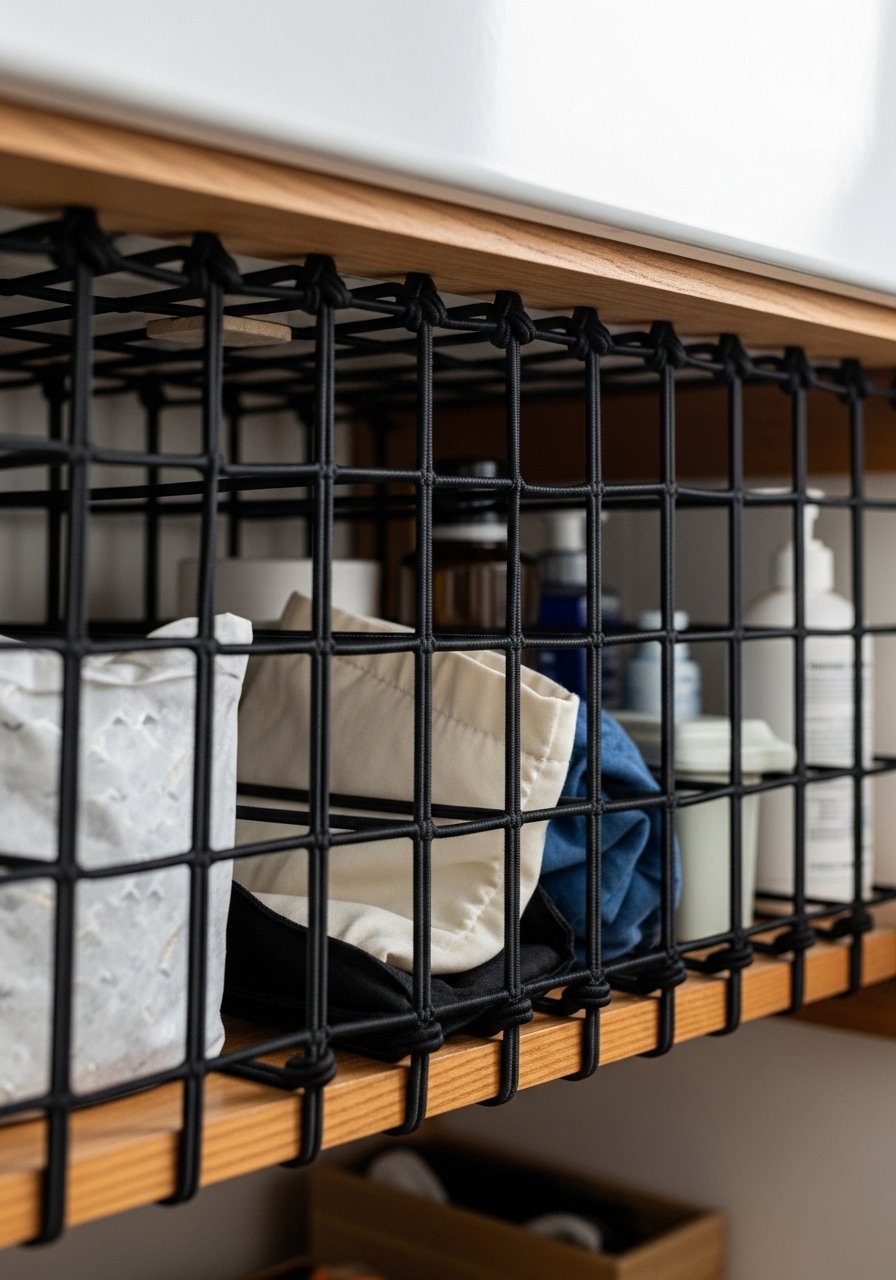
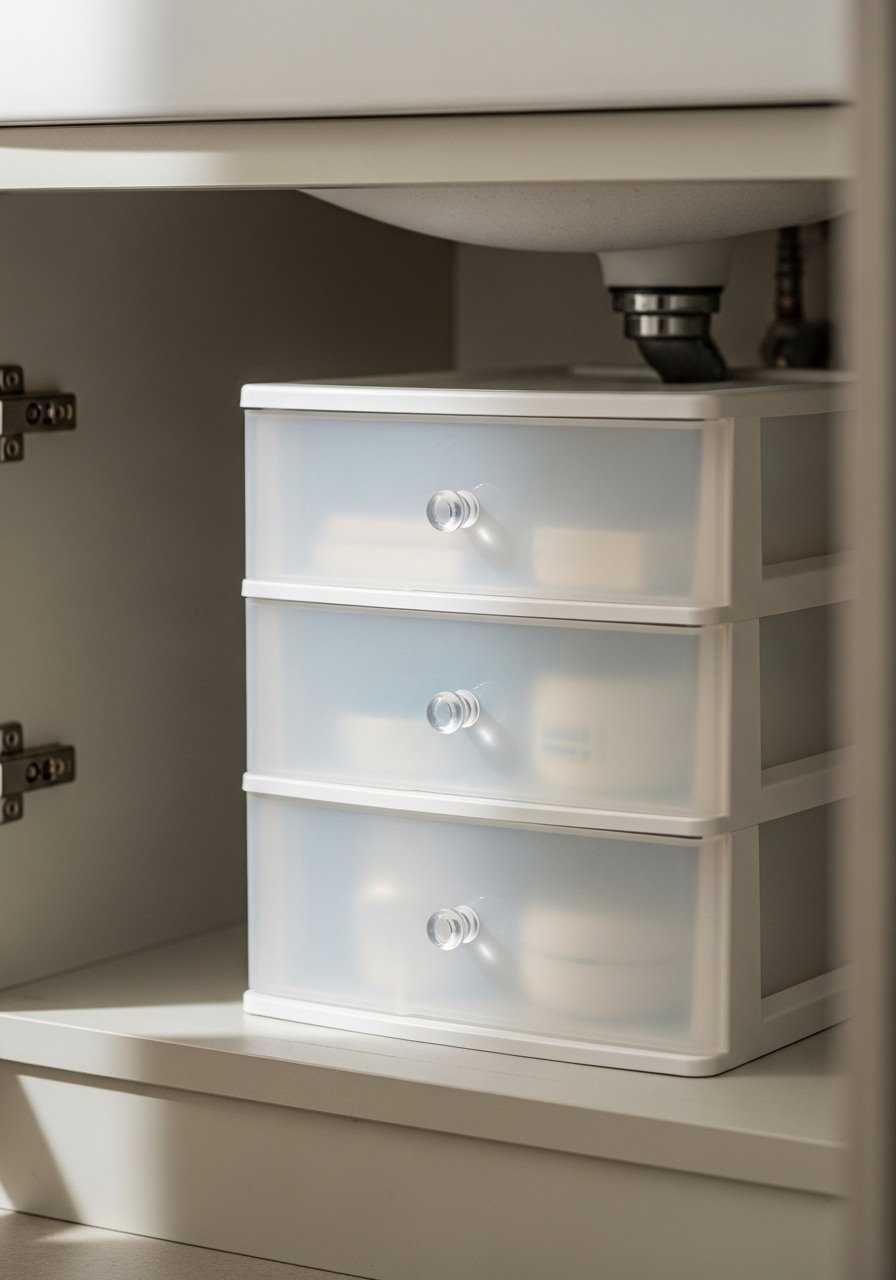
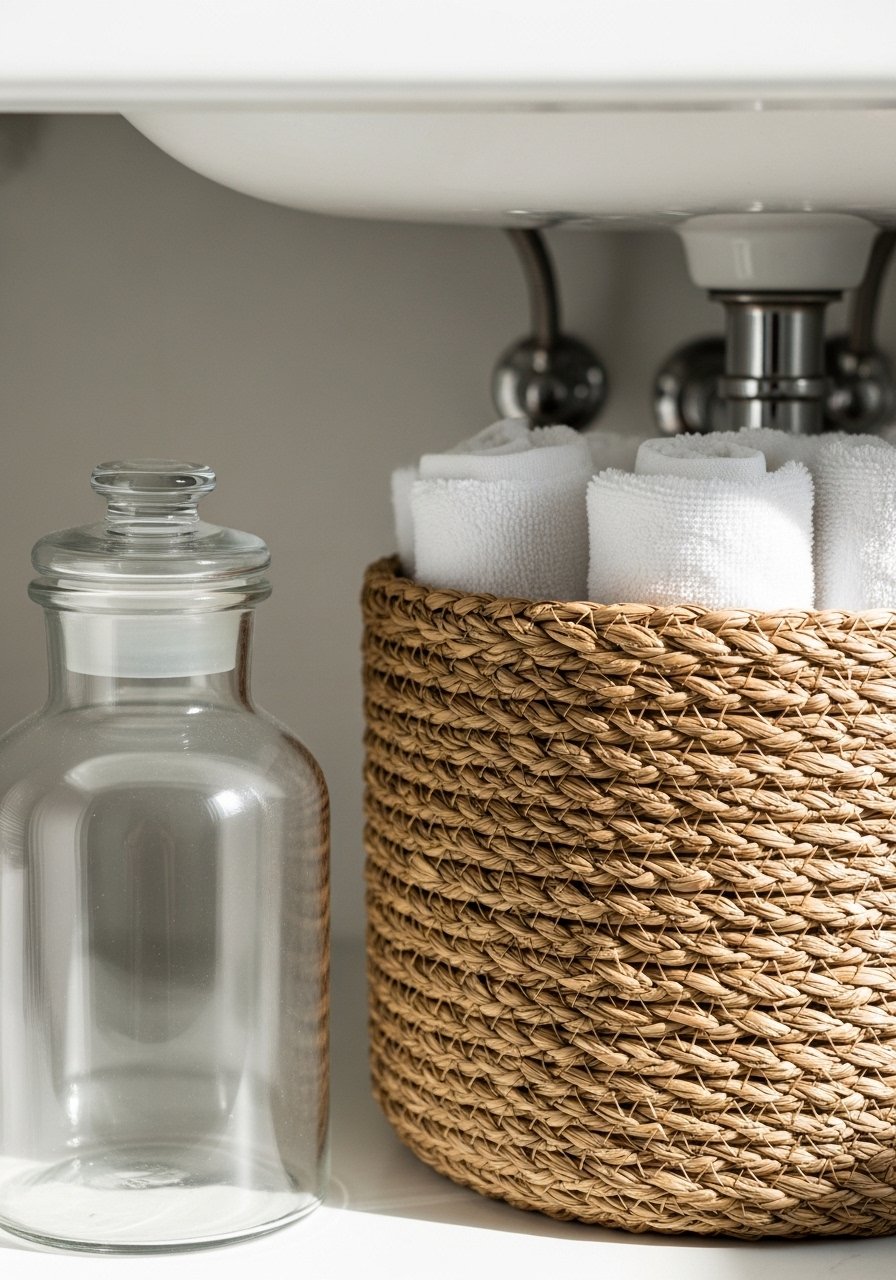
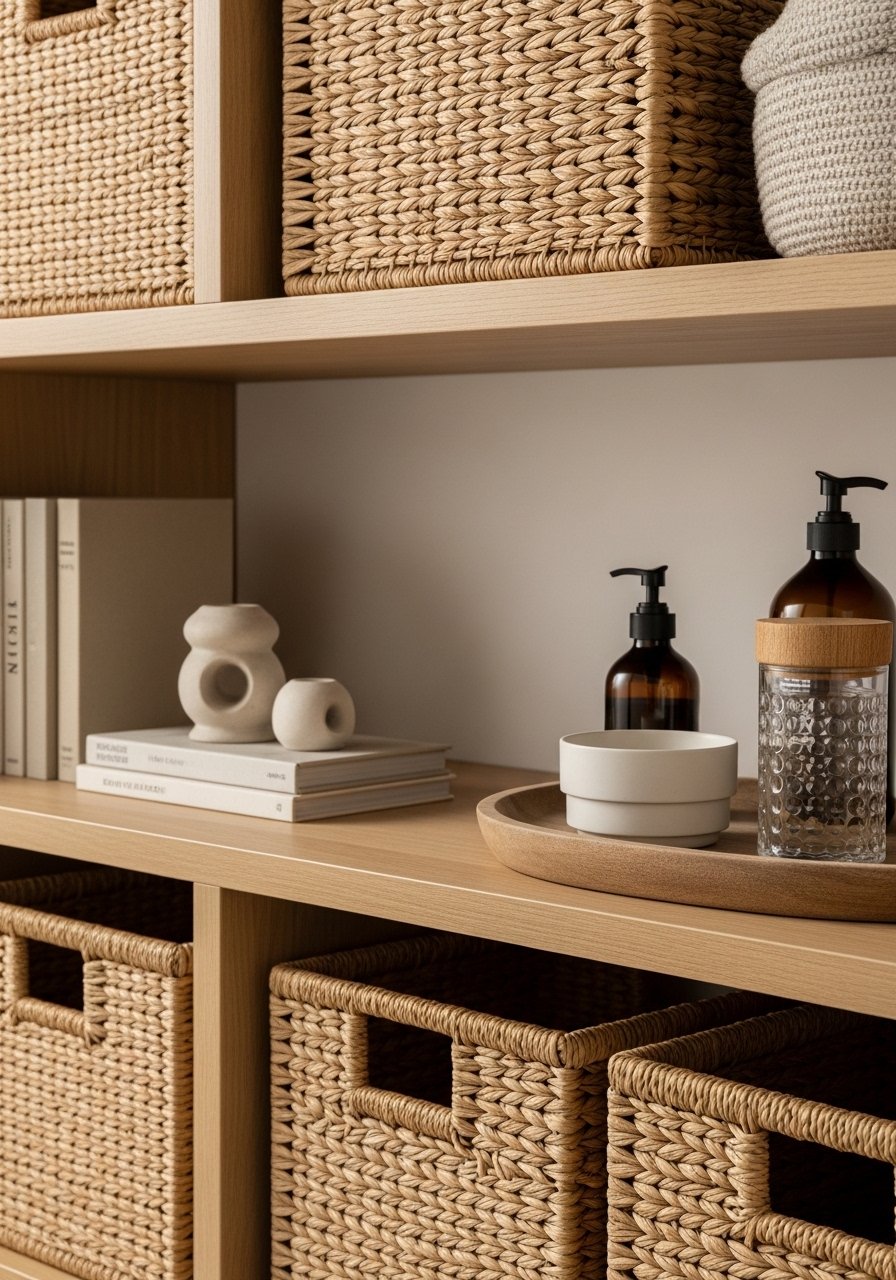
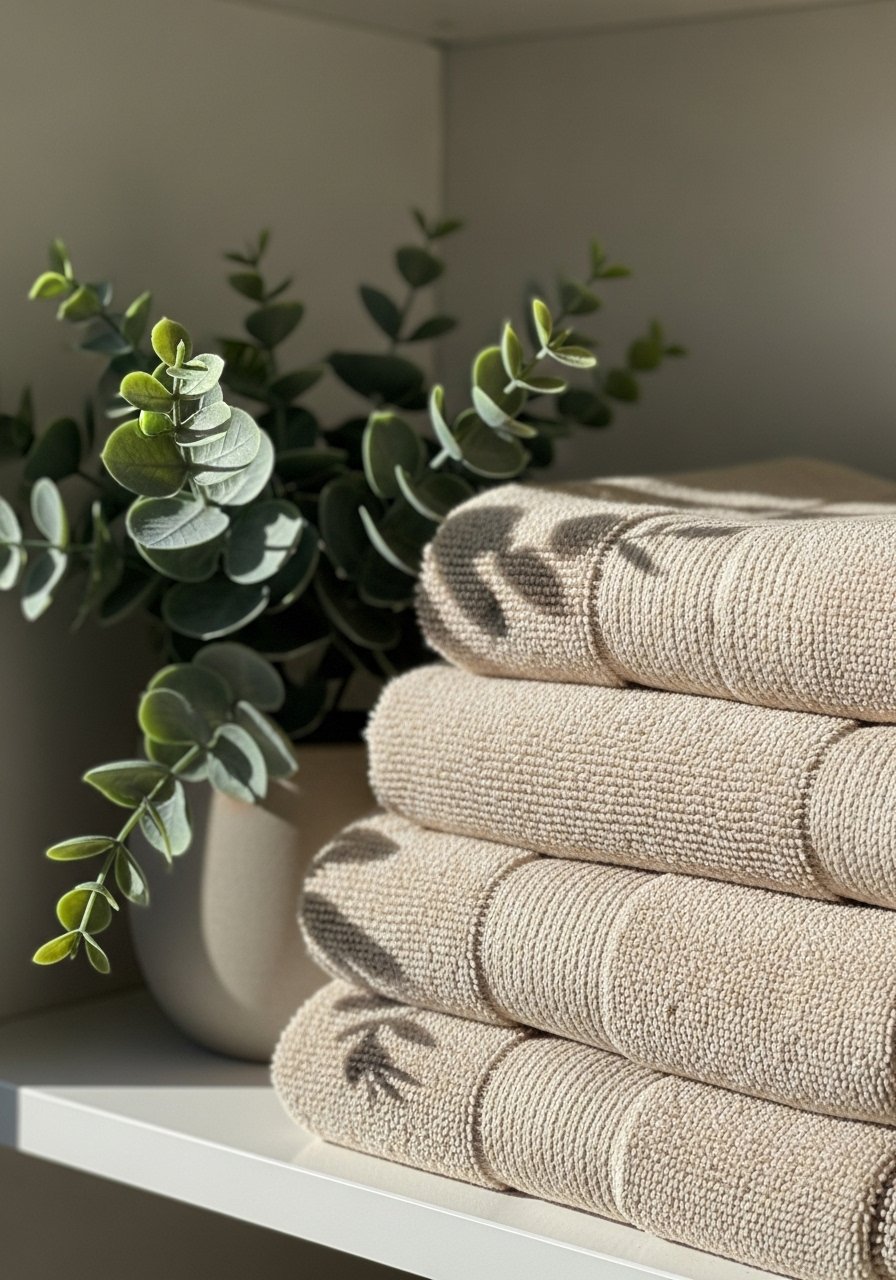
    16. Stackable Baskets Under Vanity for Flexible Storage

    I switched to stackable baskets under the vanity and finally stopped shoving loose packs of toilet paper into corners. They slide out and stay contained.

    I made the mistake of buying too-tall baskets that scraped the sink plumbing. Measure clearance before buying.

    Baskets give a tactile, warm look and are forgiving when you need quick access.

    What You’ll Need for This Look

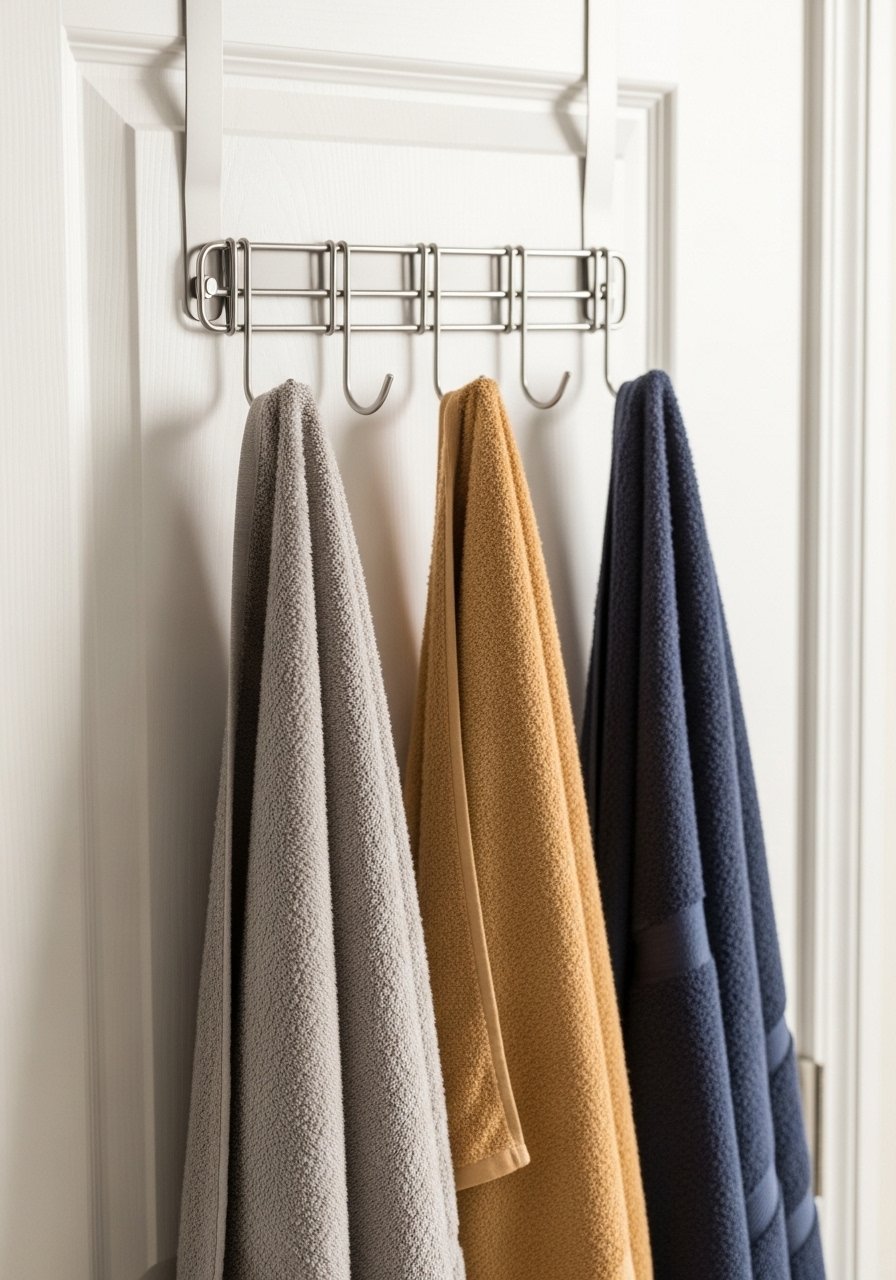
    17. Over-the-Door Towel Rack That Doesn’t Drill

    An over-the-door towel rack freed up wall space and kept towels off chairs. It’s simple and works on rental doors.

    I once got a cheap metal rack that scratched paint. Look for padded hooks or protect the door with felt strips.

    It’s a renter-friendly solution that keeps textiles off the floor and within reach.

    What You’ll Need for This Look

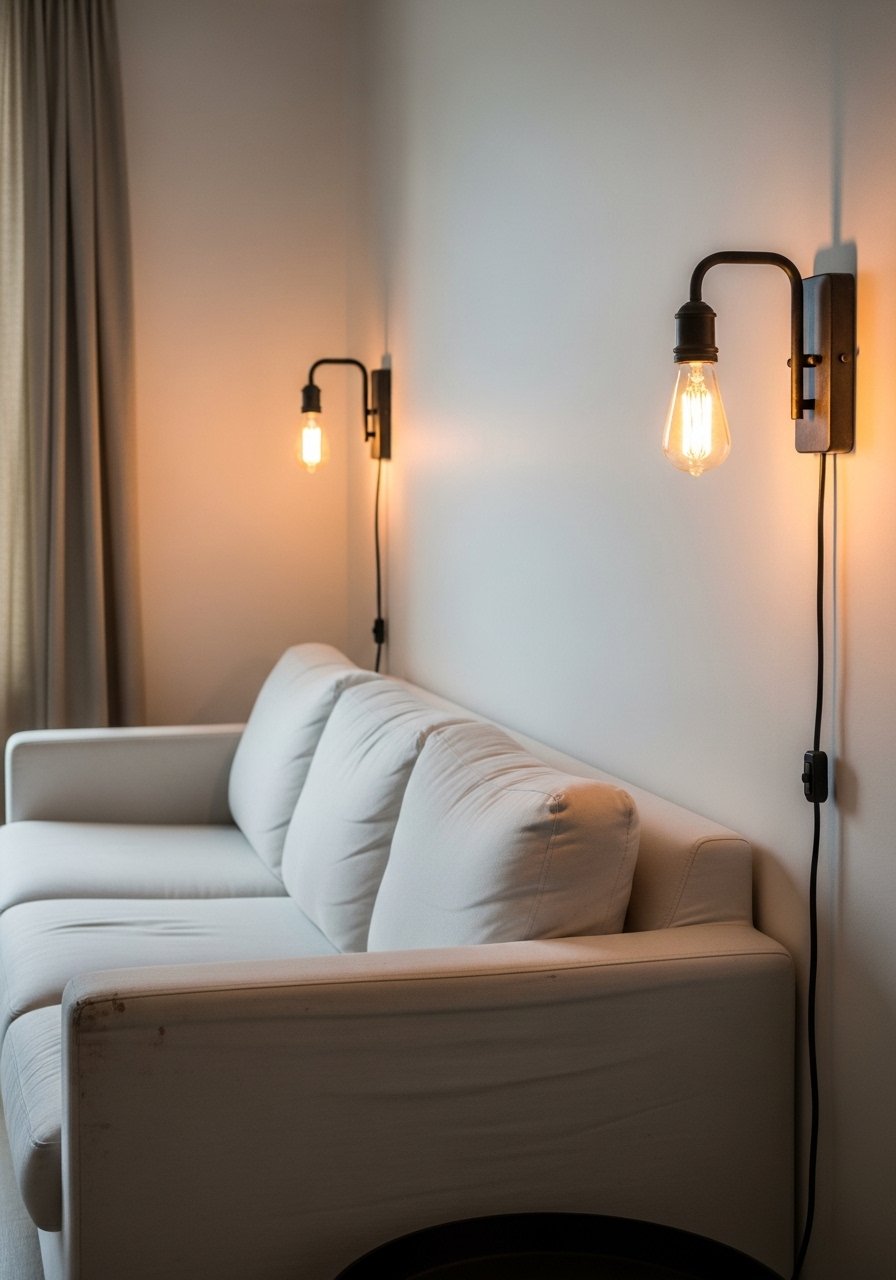
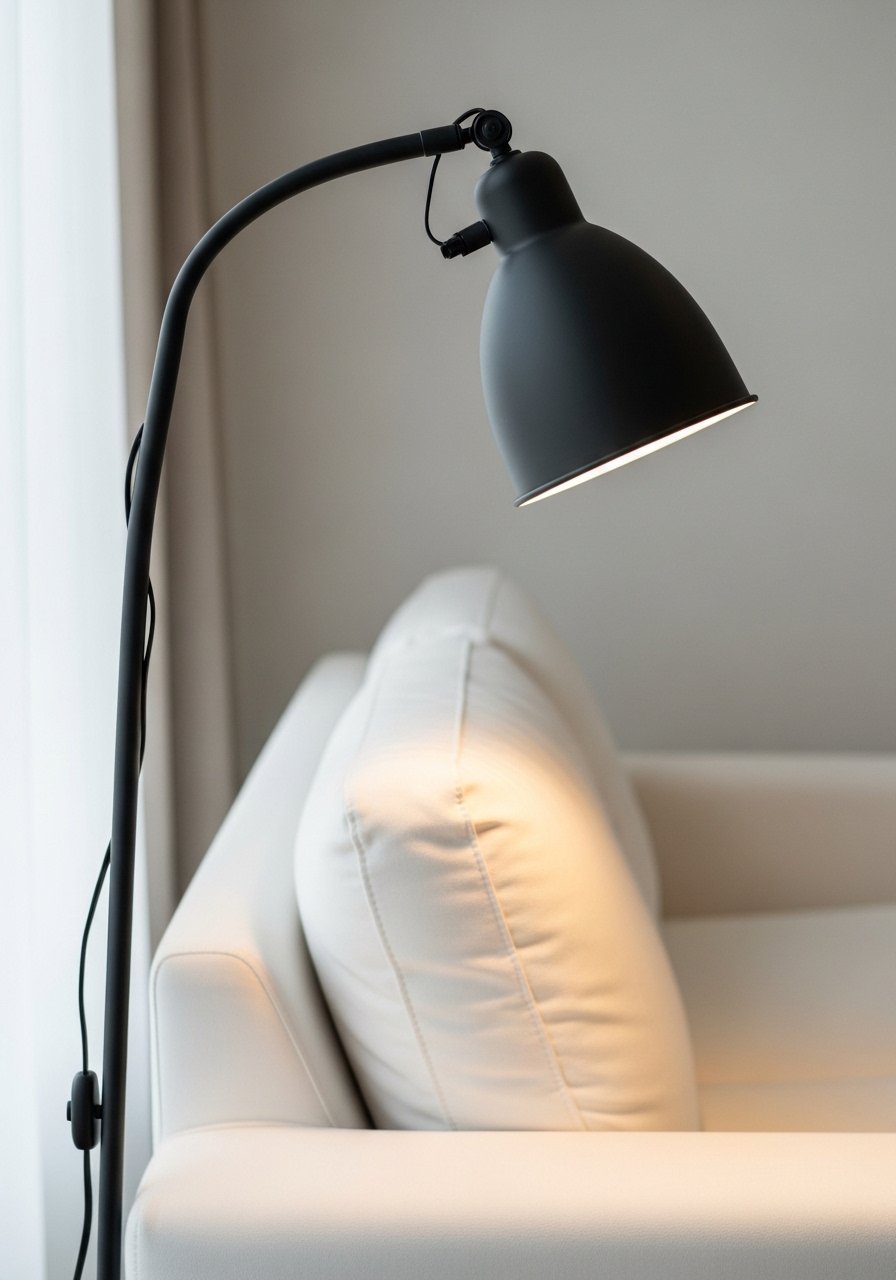
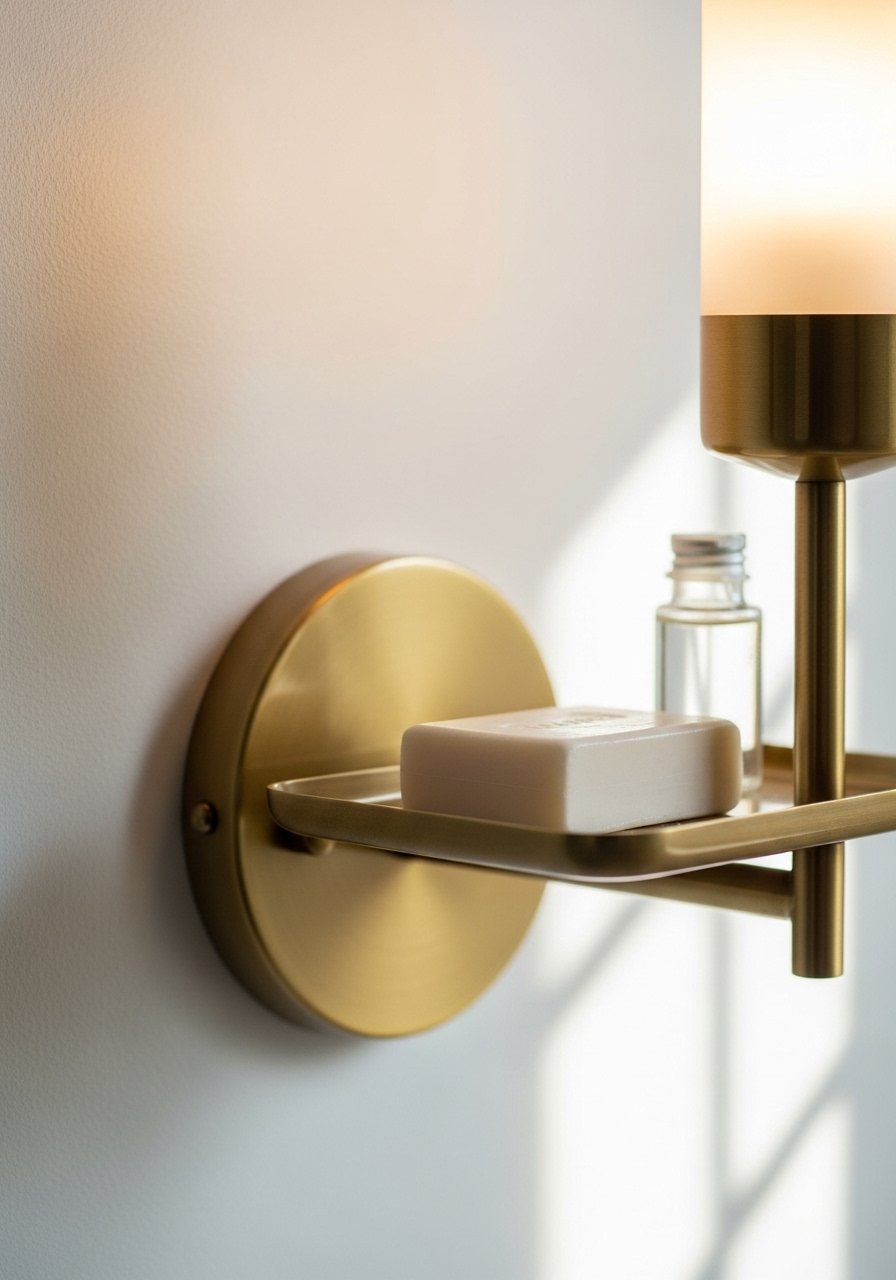
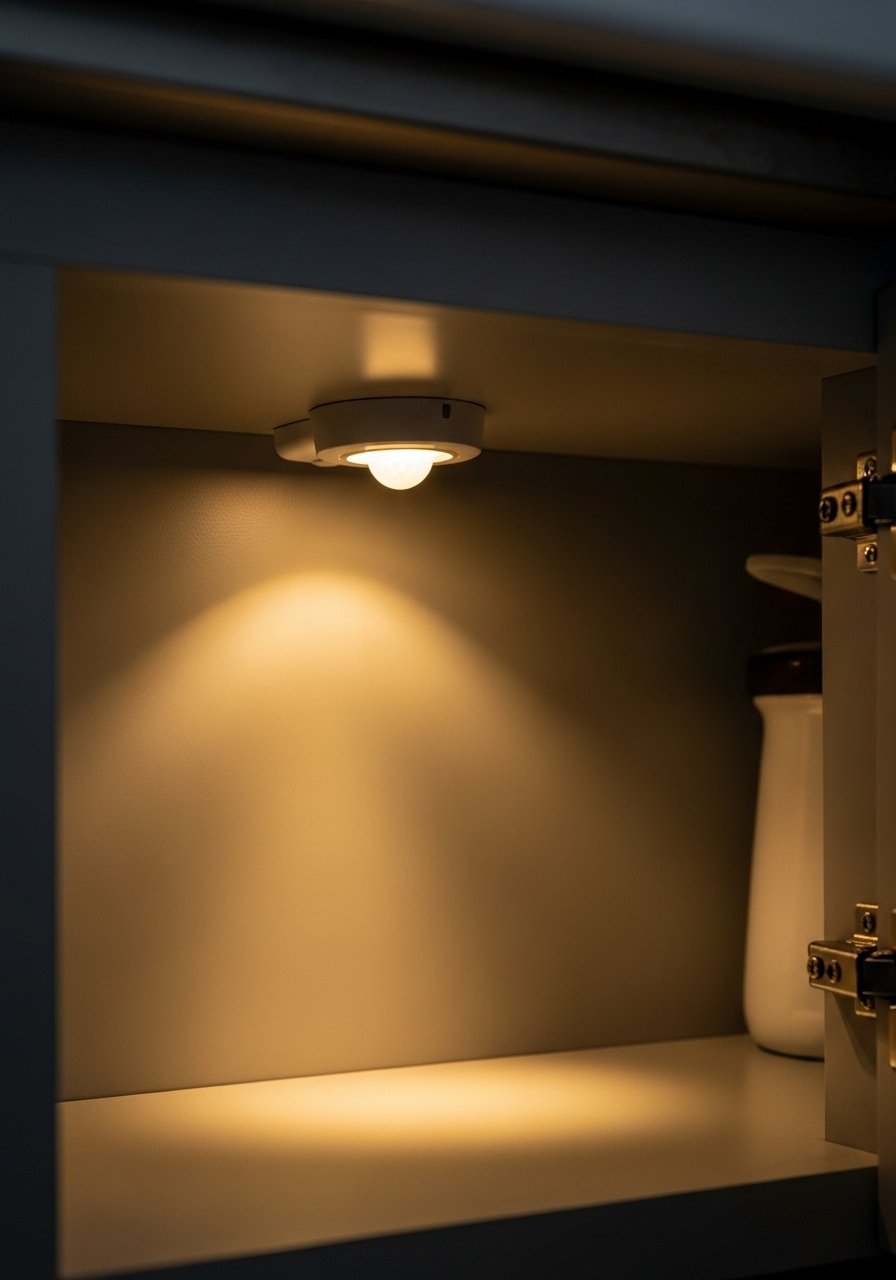
    18. Wall-Mounted Sconce with Small Shelf for Nighttime Items

    I replaced a bulky lamp with a sconce that has a slim shelf. It freed counter space and gave me a nightlight spot for my glasses and hand cream.

    I misjudged the height once and kept bumping my head. Mount sconces at eye level and keep the shelf shallow to avoid knocks.

    It’s a small investment that makes morning and night routines less fussy.

    What You’ll Need for This Look

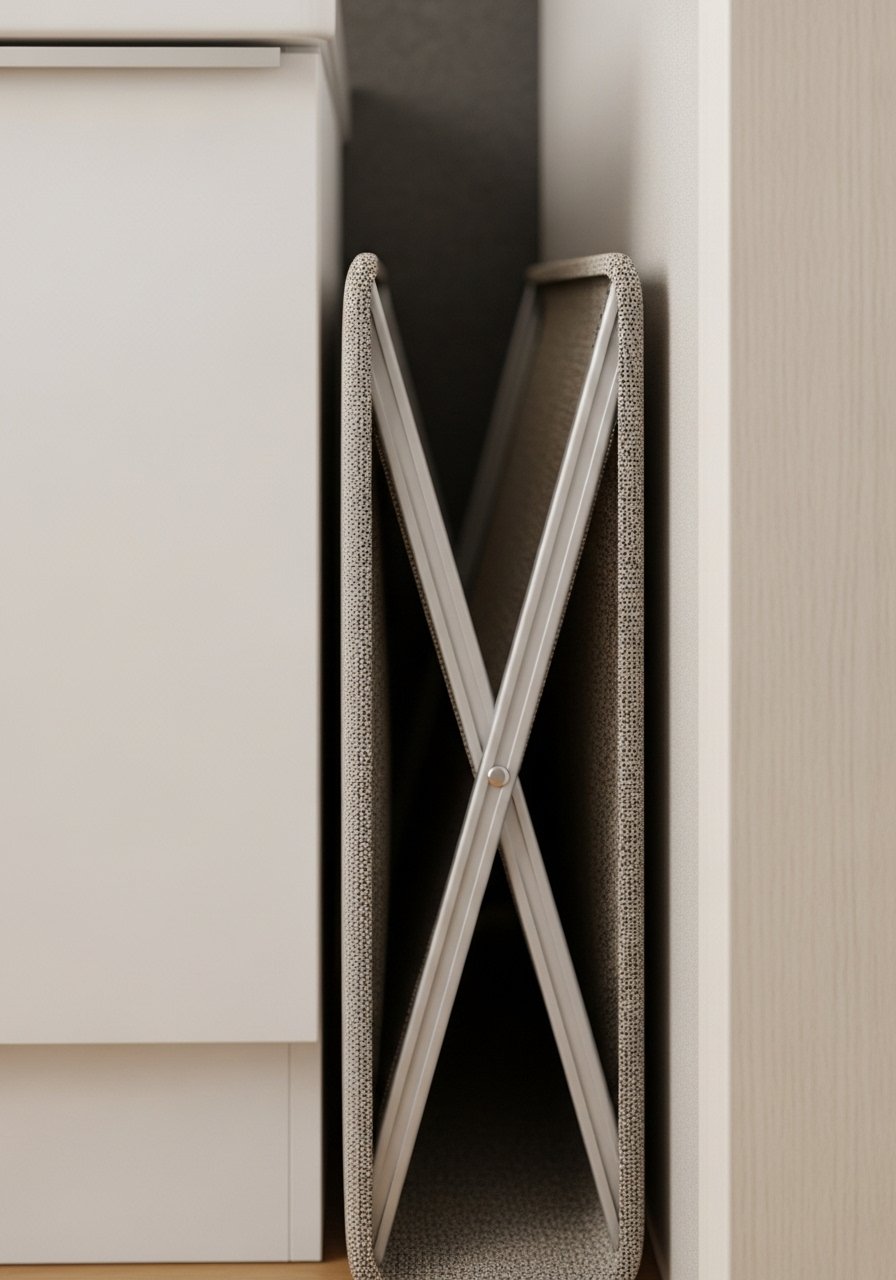
    19. Slim Folding Hamper That Stashes Flat

    Laundry piles were my recurring shame until I bought a slim folding hamper. It tucks away flat when not in use and fits narrow gaps.

    I had one that smelled after a few weeks. Removable liners that machine-wash are worth the extra cost.

    It keeps dirty clothes contained without taking the whole room hostage.

    What You’ll Need for This Look

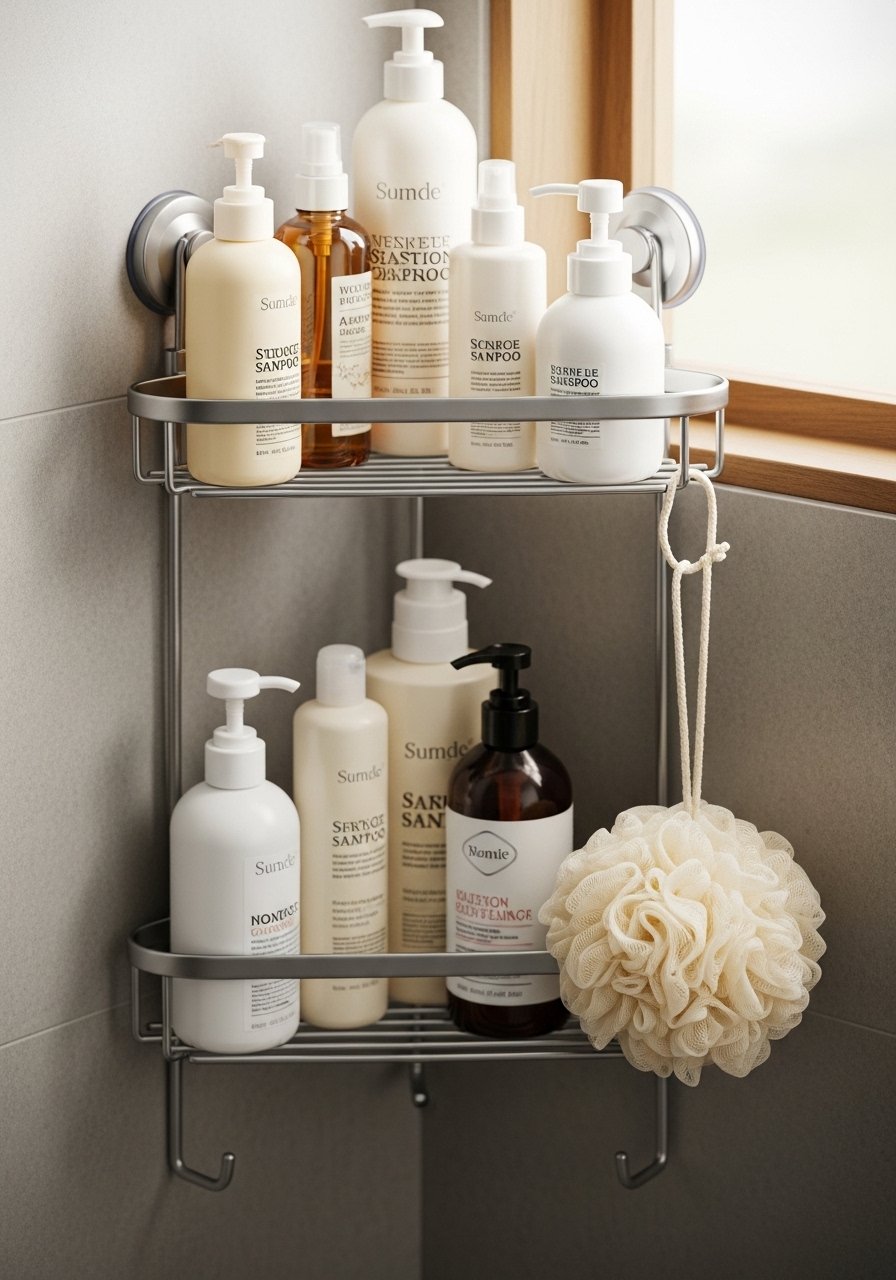
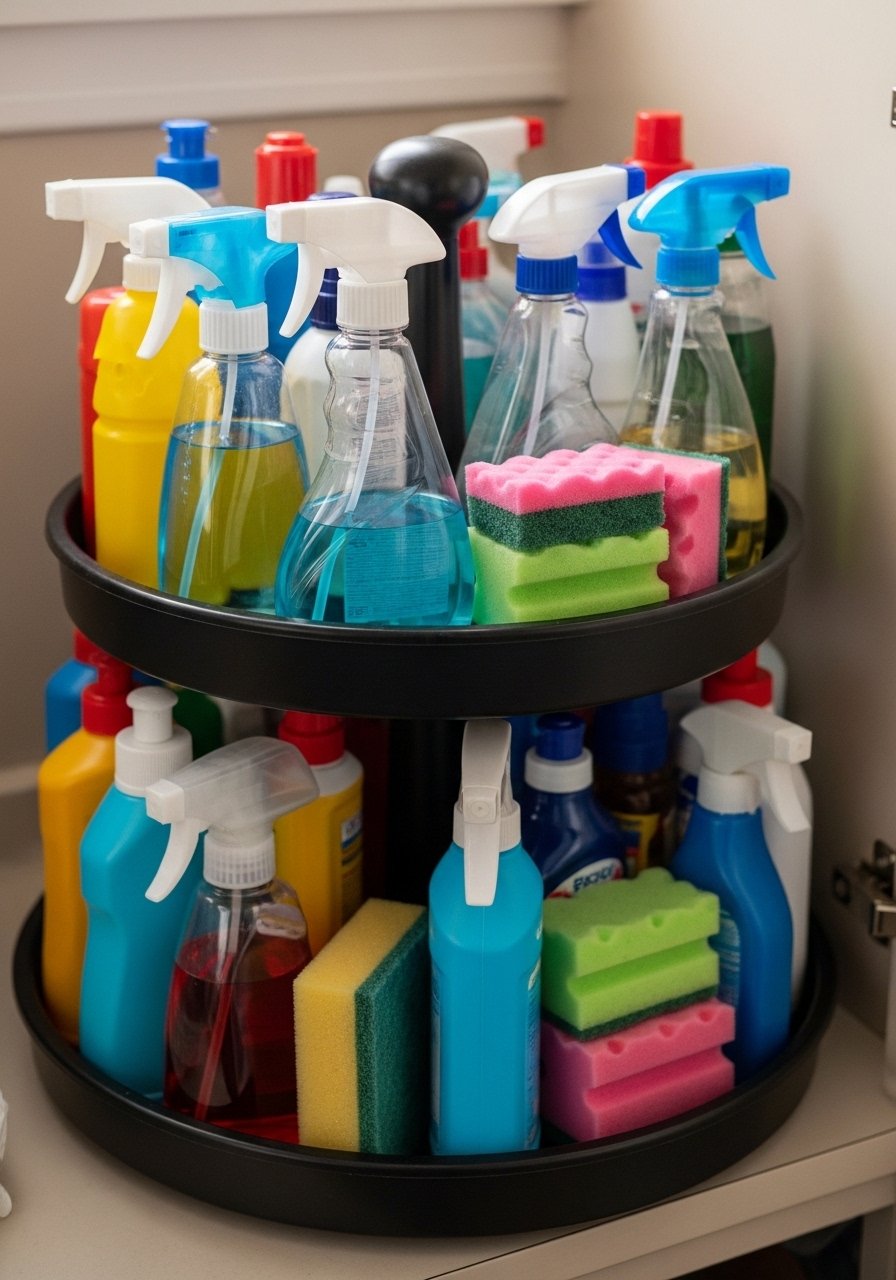
    20. Multi-Tier Corner Shower Caddy for Grouped Products

    A multi-tier corner caddy replaced the basket chaos in my shower. Everything is upright and drains properly now.

    I learned that suction cups fail on textured tile. Use one with tension pole or screw-in support for security in older showers.

    Group like with like—cleansers on one shelf, hair on another—for faster rinses and less juggling.

    What You’ll Need for This Look

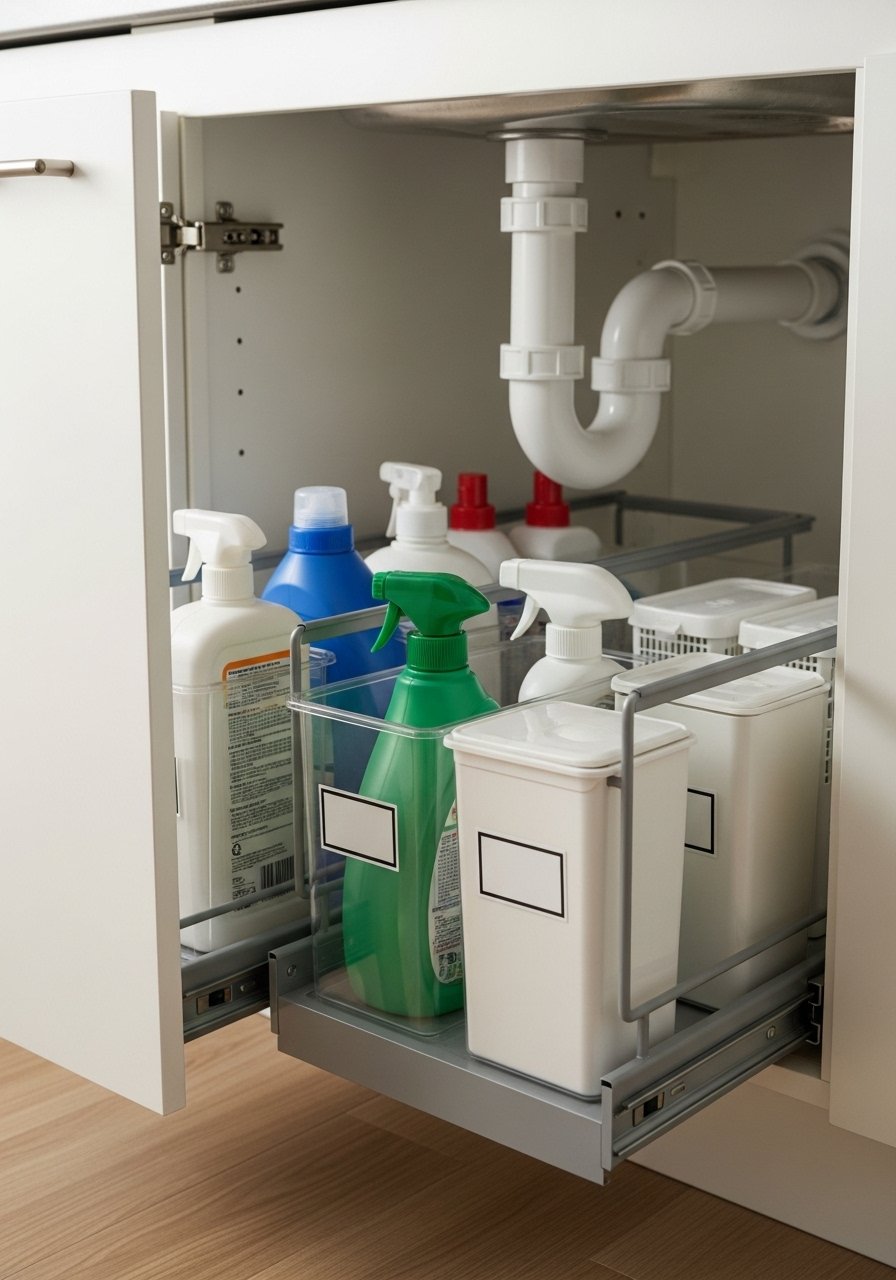
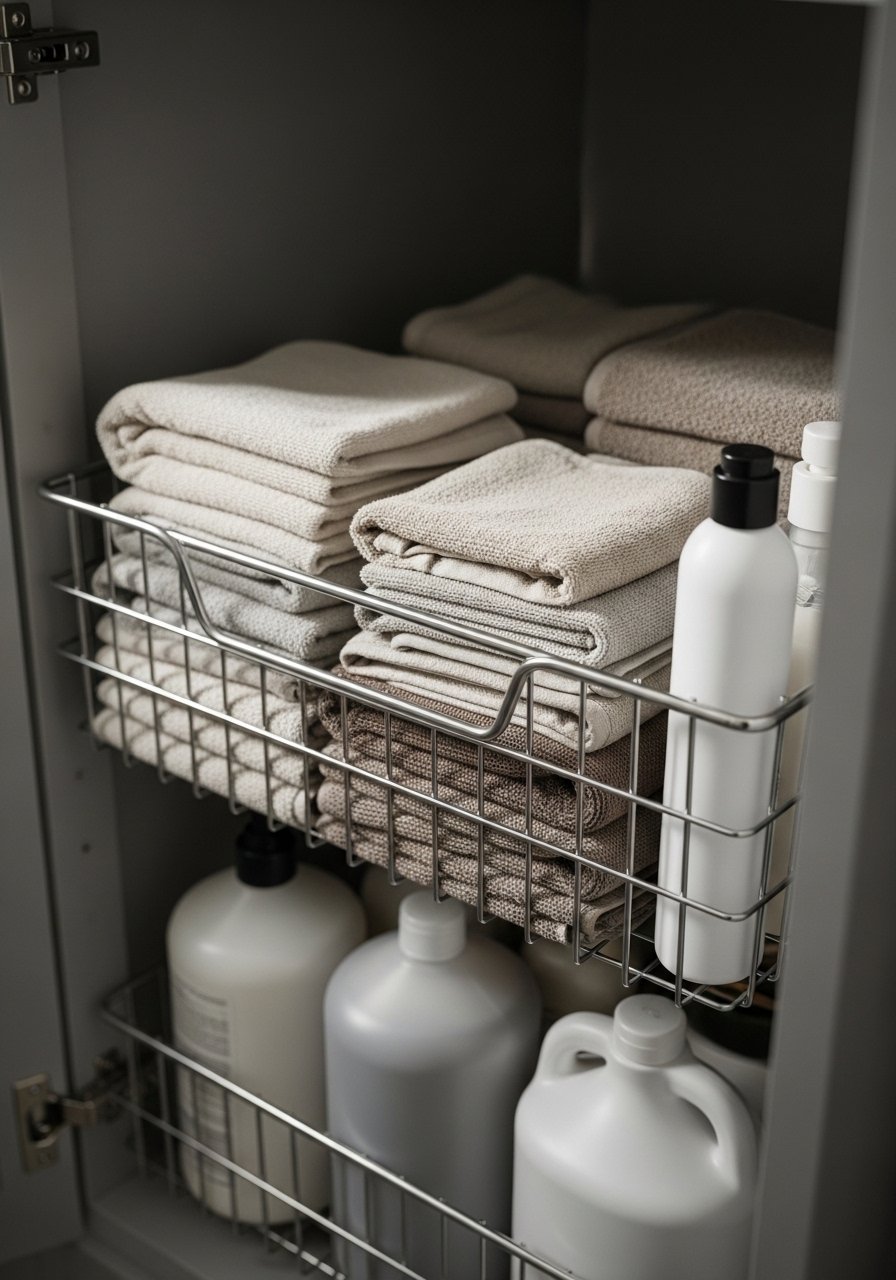
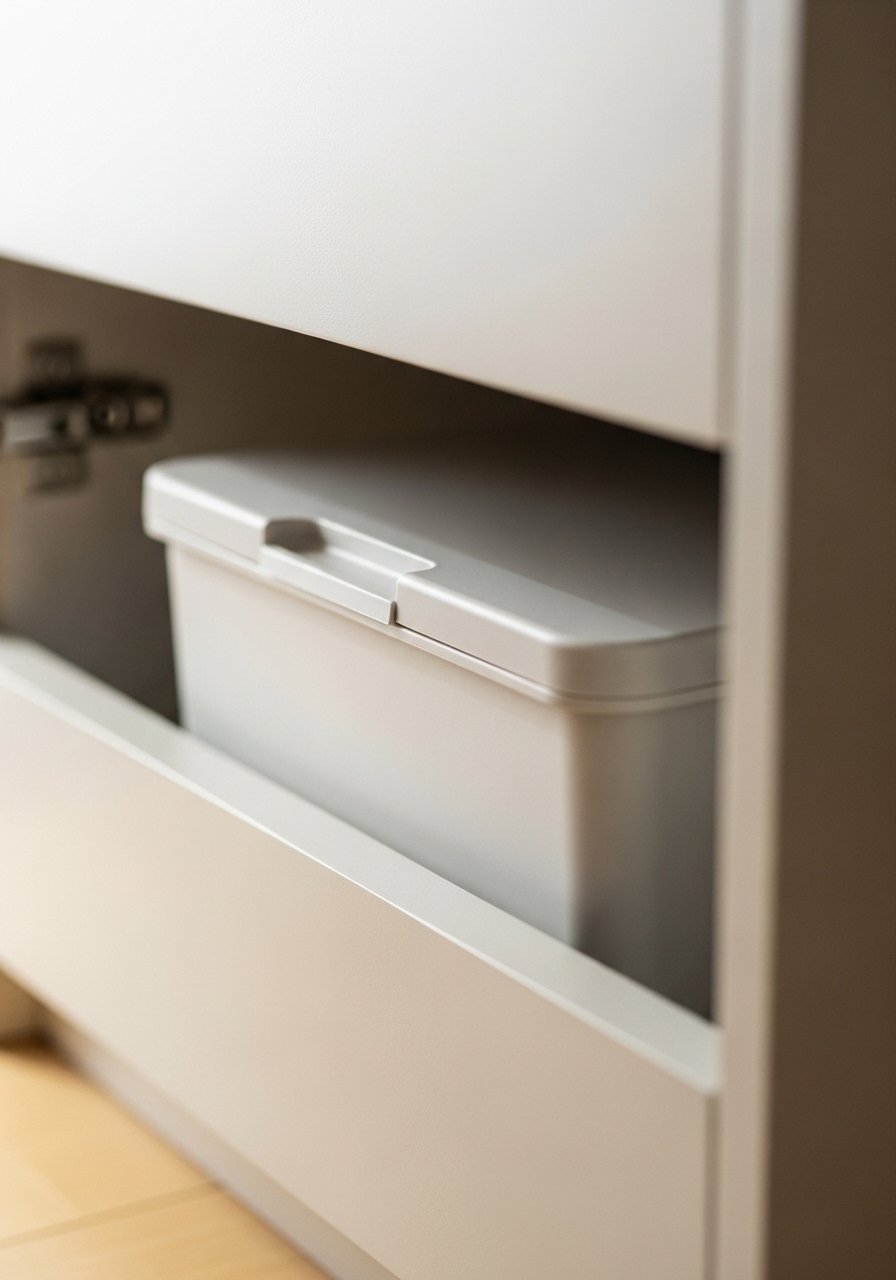
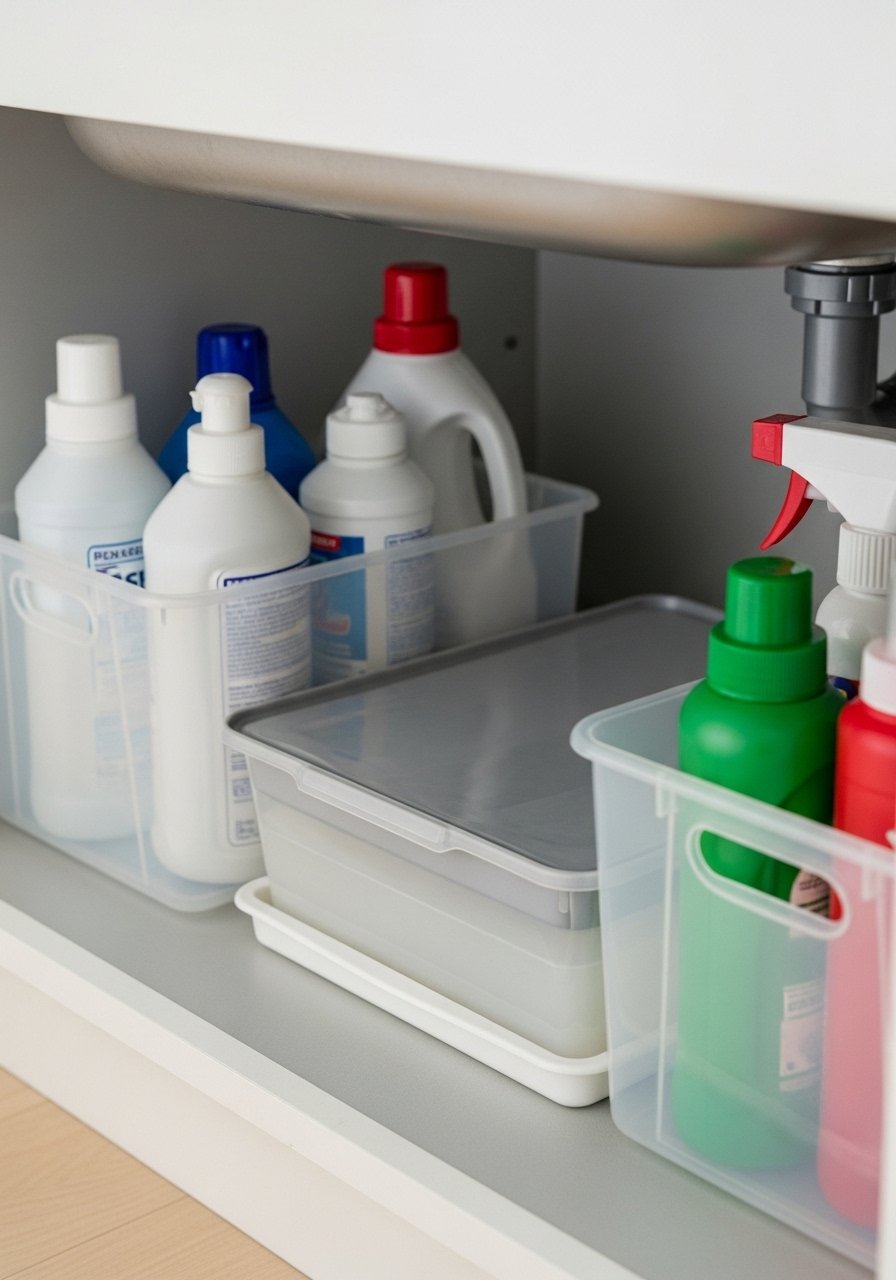
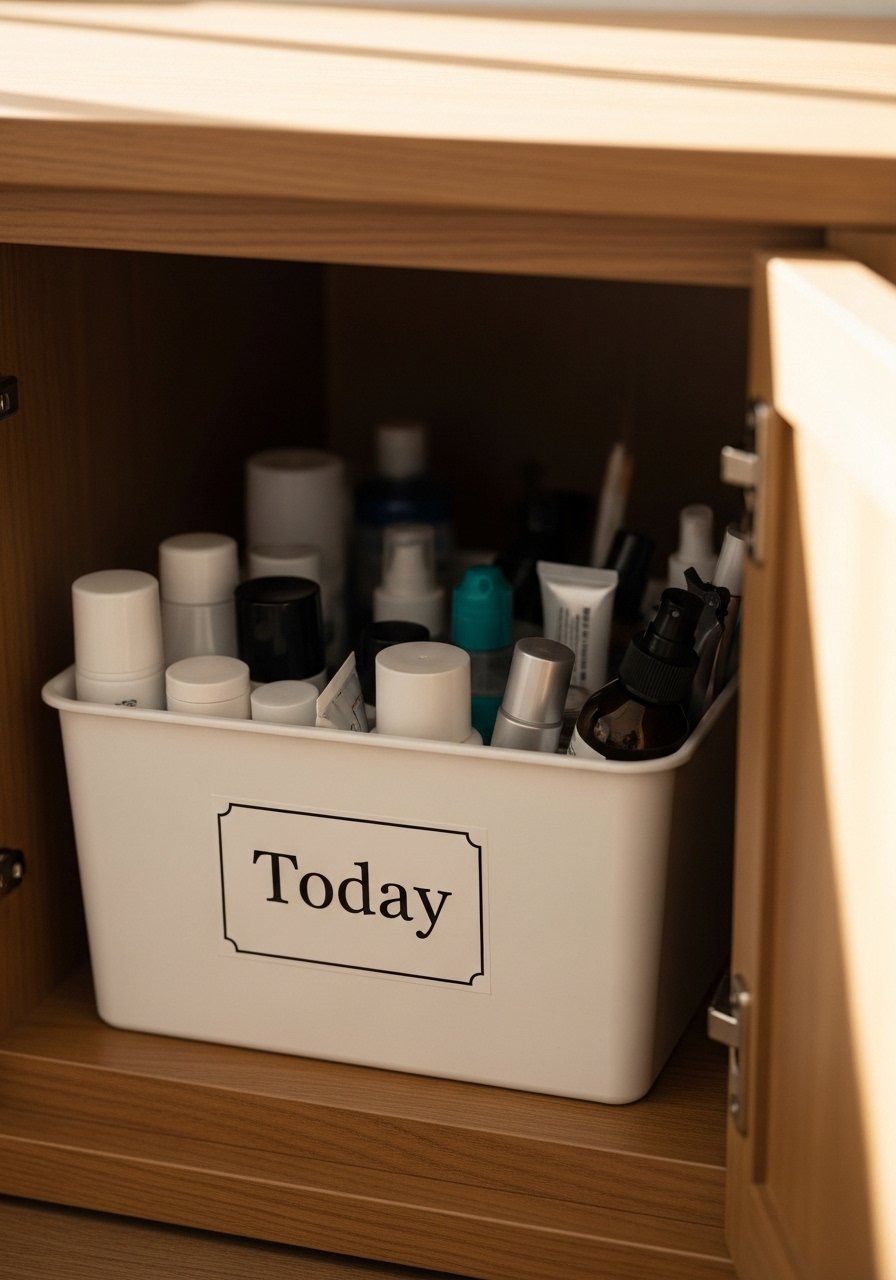
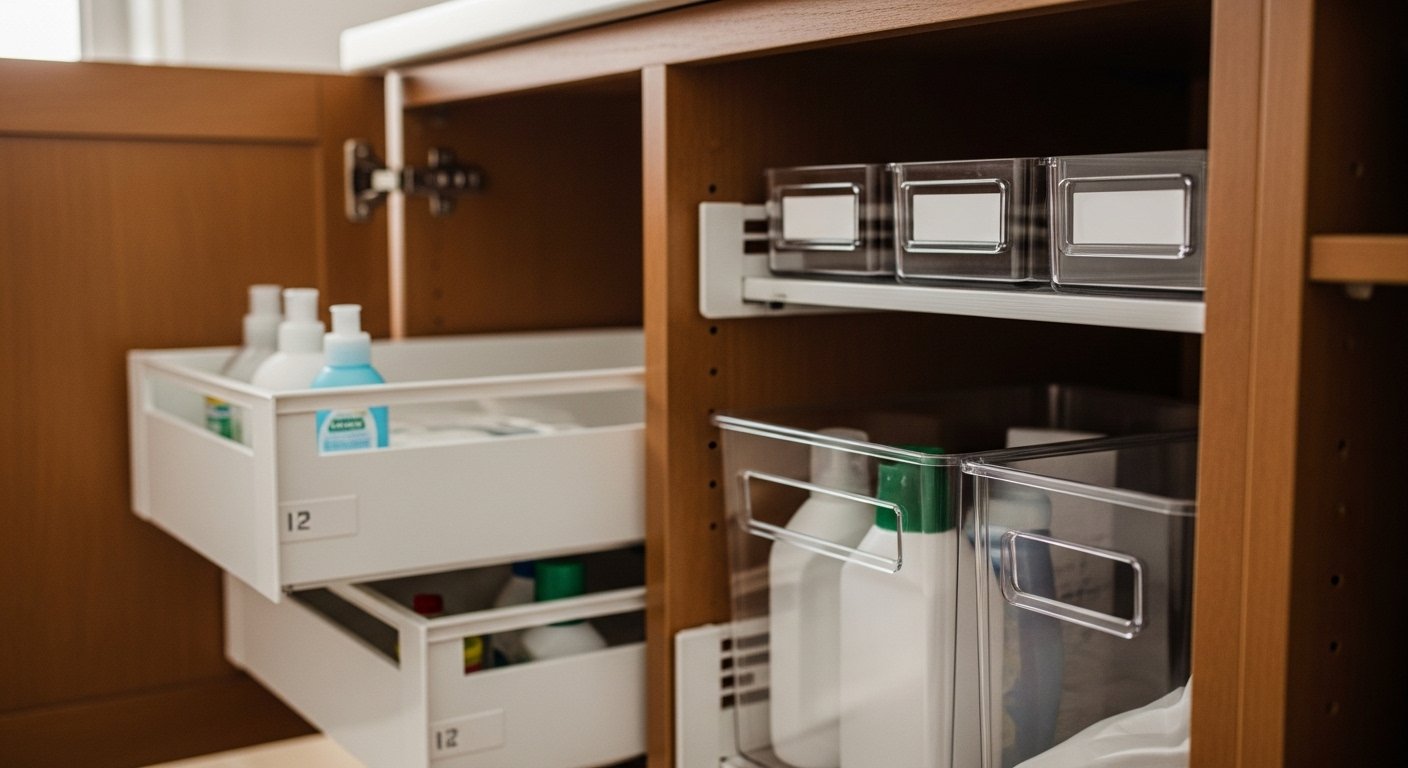
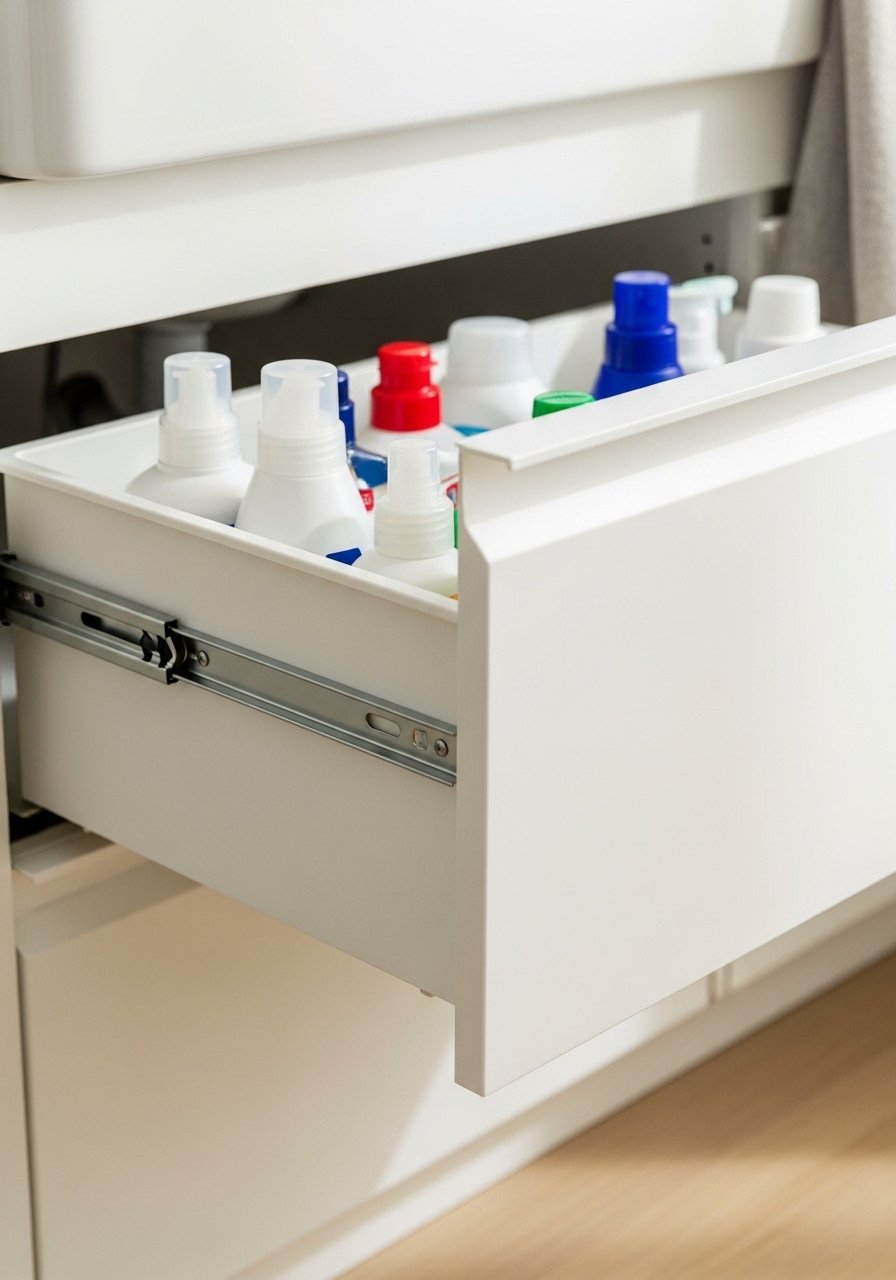
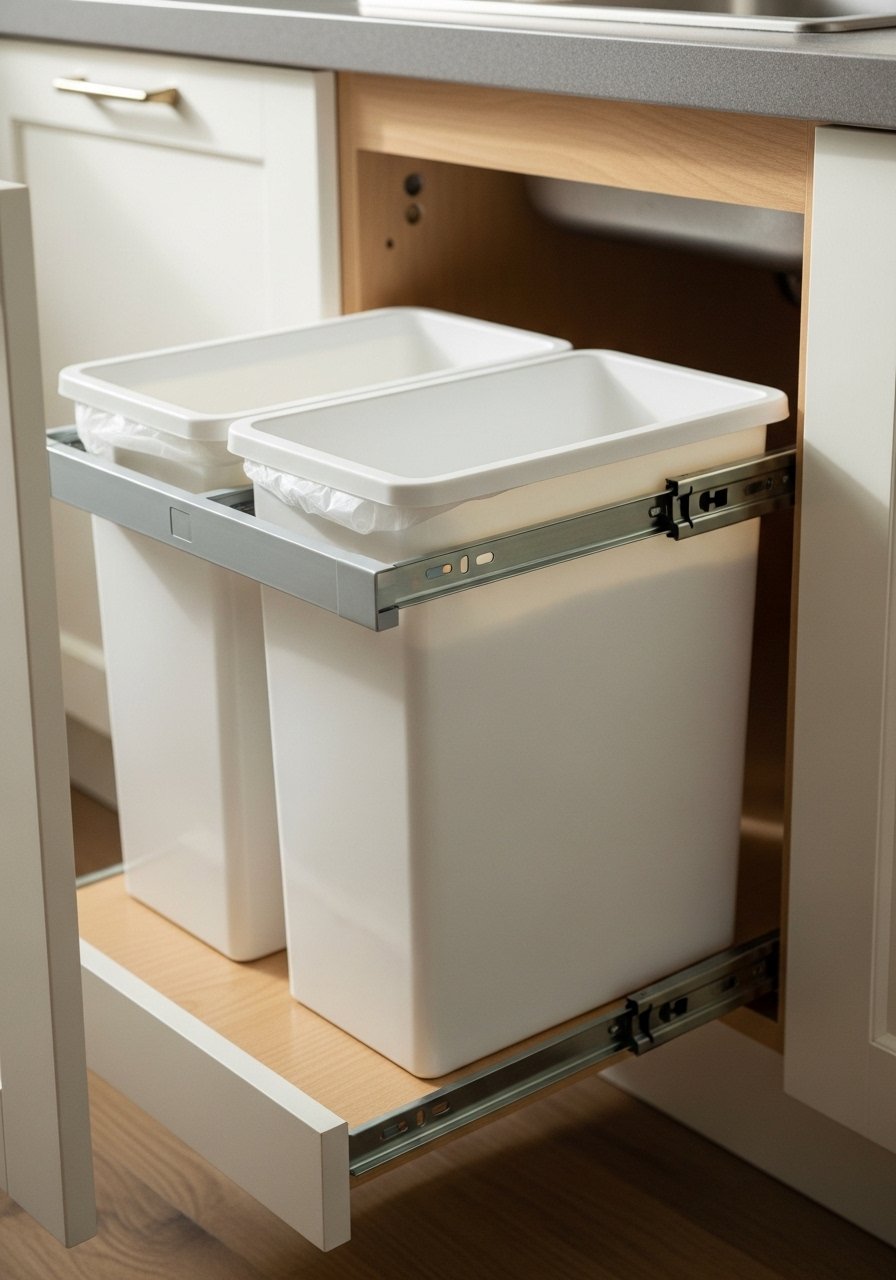
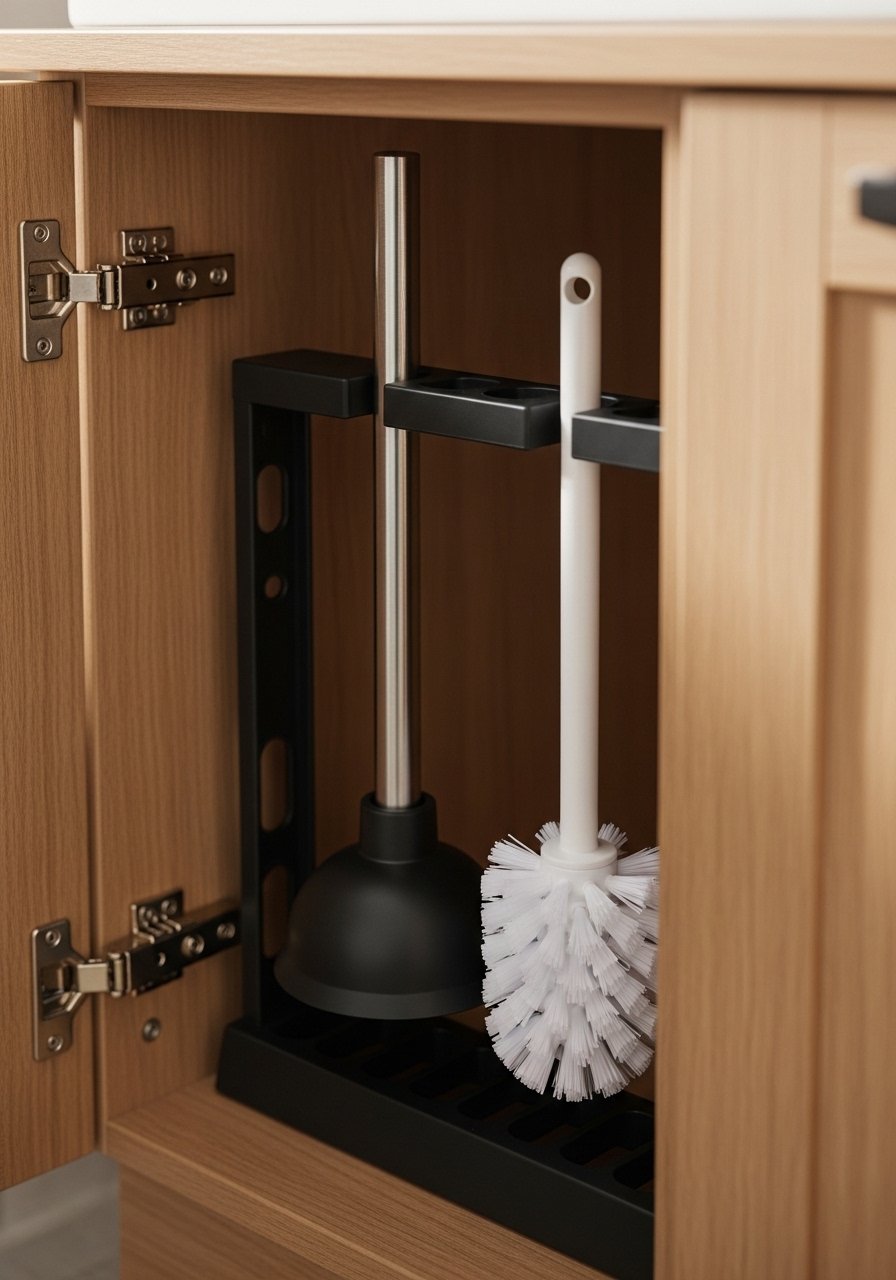
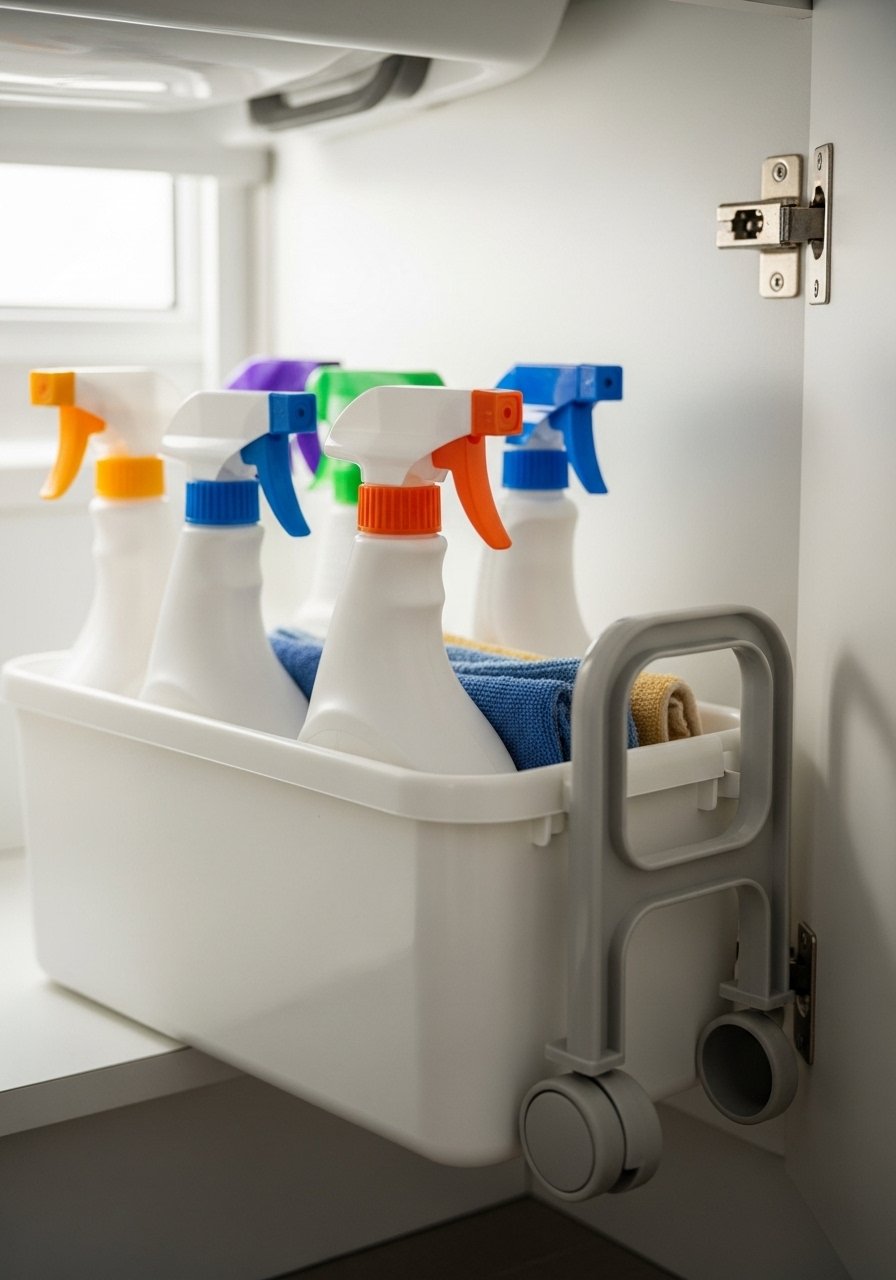
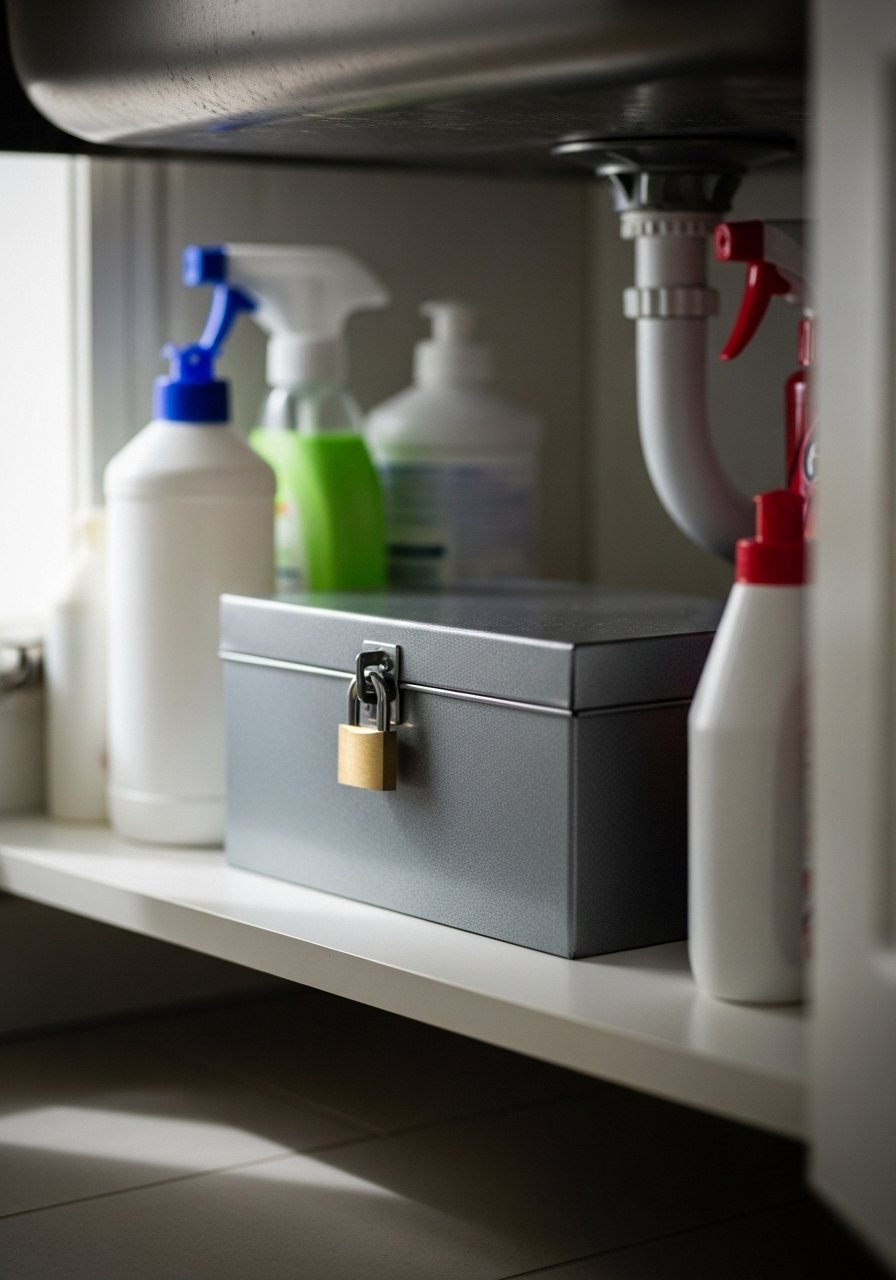
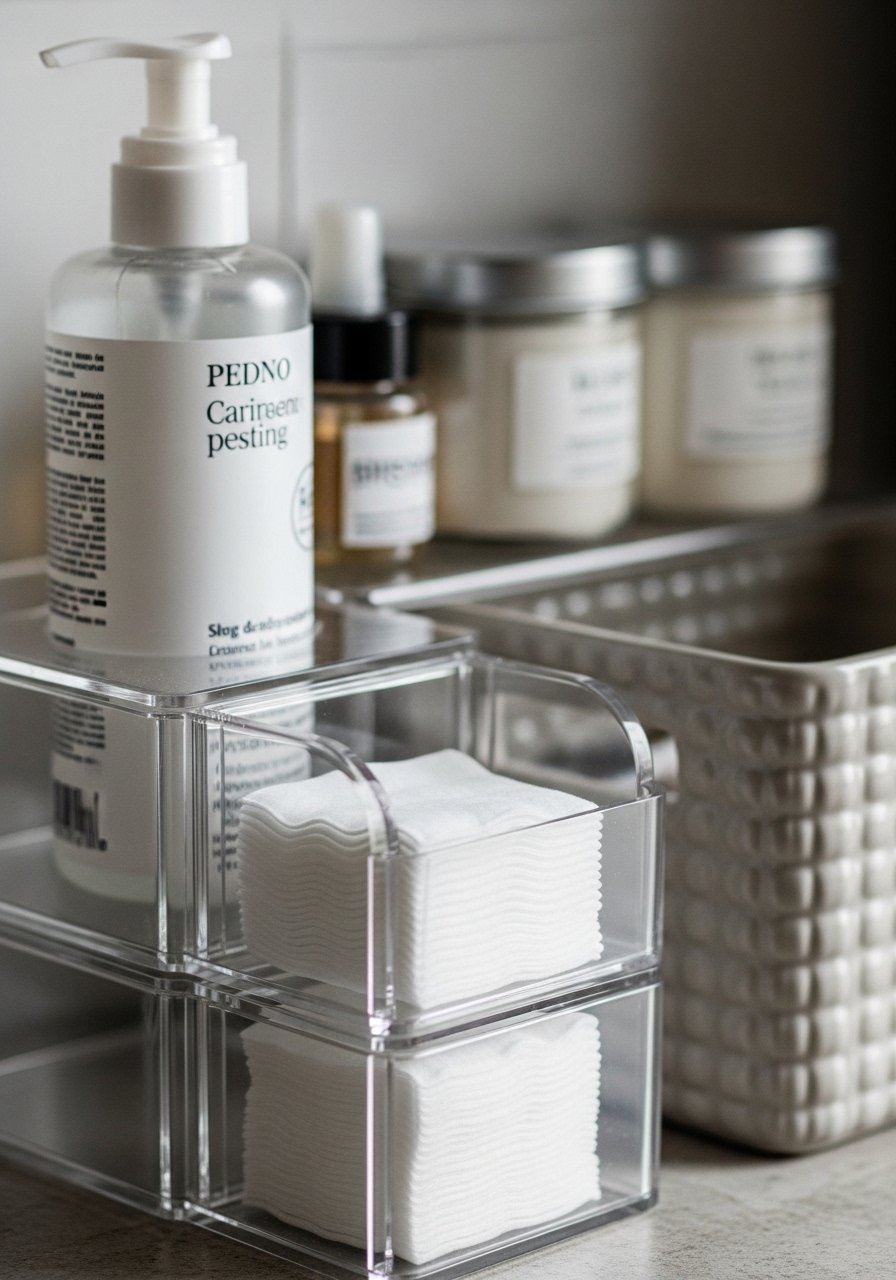
    21. Under-Sink Pull-Out Bins for Quick Access

    Pull-out bins under the sink changed how I stored cleaners. No more leaning into a dark cave—everything slides out and is visible.

    My first rails squeaked and stuck. Upgrade to metal slides for smooth operation, and measure for carrier height around plumbing.

    Divide bins by purpose: daily, cleaning, backups. It’s the best lazy-cleaning hack I own.

    What You’ll Need for This Look

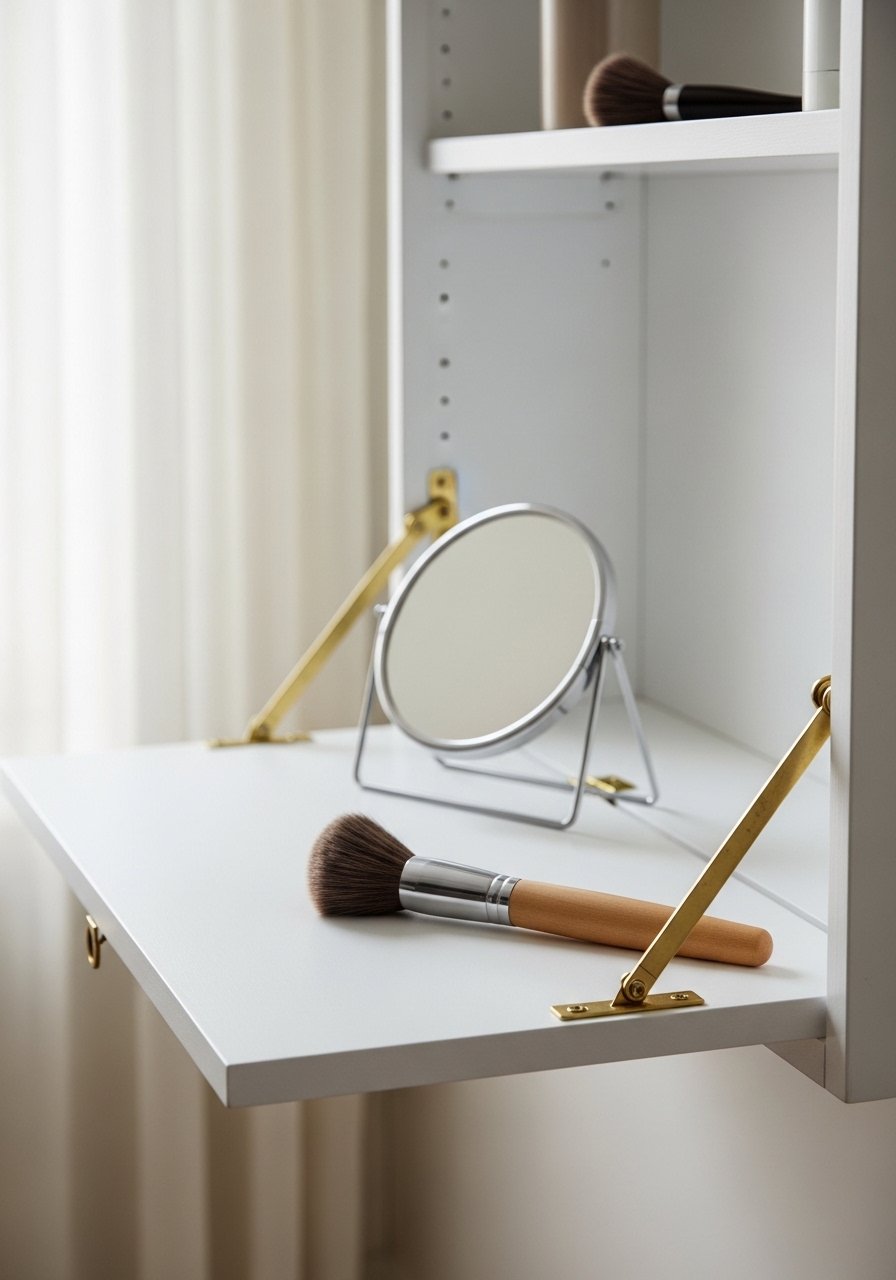
    22. Wall-Mounted Fold-Down Shelf for Temporary Workspace

    I added a fold-down shelf for mornings when I need extra counter space. It folds away cleanly when I don’t.

    My hinge squeaked at first; a bit of lubricant fixed it. Make sure the bracket is rated for the weight you plan to put on it.

    It’s perfect for quick makeup sessions or a place to set a cup while styling hair.

    What You’ll Need for This Look

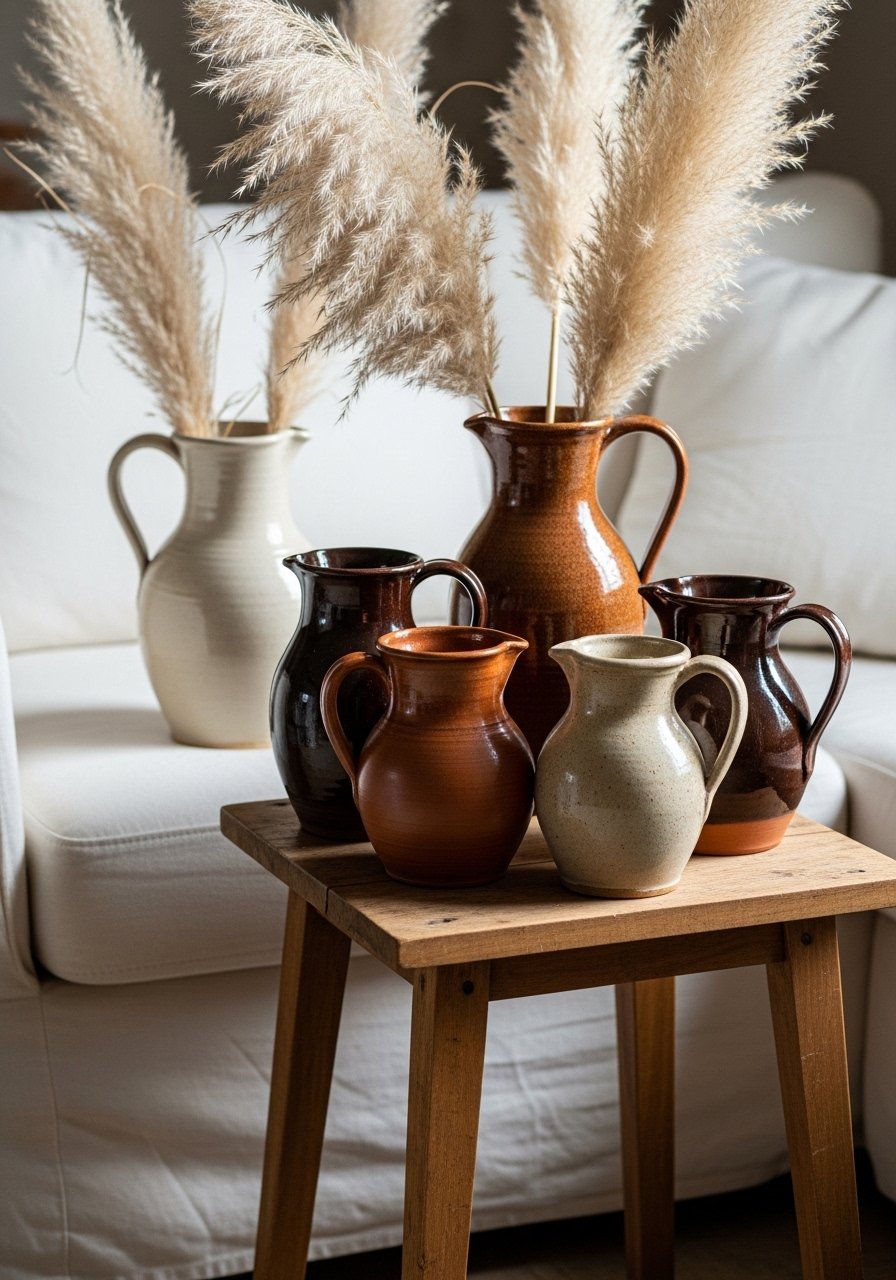
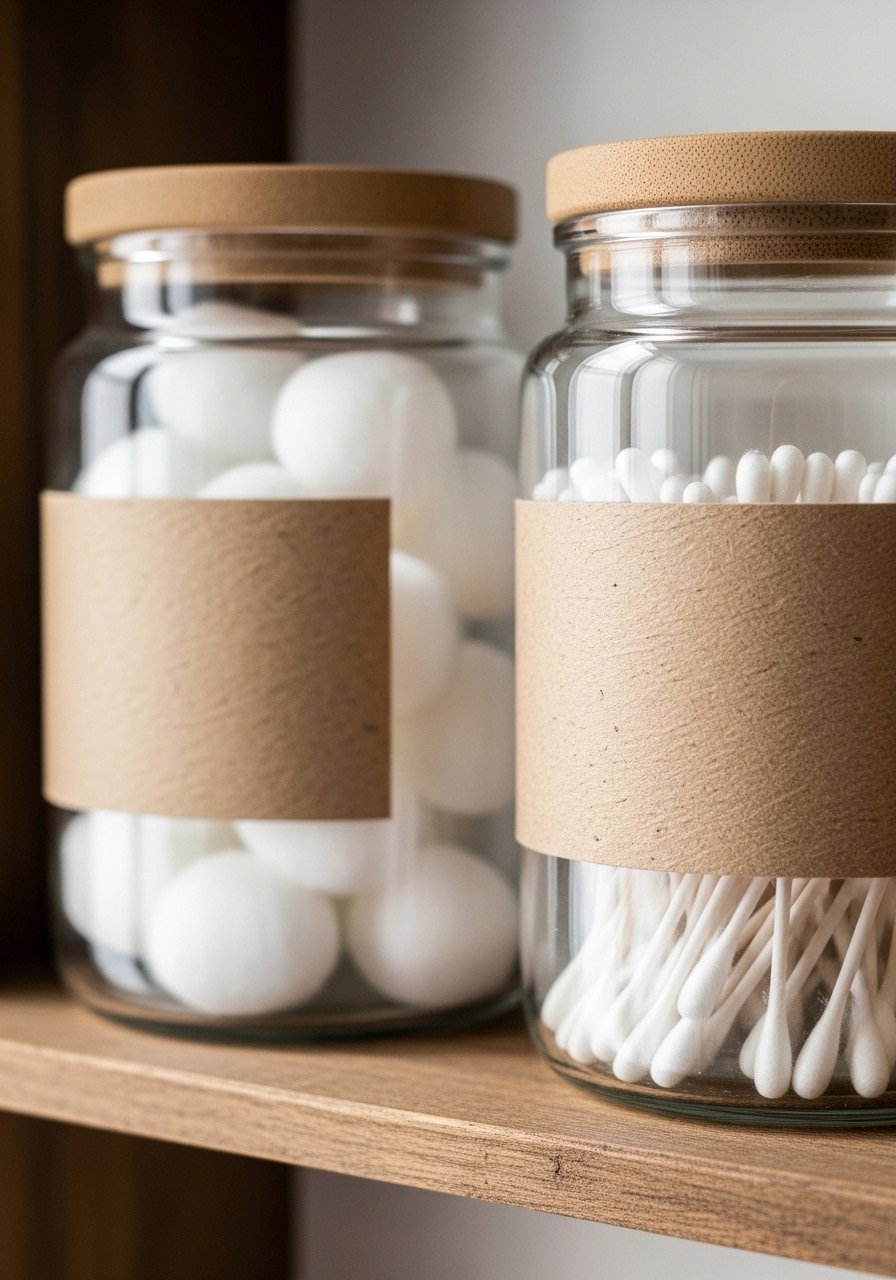
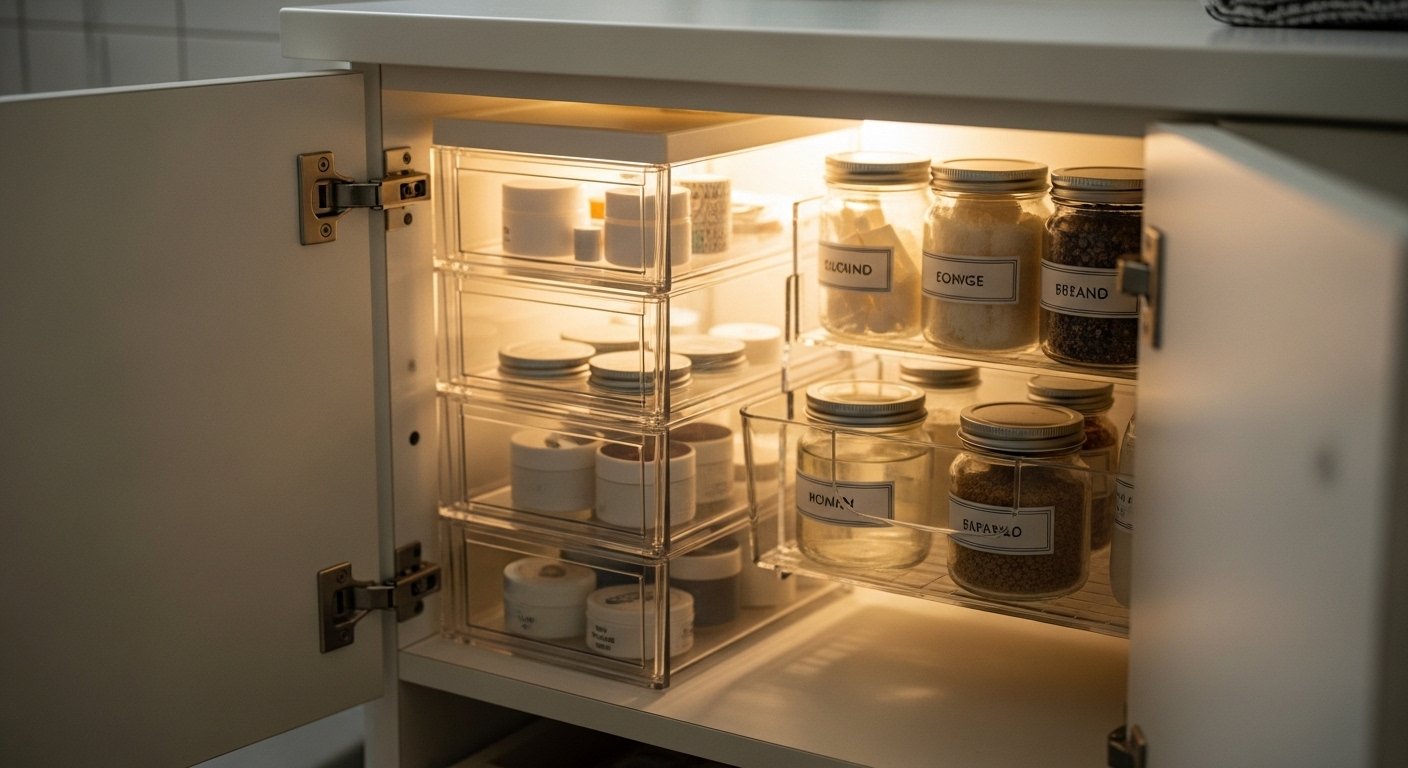
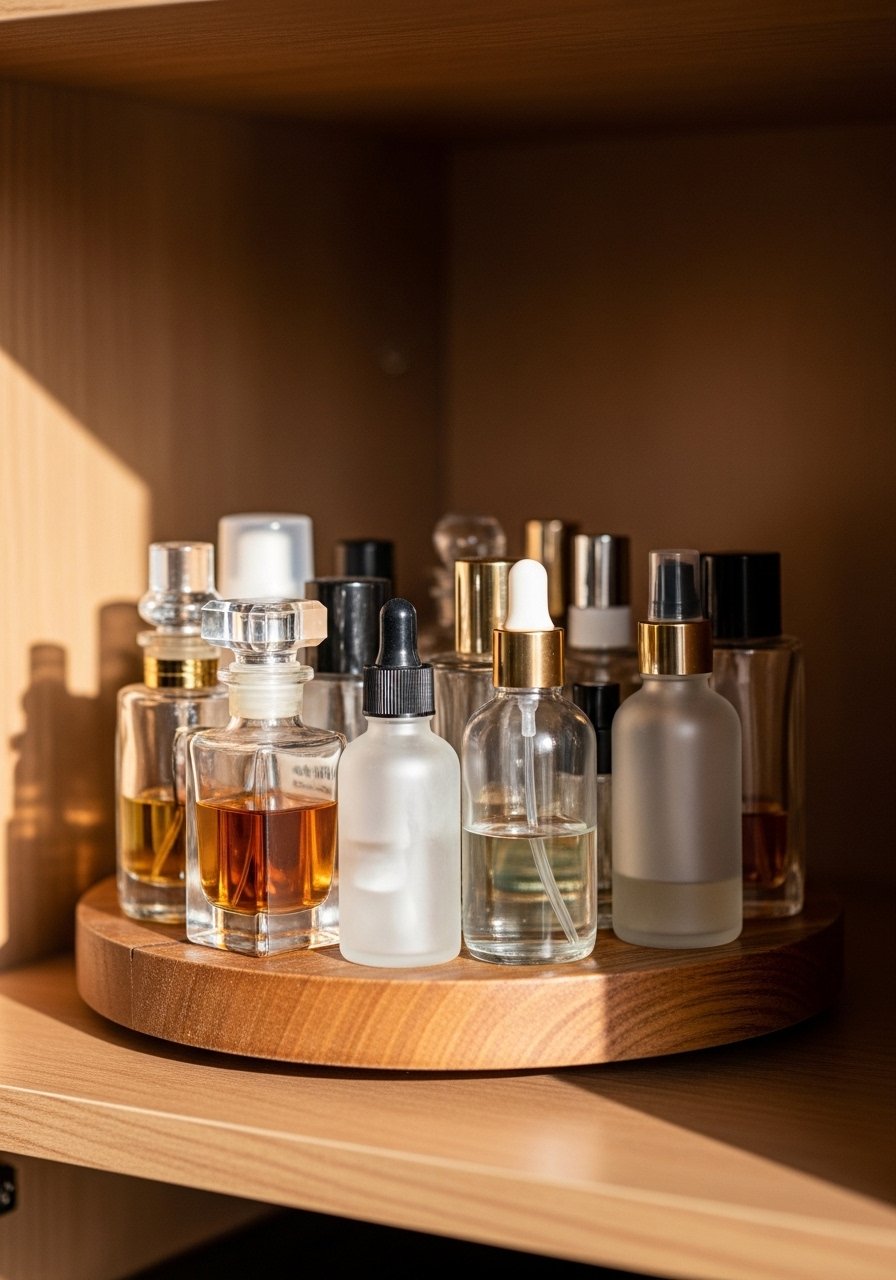
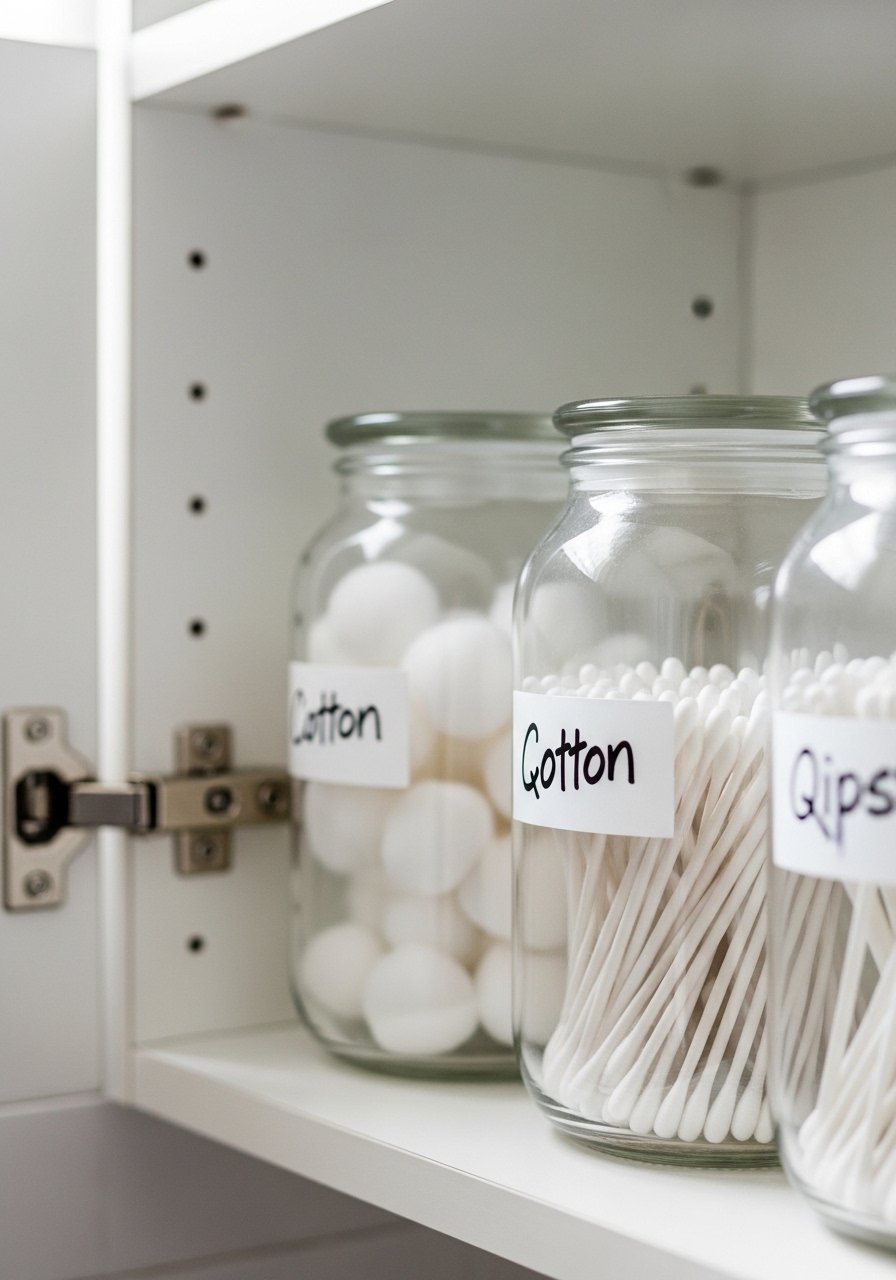
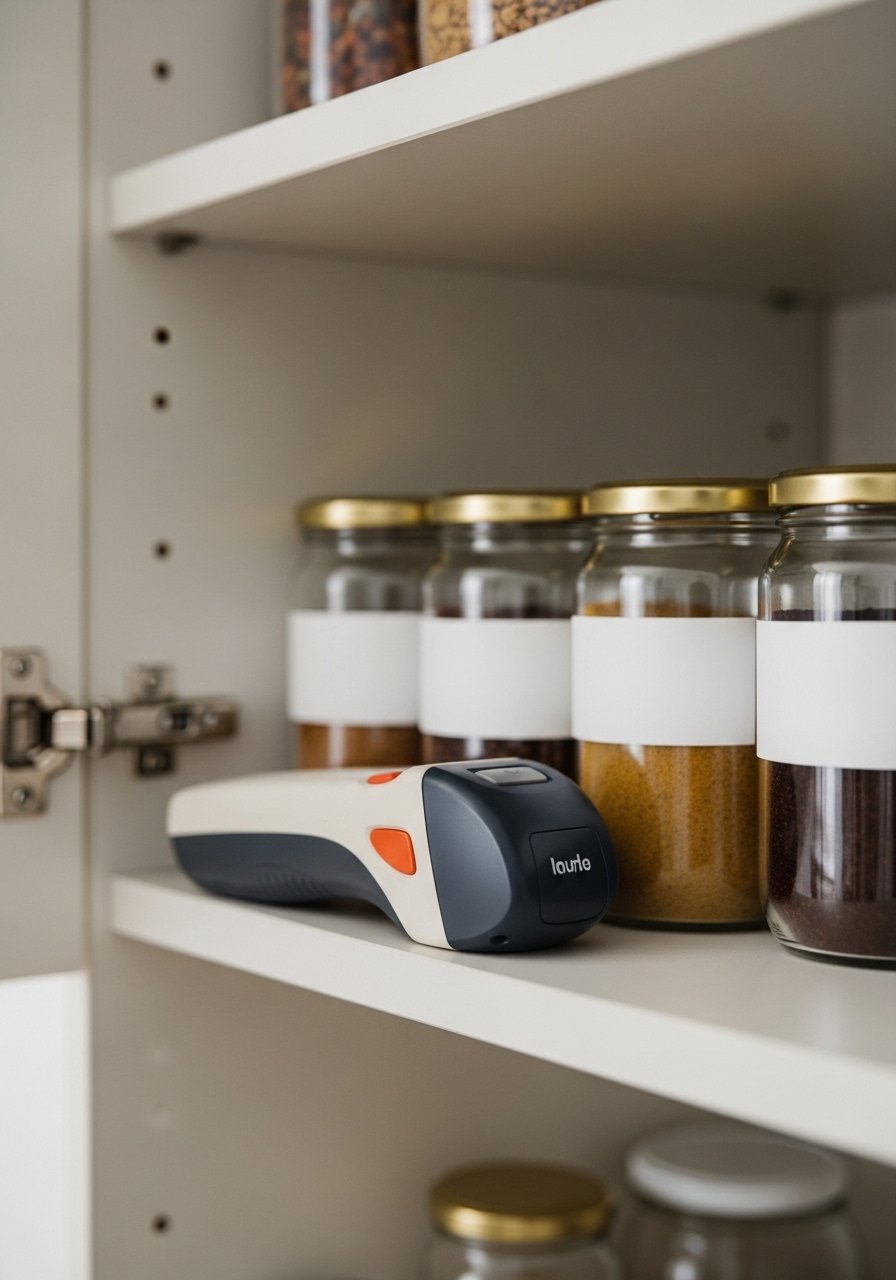
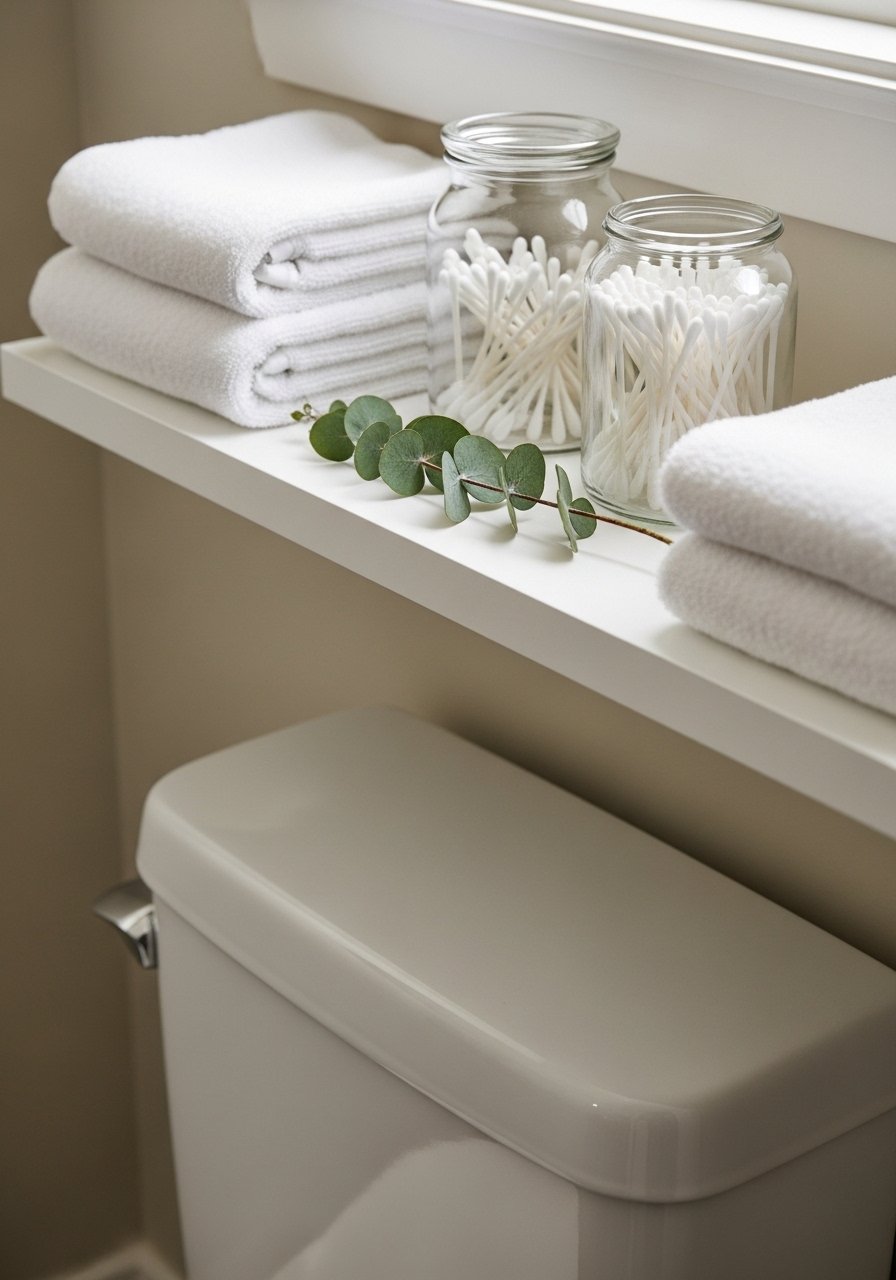
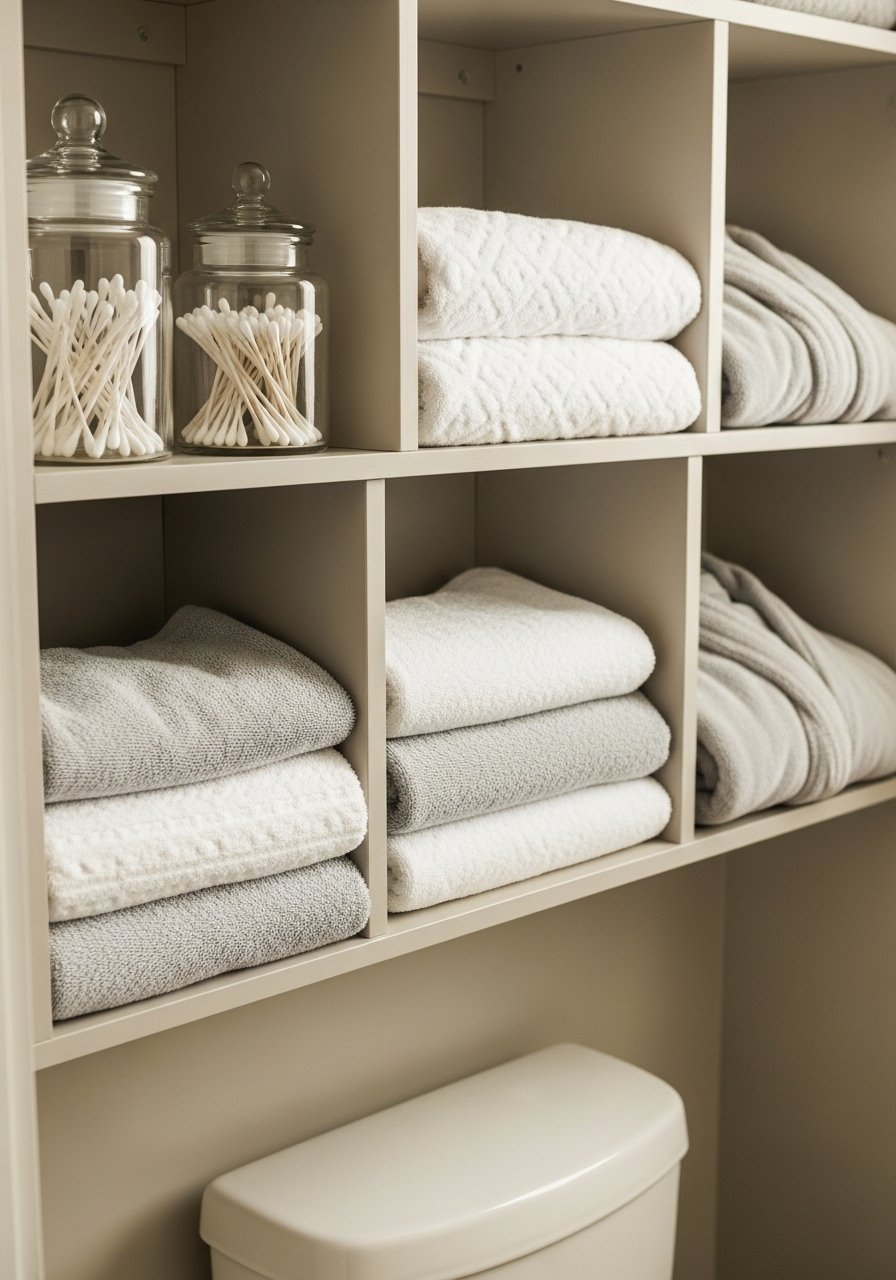
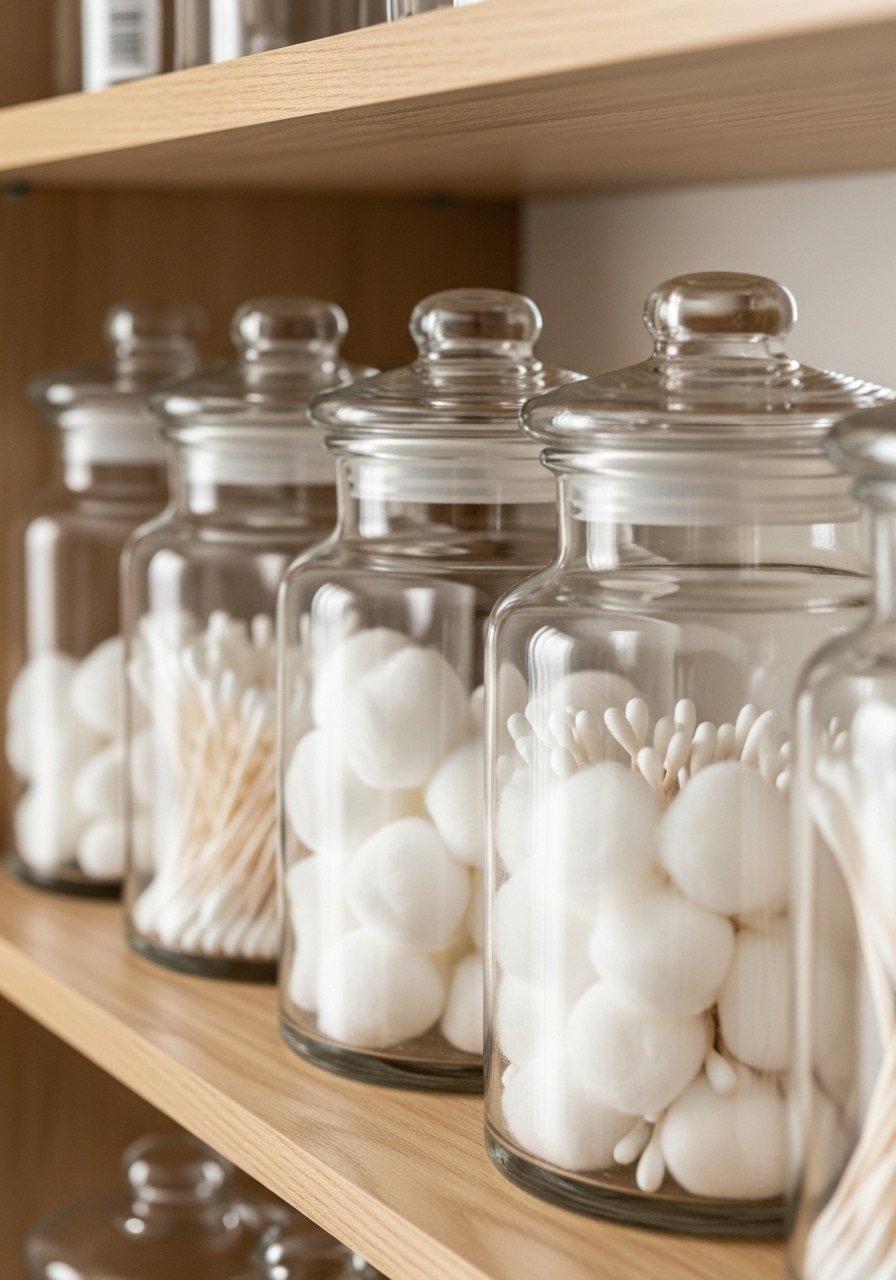
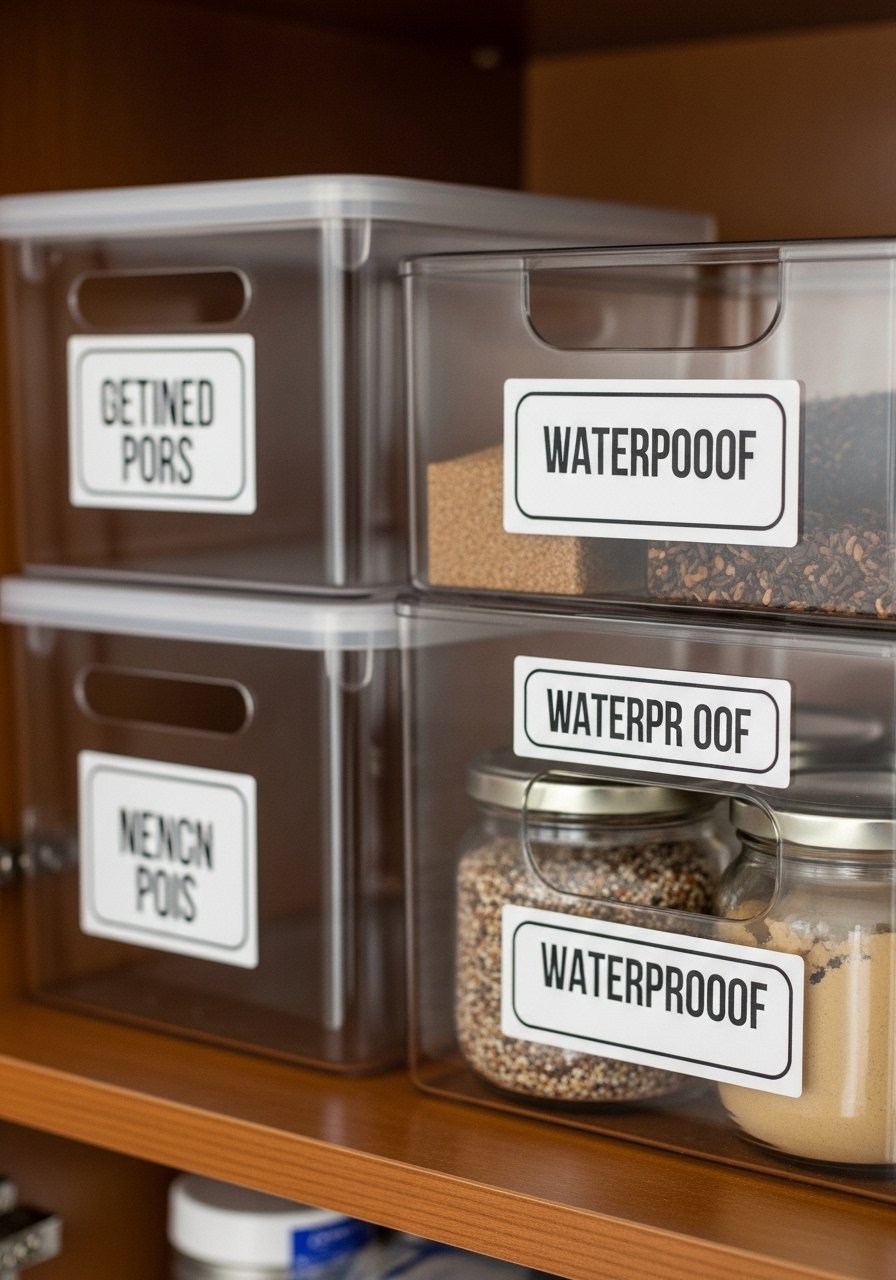
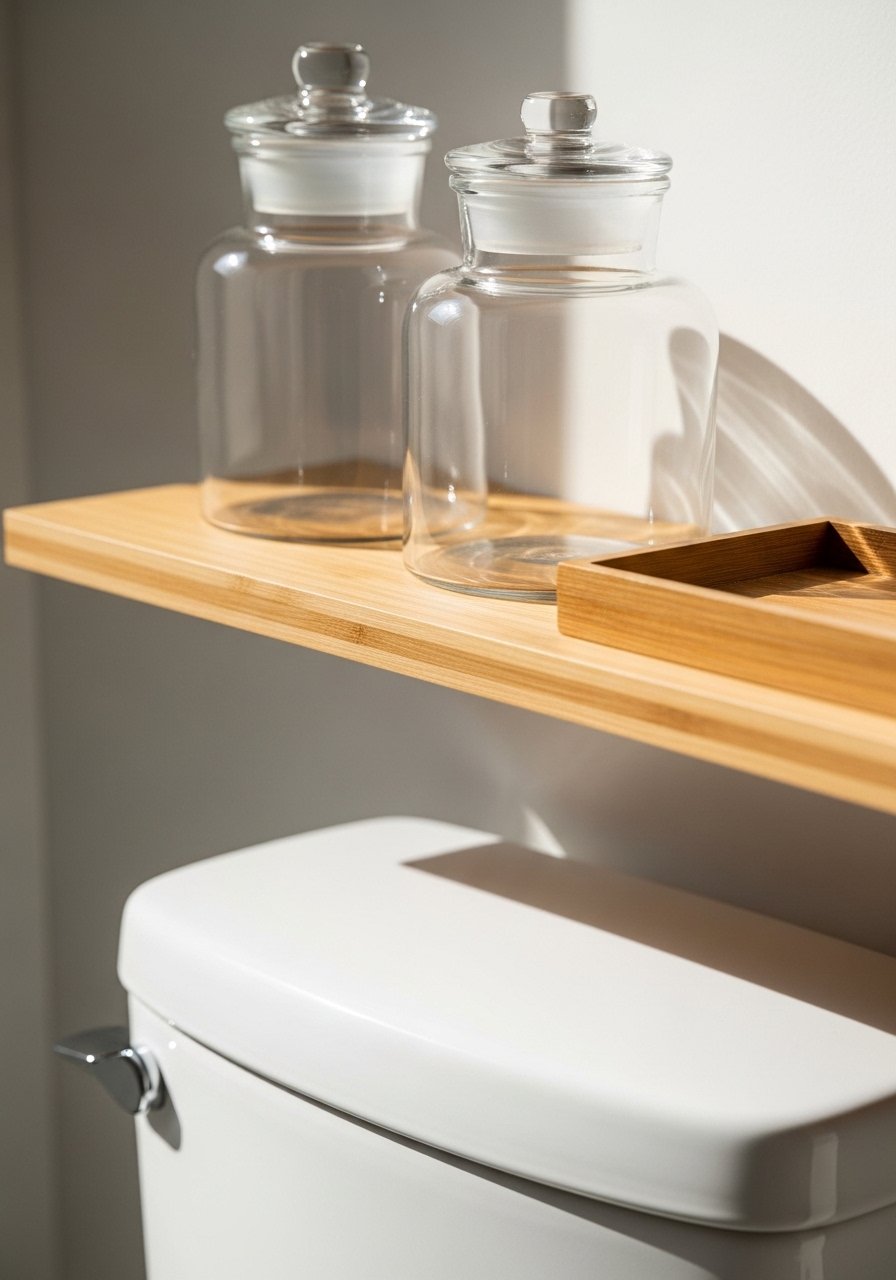
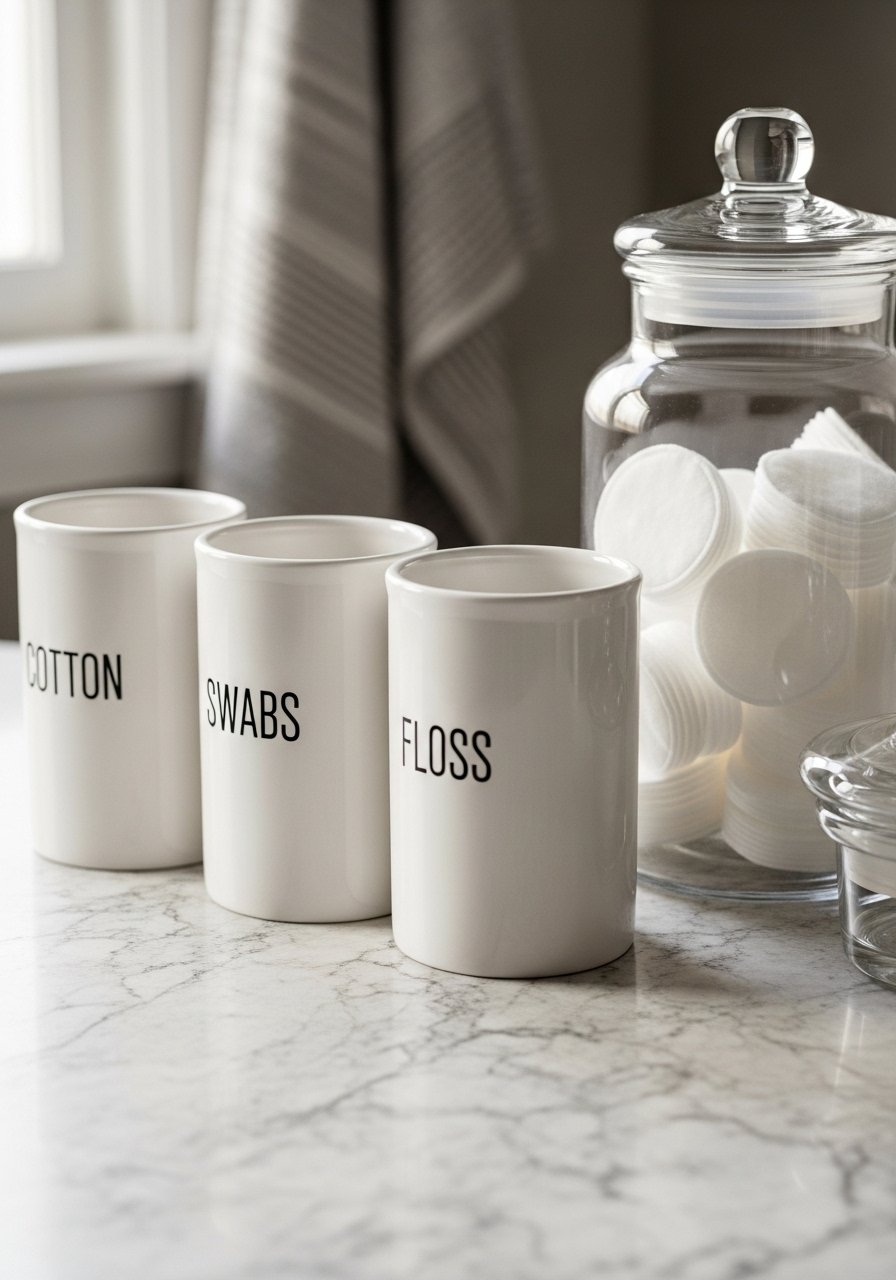
    23. Clear Canisters and Labeled Jars on a Small Shelf

    I ditched mismatched plastic and put essentials in clear canisters. Cotton pads, cotton swabs, and bath salts look tidy and are easy to grab.

    My first set had cheap lids that stuck. Invest in jars with good seals. Labels keep refills fast and mess-free.

    The uniform look makes a small shelf feel curated rather than cluttered.

    What You’ll Need for This Look

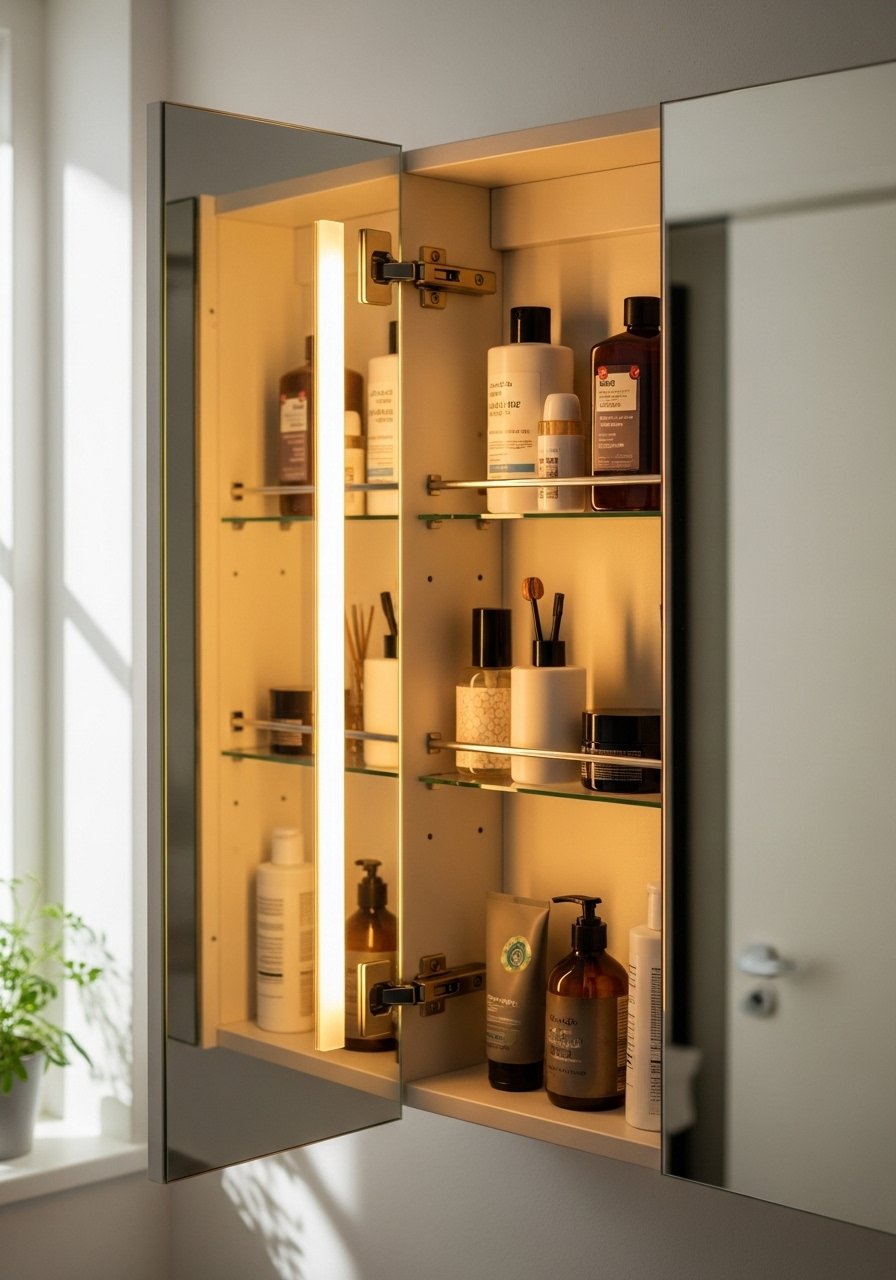
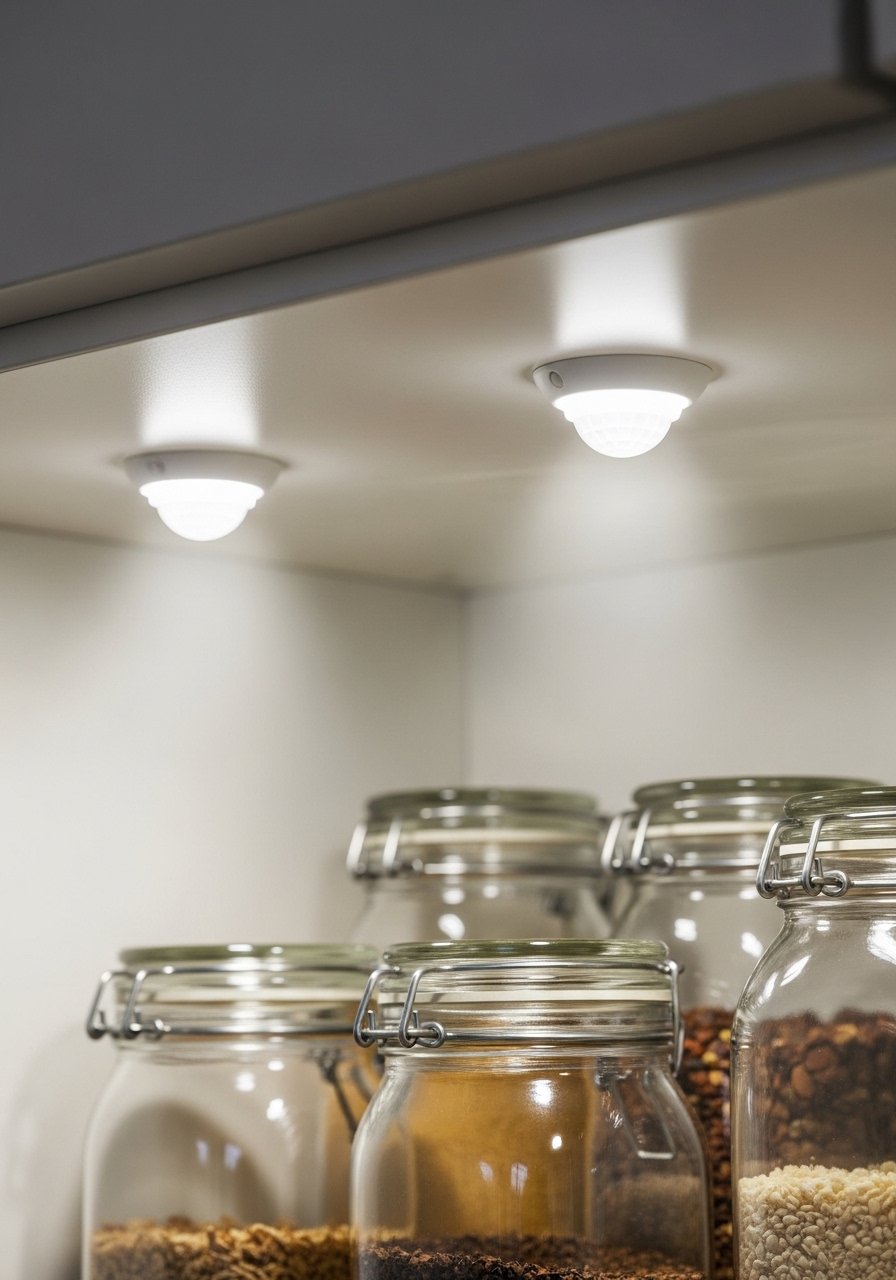
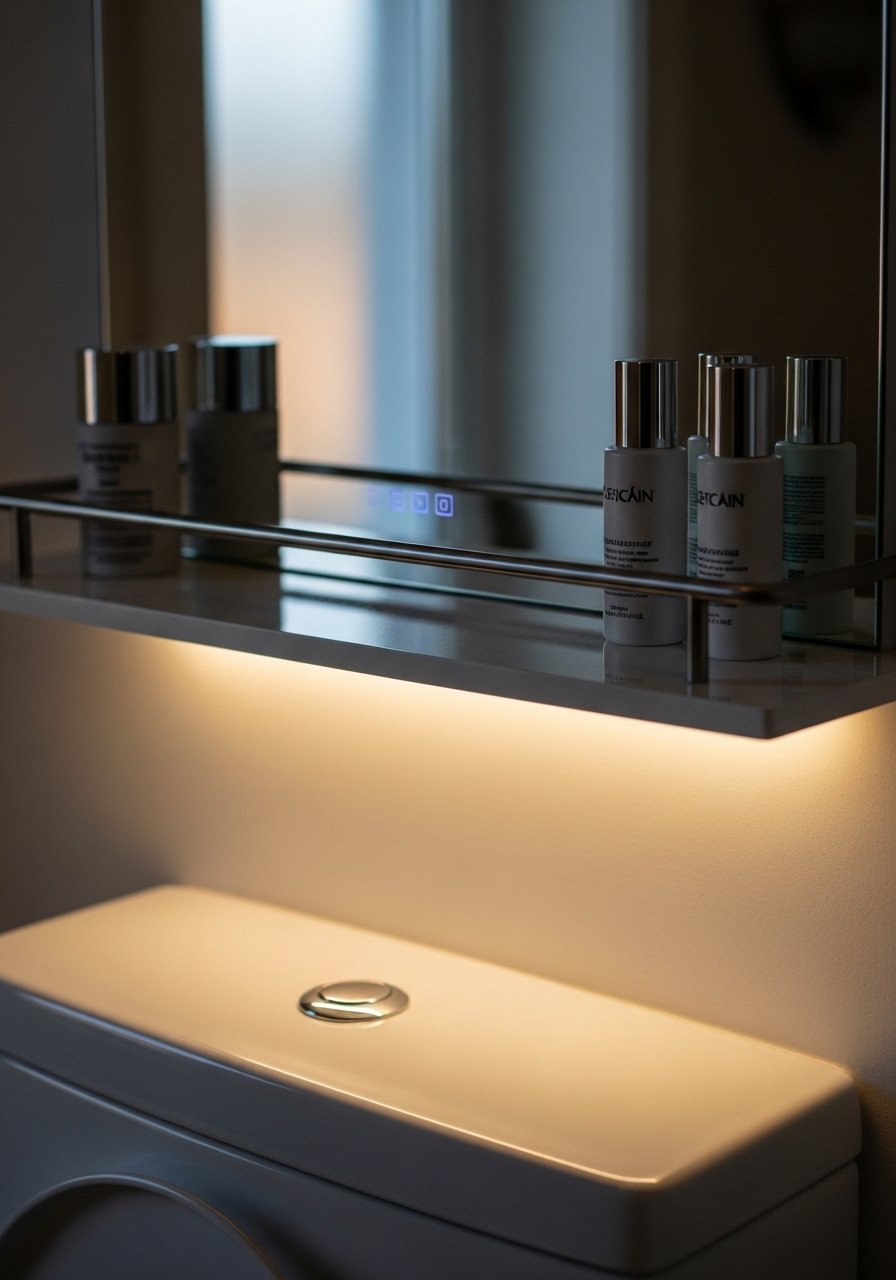
    24. Mirror Cabinet with Integrated Lighting for Extra Function

    Combining a mirror and storage solved two problems at once. Integrated LEDs add soft, useful light for routines.

    Be careful with wiring if you’re not comfortable installing electrical fixtures. I hired an electrician for ours and it was worth the cost.

    A lit cabinet makes makeup and shaving easier and the bathroom feel more intentional.

    What You’ll Need for This Look

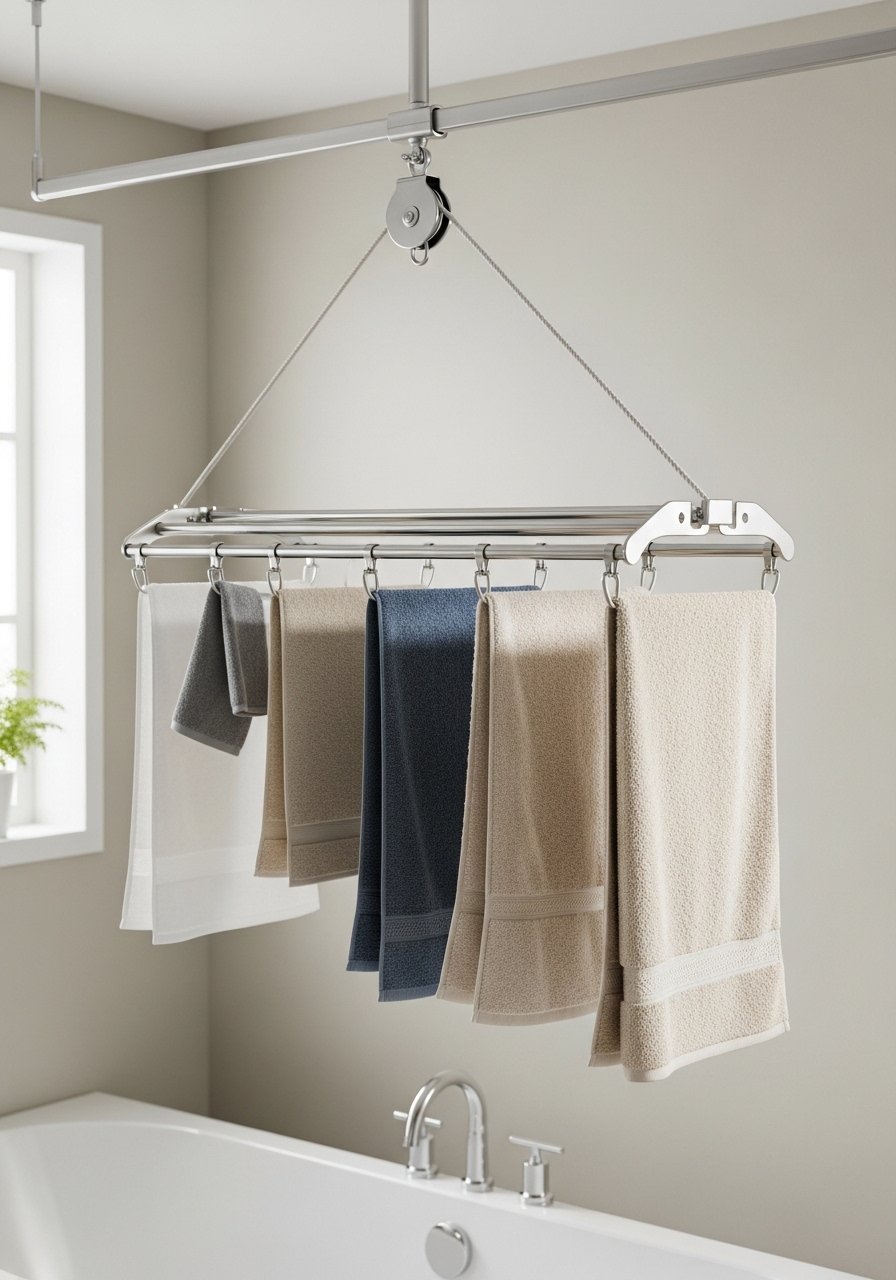
    25. Ceiling-Mounted Pulley Drying Rack for Towels and Linens

    When floor space disappeared, I hung a ceiling-mounted pulley drying rack for towels and delicate items. It’s out of the way and dries things fast.

    I once installed it too low and banged my head. Measure ceiling height and avoid walkways. Make sure anchors are rated for the load.

    It’s a small mechanical trick that clears floor space and keeps linen off radiators or chairs.

    What You’ll Need for This Look

    Final Thoughts

    You don’t need to do all 25 changes. Pick two small fixes and live with them for a month.

    Small wins add up. I learned that fewer, well-placed storage pieces make a tiny bathroom feel calm and usable.

  • 28 Stunning Small Bathroom Cabinet Organization Ideas For Clutter-Free Counters

    28 Stunning Small Bathroom Cabinet Organization Ideas For Clutter-Free Counters

    I used to stack bottles and lose a favorite serum under a hairdryer. Small bathroom cabinet organization finally clicked when I stopped treating cabinets like a junk drawer. These ideas are practical and lived-in—what I kept, what I returned, and what actually freed my counters.

    I’m sharing 28 real ideas that helped me keep counters clear and make daily routines faster.

    28 Stunning Small Bathroom Cabinet Organization Ideas For Clutter-Free Counters

    These 28 ideas are practical, tested in small real bathrooms, and aimed at clearing counters fast. I include storage options, low-effort upgrades, and buys that actually made a difference. Use what fits your space—there are 28 distinct solutions here.

    1. Clear Stackable Acrylic Drawers for Small Toiletries

    I bought clear stackable drawers after losing cotton pads in a dark cabinet corner. Seeing everything at a glance changed morning speed. I keep one drawer for daily skincare and one for travel-size extras. The clear acrylic makes it obvious when I’m low.

    Small mistake: I first bought too-deep drawers that wasted vertical space. Measure cabinet height before you buy. I now stack two low-profile drawers for neat layers.

    What You’ll Need for This Look

    2. Tension Rod for Spray Bottles and Cleaning Supplies

    I slid a tension rod under the sink to hang spray bottles. It cleared the floor of the cabinet and kept leak-prone bottles upright. I hang a small mesh basket for sponges too. It’s cheap and reversible.

    My mistake: I installed the rod too far forward and it bumped the door. Move the rod back to avoid slamming. Check weight: tension rods are great for lightweight bottles but not for heavy gallon jugs.

    What You’ll Need for This Look

    3. Pull-Out Wire Baskets for Full-Depth Cabinets

    Pull-out wire baskets saved my back and my patience. Instead of digging for toilet paper, I pull the basket out and grab what I need. It’s great for towels, refill packs, and toilet paper.

    What changed visually is less chaos in the back of cabinets. Install is simple if you have space. Size the baskets to clear the door and drawer slides. I prefer the shallow ones to avoid wasted depth.

    What You’ll Need for This Look

    4. Door-Mounted Organizer for Hair Tools and Brushes

    I started hanging hair dryers and straighteners on the inside of the cabinet door. It freed the shelf for towels and kept hot tools ventilated. I use a fabric organizer with pockets and a strap for cords.

    I once tried hanging directly on nails and melted a cord. Don’t: use heat-resistant pockets or allow still-warm tools to rest inside sealed fabric. Let them cool first or use silicone sleeves.

    What You’ll Need for This Look

    5. Lazy Susan for Perfume and Serums

    I used a small lazy susan for bottles that otherwise sat jammed behind each other. Spinning it finds the exact bottle without knocking others over. It made the cabinet feel curated and calm.

    Pick the right diameter so it spins freely. I swapped plastic for a wooden one when the cabinet smelled synthetic. It’s a tiny upgrade that keeps counters free.

    What You’ll Need for This Look

    6. Magnetic Strip for Metal Tools and Bobby Pins

    I stuck a magnetic strip inside the cabinet for tweezers, nail clippers, and metal hairpins. No more digging in a drawer for a single pin. It’s simple and uses vertical space well.

    My oversight was mounting it with the magnets too close to small electronics. Keep it away from memory cards or devices. Also, check that the items are clean and dry before sticking them on.

    What You’ll Need for This Look

    7. Slim Rolling Cart That Tucks Into Cabinets

    I bought a slim rolling cart that fits into a cabinet gap. It pulls out for use and slides back when done. It’s perfect for daily items I don’t want on counters.

    The cart became my go-to for QA: no more scattering serums across the sink. Pick a cart width that matches your cabinet opening. Lightweight carts are easier to pull but check the wheel quality.

    What You’ll Need for This Look

    8. Stackable Wire Bins for Bulk Toilet Paper and Towels

    I started stacking wire bins to organize bulk toilet paper and towels. It looks tidy and makes inventory obvious. I can grab a roll from the front without shifting the stack.

    I learned to label the front bin after I mixed guest towels with bathroom towels. Labels prevent that confusion. Wire bins are excellent if you want airflow and visibility.

    What You’ll Need for This Look

    9. Small Drawer Dividers for Cosmetic Kits

    I installed small adjustable dividers in a shallow cabinet drawer to corral makeup. Brushes lie flat and compacts stack without toppling. It turned a junky drawer into a tidy kit.

    The feel is calmer each morning. Choose thin dividers to preserve depth. I swapped plastic for bamboo after one cracked—bamboo is sturdier and looks nicer inside a white drawer.

    What You’ll Need for This Look

    10. Clear Labeled Jars for Cotton Balls and Q-Tips

    I swapped bulky boxes for clear labeled jars. Cotton balls, Q-tips, and makeup pads look tidy and are simple to refill. It also stopped stray cotton puff crumbs in the cabinet.

    My early mistake was using unlabeled cheap jars that leaked lids. Use jars with secure lids and add waterproof labels. Clear glass also helps me see stock at a glance.

    What You’ll Need for This Look

    11. Vertical Dividers for Flat Items (Masks, Sheets, Trays)

    I added vertical dividers to keep sheet masks and facial cloths upright. It’s surprising how much more fits when stored like books. I can see every mask at a glance.

    This approach reduces the mess of crumpled packets. Use thin dividers so you don’t lose depth. I learned to keep heavier items on the bottom shelf to prevent leaning.

    What You’ll Need for This Look

    12. Over-the-Cabinet Mirror with Storage Pockets

    I hung an over-the-cabinet mirror with pockets inside a shallow cabinet door. It doubled as a mini vanity and stashed small items like lip balm and travel toothpaste. It’s compact and useful.

    I once installed a heavy mirror that warped the door. Choose a lightweight model. This combo saves countertop real estate and keeps small items accessible.

    What You’ll Need for This Look

    13. Small LED Motion-Sensor Lights for Dark Cabinets

    Motion-sensor LEDs changed how I use my cabinets at night. Open the door and the light comes on. No more fumbling for items in the dark.

    I used stick-on rechargeable lights for a wire-free fix. Keep them away from water and replace batteries when dim. They make the cabinet feel intentional without wiring.

    What You’ll Need for This Look

    14. Tiered Spice Rack Shelves for Small Bottles

    I repurposed a small tiered spice rack to display essential oils and travel serums. The stepped view makes everything visible and tidy. It doubled as both storage and small display.

    Mistake: I initially bought a too-tall tier that hit the door. Measure shelf height before buying. The right rack brings order without crowding.

    What You’ll Need for This Look

    15. Slim Trash Bin That Lives Inside a Cabinet

    Hiding a slim trash bin inside a cabinet keeps counters clean and smells contained. I use a lidded slim bin that fits vertically and is easy to slide out for emptying.

    Keep a spare liner nearby so you aren’t scrambling when it’s full. This simple swap cut my countertop clutter immediately.

    What You’ll Need for This Look

    16. Cable Clips and Heat-Resistant Holders for Hair Tools

    I used cable clips to keep hair tool cords tidy and added silicone heat-resistant holders so I could put tools away after cooling. No more tangled cords across the counter.

    I once shoved a warm iron into a drawer and scorched the lining. The heat sleeve is a small expense that prevents damage and keeps cabinets usable.

    What You’ll Need for This Look

    17. Slim File Holders for Hair Brushes and Flat Tools

    File holders worked for my brushes and flat irons. Storing upright prevents bent bristles and keeps tools separated. I slide them out like a magazine to pick a brush.

    It made styling quicker and stopped brushes from getting lost under dust. Use plastic holders for wet items; cardboard will warp over time.

    What You’ll Need for This Look

    18. Waterproof Bins for Under-Sink Leak Safety

    Under-sink leaks taught me to use waterproof bins. They protect supplies and make cleanup easy. I keep bigger bottles in shallow tubs to catch drips and avoid ruined shelving.

    Mistake: I first used open baskets that soaked through. Opt for sealed or higher-walled bins if you store liquids. They give peace of mind and keep counters clear by containing mess.

    What You’ll Need for This Look

    19. Small Label Maker for Instant Order

    Labels make me keep order. A tiny label maker gave each bin and jar a clear name. I stopped pulling open every container and guessing what’s inside.

    Labels aren’t pretty, but they prevent repeated searches. I used matte labels for a calm look. For rented spaces, use removable adhesive labels to avoid residue.

    What You’ll Need for This Look

    20. Small Tray for Everyday Items Stashed Inside

    I keep a small tray inside a cabinet with my daily essentials: cleanser, moisturizer, sunscreen. In the morning I pull the tray out instead of opening every shelf.

    My mistake was making the tray too ornamental; it slid when wet. Choose a tray with a non-slip base. The tray also keeps spills contained and counters clear.

    What You’ll Need for This Look

    21. Hanging Baskets from Shelf for Lightweight Items

    I clipped a hanging basket under a shelf to store washcloths and small bottles. It uses dead air and keeps the shelf surface free. It’s an easy add and removable if needs change.

    The baskets are best for lightweight items. Heavy loads will sag the shelf. I once overloaded one with books—don’t do that.

    What You’ll Need for This Look

    22. Clear Zip Pouches for Travel and Seasonal Kits

    I pack travel and seasonal kits into clear zip pouches. They stack neatly, and I grab the right pouch when needed. It keeps smaller items together and looks tidy on a shelf.

    I once used opaque pouches and forgot their contents. Clear wins for visibility. Choose sturdy zippers so they don’t burst under pressure.

    What You’ll Need for This Look

    23. Small Dehumidifier Packets or Cedar Blocks

    Keeping the cabinet fresh matters. I tuck small dehumidifier packets or cedar blocks into corners to prevent mustiness and protect towels. It’s subtle but effective.

    The packets are inexpensive and last months. Cedar also keeps moths from attacking cotton towels. Replace them seasonally for best results.

    What You’ll Need for This Look

    24. Small Step Stool That Stores Flat

    I keep a slim foldable step stool in the cabinet for reaching top shelves. It stores flat and slides in easily. When guests need it, it’s there without crowding counters.

    I once left a bulky stool on the floor—tripping hazard. Slim and foldable is the way to go. Check for non-slip feet for safety.

    What You’ll Need for This Look

    25. Small Plant or Moisture-Loving Greenery on a High Shelf

    I keep a small potted plant on a high shelf inside a cabinet with a glass door. It’s an unexpected touch that softens the storage look without cluttering the counter. Choose low-light tolerant plants.

    I overwatered once and dripped soil inside the cabinet. Use a saucer or a faux plant if you want zero maintenance.

    What You’ll Need for This Look

    26. Shallow Pull-Out Tray for Heavy Jars and Pots

    I installed a shallow pull-out tray for heavier jars and ceramic pots. It prevents tipping and makes heavy items accessible. Pull the tray out and lift safely instead of leaning into the cabinet.

    I once tried lifting a heavy jar from the back and ended up dropping it. The tray saved future breakages. Ensure slides are rated for the weight you plan to store.

    What You’ll Need for This Look

    27. Aesthetic Baskets to Hide Ugly Packaging

    I use woven baskets to hide mismatched or ugly packaging. It makes the cabinet look intentional even if the contents are miscellaneous. Baskets also double as easy grab-and-go containers.

    Choose baskets that breathe for products that need airflow. I swapped plastic bins for woven ones when I wanted a warmer look inside white cabinets.

    What You’ll Need for This Look

    28. One-Day-Use Bin to Keep Counters Clear Overnight

    I keep a small "Today" bin in the cabinet for items I use during the day—sunscreen, face mist, and hand cream. At night I pop the whole bin back into the cabinet. It keeps counters clear and my routine consistent.

    This habit stopped the nightly ritual of chasing stray bottles. It’s low effort and high payoff. Choose a shallow bin so it slides into the front of the shelf easily.

    What You’ll Need for This Look

    Final Thoughts

    You don’t need every idea here. Pick two or three that match your cabinet layout and habits. Small changes—clear drawers, a pull-out tray, or a tension rod—made my mornings calmer and counters emptier.

    Start with what annoys you most. The rest can come later.

  • 22 Creative Over The Toilet Storage Ideas To Save Every Inch

    22 Creative Over The Toilet Storage Ideas To Save Every Inch

    I finally stopped fighting the tiny space above the toilet. It’s a dumb little spot that can either look awkward or feel useful. Once I treated it like real storage, the whole bathroom calmed.

    These ideas are things I’ve tried, returned, or kept. Practical, simple, and ready to buy.

    22 Creative Over The Toilet Storage Ideas To Save Every Inch

    If you want usable storage that looks intentional, you’re in the right place. These 22 ideas cover built-ins, thrifted fixes, and quick buys you can install in an afternoon. I tested them in real bathrooms — not showrooms — so you’ll get honest wins and a few of my learning moments.

    1. Slim Floating Shelf for Everyday Essentials

    I put a single slim floating shelf above the toilet in my first apartment. It was the easiest change that actually worked. The shelf holds toothpaste, a spare roll, and a tiny plant. Visually, it gives the wall purpose without feeling crowded.

    My mistake was choosing a shelf too shallow at first — things slid off. I learned to pick one with a 6–8” depth. Install it at eye level so it looks deliberate.

    What You’ll Need for This Look

    2. Over-the-Toilet Cabinet That Hides Clutter

    I needed hidden storage for cleaning supplies and extra rolls. An over-the-toilet cabinet made the space feel tidy overnight. Closed doors hide the mess and keep things smelling fresher.

    I once bought a flimsy cabinet and the doors warped. Spend a little more for solid hardware. Mount it into studs or use heavy anchors. It makes a huge difference.

    What You’ll Need for This Look

    3. Ladder Shelf Leaning Behind the Toilet

    I fell in love with a leaning ladder shelf because it’s flexible and easy to move. I use the top for art and the lower rungs for towels and a basket of toiletries. It feels casual and layered.

    The trick is depth. Pick a ladder with a slim profile so it doesn’t hit the toilet tank. I once had one that overhung and it looked sloppy. Position it slightly angled for a lived-in feel.

    What You’ll Need for This Look

    4. Narrow Slim Cabinet for Tall Items

    Our tiny bathroom needed a place for the brush, cleaner, and extra bottles. A narrow slim cabinet fits beside the toilet and tucks those taller items out of sight. It keeps the floor clear and looks intentional.

    I learned to choose one with an internal shelf so bottles don’t topple. Also, soft-close doors save the startling midnight slam I hated.

    What You’ll Need for This Look

    5. Open Cubby Shelves to Display Towels and Jars

    Open cubbies make the space feel curated. I stacked towels, added apothecary jars, and a small tray for perfumes. It looks like a boutique shelf but works in a real home.

    My early attempt used too many decorative items. The cubbies felt cluttered. I pared back to 3–4 essentials per cubby. That tiny edit changed the whole look.

    What You’ll Need for This Look

    6. Floating Cabinet with Hidden Outlets for Nightlight

    I added a floating cabinet and routed an outlet inside it for a plug-in nightlight. The glow is subtle and keeps midnight trips safe without bright overheads. The cabinet keeps chargers and a diffuser out of sight.

    I accidentally bought one without predrilled access for wiring. Lesson learned: measure and ask if there’s a wiring channel. It saved me an electrician call later.

    What You’ll Need for This Look

    7. Tall Metal Shelving Unit for Industrial Flair

    In a rental, I used a tall metal shelving unit leaned against the wall. It felt sturdy and gave me three full shelves for towels, tools, and decor. The black frame makes the bathroom feel grounded.

    I learned to measure the clearance from the tank; some units are too deep. Choose an industrial unit with a slim profile to avoid bumping the tank.

    What You’ll Need for This Look

    8. Built-In Niche With Open Shelving (DIY)

    When we remodeled, I carved a shallow niche into the wall above the toilet and fitted two wood shelves. It looks custom and costs less than a full cabinet. The niche gives the wall a real purpose.

    My screw-up was making it too shallow; I couldn’t fit jars. Aim for at least 6–8” depth and line it with tile for a finished look.

    What You’ll Need for This Look

    9. Mirrored Medicine Cabinet That Doubles as Storage

    I swapped a plain mirror for a recessed mirrored medicine cabinet. It gave me hidden space for skincare and meds, while keeping the reflection to open the room. It was a tidy upgrade.

    The catch: some mirrored cabinets are shallow. I traded one back for a deeper model. Measure your toiletries before you buy.

    What You’ll Need for This Look

    10. Hanging Basket Rail for Towels and Small Items

    I installed a simple rail and hung 2–3 wire baskets. It’s inexpensive and makes use of vertical space without permanent bulky furniture. I keep spare soaps and washcloths there.

    I initially bought flimsy hooks and baskets sagged. Choose metal hooks and baskets with solid rims. The rail should sit high enough not to bump your head.

    What You’ll Need for This Look

    11. Over-the-Toilet Unit with Drawers for Small Bathrooms

    If you want hidden zones for hair ties and makeup, go for an over-the-toilet unit with shallow drawers. I keep a drawer for meds and one for styling tools. It reduces visual clutter.

    I ordered one with cheap drawer runners once. Drawers stuck. Look for soft-close or metal runners — they last and feel nicer every day.

    What You’ll Need for This Look

    12. Shelf with Integrated Hooks for Robes and Towels

    A shelf with integrated hooks solved the “where to hang the robe” problem. Hooks below take towels and robes. The shelf above stores a basket and a candle. It’s compact and multifunctional.

    I mistakenly put hooks too far apart once and the robe slipped. Measure your hook spacing based on what you’ll hang. Place the shelf high enough to clear the toilet tank.

    What You’ll Need for This Look

    13. Reclaimed Crate Shelves for a Thrifted Look

    I scavenged reclaimed crates to make shelves. They add texture and a casual vibe. Crates are great for baskets and small jars and give the space personality.

    I didn’t sand the edges enough at first and got splinters. A light sanding and a protective finish made them feel intentional and safe in a bathroom.

    What You’ll Need for This Look

    14. Slim Rolling Cart Tucked Next to Toilet

    A slim rolling cart is perfect when you can’t drill. I used one for extra rolls, cleaners, and a diffuser. Wheels mean I can pull it out to clean, then tuck it back.

    The mistake was not locking the wheels. Get casters with locks so it doesn’t drift. Also measure the gap so it can slide in without scraping the tank.

    What You’ll Need for This Look

    15. Framed Cubby Display With Small Art and Plants

    I turned a shallow frame into a single cubby for a small vase, a photo, and a plant. It reads like art and adds a layered moment to the wall without bulk.

    Be careful with water on plants — my first succulent left a ring on the shelf. Use a saucer or artificial plants if you forget to water.

    What You’ll Need for This Look

    16. Pegboard Organizer for Changing Storage Needs

    I installed a pegboard and rearranged hooks and small shelves every season. It’s ideal if your storage needs change — you can add baskets, hooks, or a little shelf where you need it.

    My pegboard was too small at first. Go big enough to balance the toilet visually. Paint it to match or contrast for style.

    What You’ll Need for This Look

    17. Mirrored Shelf With Built-In Lighting

    A mirrored shelf with an LED strip solved two things: reflection to open the room and soft light for nighttime. I keep skincare and a candle on the shelf. It feels tidy and calm.

    I once chose cold LEDs and regretted it. Go for warm light (2700–3000K) — it reads better on skin and makes the bathroom feel cozy.

    What You’ll Need for This Look

    18. Narrow Bookcase Repurposed for Linens

    I repurposed a narrow bookcase as over-the-toilet storage. It holds towels and a basket of toiletries. Paint it to match your trim and it reads as built-in.

    I learned to secure it to the wall. Unsecured bookcases wobble and it’s not worth the risk. Use brackets or anti-tip straps.

    What You’ll Need for This Look

    19. Painted Cabinet to Match Trim for Seamless Look

    I painted an off-the-shelf cabinet the same color as my trim. Suddenly it didn’t look like an add-on. It disappeared into the room and felt custom.

    My tip: use a primer and satin finish for durability in the bathroom. Avoid super glossy paints that show every fingerprint.

    What You’ll Need for This Look

    20. Wire Tiered Baskets for a Farmhouse Touch

    Wire tiered baskets bring a farm-style practicality. I use them for extra soap, small hand towels, and a little greenery. They’re light and make everything easy to reach.

    I once hung them too low and bumped my head. Keep them high enough to clear the tank and choose baskets with closed bottoms for small items.

    What You’ll Need for This Look

    21. Shelf with Decorative Doors for Style and Storage

    I bought a shelf with small decorative doors so I could hide the ugly bits and still have a styled surface. The doors add personality and keep toiletries private.

    I learned to check hinge quality. Cheap hinges sag. Upgrade to solid hardware if the doors feel flimsy.

    What You’ll Need for This Look

    22. Plant Ladder Shelf to Add Greenery and Softness

    Plants make any small bathroom breathe. I used a ladder-style shelf specifically for plants — trailing pothos and a fern that thrives in humidity. It softens the space and adds color.

    I overwatered once and learned to use saucers. Pick plants that like humidity and put plastic liners under pots to protect the shelf.

    What You’ll Need for This Look

    Final Thoughts

    You don’t have to use every idea here. Pick one or two that match your routine and space. I found small changes add up to a calmer bathroom.

    Measure, think about how you use the room, and plan for durability. Then install and live with it — you’ll know what to tweak next.

  • 27 Easy Under Sink Storage Solutions To Keep Essentials Neat

    27 Easy Under Sink Storage Solutions To Keep Essentials Neat

    I used to dread opening under-sink cupboards. Stuff slid, leaked, and nothing felt reachable. Over years I tried drawers, baskets, a tension rod—and kept the few tricks that actually work in real homes.

    These are hands-on fixes I live with now. Simple, affordable, and easy to install. They’ll keep 27 under sink storage solutions within reach.

    27 Easy Under Sink Storage Solutions To Keep Essentials Neat

    These 27 ideas are practical and tested in real homes. I include small lessons I learned, what I’d skip next time, and exactly what to buy. Use the list to pick a few fixes that match your cabinet size and style.

    1. Sliding Drawer Organizers for Deep Cabinets

    I installed a set of sliding drawers in my kitchen sink cabinet and it changed how I use the space. No more kneeling and digging for cleaning sprays. I can tuck towels in the bottom drawer and keep daily items at eye level.

    The glide runners make everything feel solid. My mistake: I bought shallow drawers first and lost usable height. Measure for taller drawers that fit around pipes.

    What You’ll Need for This Look

    2. Tiered Lazy Susan for Round Storage

    A tiered Lazy Susan fits perfectly around plumbing curves. I spin it and the back row is suddenly accessible. It’s great for matching bottles or small jars, and it keeps spills contained on a wipeable surface.

    I once underestimated the height of taller bottles—use tiers with adjustable spacing. The rotating base also prevents me from shoving things to the back.

    What You’ll Need for This Look

    3. Tension Rod for Hanging Spray Bottles

    A tension rod is a goofy little win. I hang spray bottles by their triggers so they don’t tip over. It frees up the bottom shelf for bulkier items and is ridiculously cheap.

    Where I tripped up: hooks that were too small kept slipping. Use S-hooks sized for bottle handles and a rod rated for the cabinet width.

    What You’ll Need for This Look

    4. Over-the-Door Pocket Organizer for Small Tools

    I nailed an over-the-door pocket organizer to the inside of my cabinet door and suddenly brushes, gloves, and sponges had homes. It keeps small items visible and off the bottom shelf.

    Lesson learned: wire hooks can rub the finish. I switched to padded hooks and it was kinder to the cabinet. This solution is cheap and flexible.

    What You’ll Need for This Look

    5. Stackable Clear Bins to See Everything

    Clear stackable bins are my go-to for groupings: one bin for dish soap, one for scrubbies. I can grab the whole bin and pull it out. It makes refilling and cleaning easier.

    I once bought opaque bins to hide clutter and ended up forgetting what I had. Clear bins save me that trouble. Add labels for categories.

    What You’ll Need for This Look

    6. Pull-Out Trash and Recycling Bins

    I swapped a static trash can for a pull-out system and it felt like a small miracle. The bins tuck away, stay out of sight, and the slide makes disposal effortless.

    My early mistake: I bought a unit that didn’t fit around my pipes. Measure space carefully and choose a slim profile for shallow cabinets.

    What You’ll Need for This Look

    7. Under-Shelf Baskets for Extra Layers

    Under-shelf baskets clip onto an existing shelf and create a second surface for lightweight items. I used one for dishcloths and smaller cleaners and it doubled my storage without drilling.

    Tip: don’t overload—these baskets sag if you pack them too full. They’re best for soft items or small bottles.

    What You’ll Need for This Look

    8. Magnetic Strips for Small Metal Tools

    I installed a magnetic strip on the inside wall to hold tiny metal tools—scissors, nail clippers, and a small wrench. It’s easy to reach and keeps things from getting lost in bins.

    I once mounted it too close to the pipes; check for moisture and choose stainless steel to avoid rust. This keeps the floor clear and tools visible.

    What You’ll Need for This Look

    9. Slim Caddies for Tall Spray Bottles

    Slim caddies are great for tall sprays that topple. I slide one out, grab what I need, and set it back. The vertical arrangement saves horizontal space and keeps nozzles from catching on items.

    I learned to pick caddies with handles that clear the cabinet lip—otherwise you tug awkwardly. Look for molded handles.

    What You’ll Need for This Look

    10. Waterproof Liners to Protect Cabinet Bases

    I line every under-sink shelf with a waterproof mat now. It soaks up small leaks and makes cleanup as simple as a wipe. The cabinet wood stays intact longer, which saved me a repair later.

    My early liners moved around. Choose one with a textured underside or cut-to-fit thickness so it stays put.

    What You’ll Need for This Look

    11. Clear Apothecary Jars for Cotton and Q-tips

    I swapped flimsy plastic containers for glass apothecary jars under the vanity. It looks tidier and I can see when items are running low. Plus, they’re sturdier and stack nicely.

    My error: lids that don’t seal well. I now keep frequently used items in jars but reserve airtight options for moisture-prone supplies.

    What You’ll Need for This Look

    12. Foldable Fabric Bins for Soft Goods

    I use soft fabric bins for extra towels and seasonal dishcloths. They’re forgiving around pipes and look nicer than random stacks. When not needed they fold flat.

    I once bought bins without a stiff base and they slumped. Choose bins with a reinforced bottom to keep a clean shape.

    What You’ll Need for This Look

    13. Small Tool Rack for Plungers and Brushes

    A slim vertical rack keeps plungers and brushes upright and separate from other supplies. It’s messy stuff, but when contained it feels less gross. I keep mine in a corner with a liner.

    Pro tip: pick a rack with drainage so the base doesn’t pool water. That made a big difference.

    What You’ll Need for This Look

    14. Cable Clips to Tame Appliance Cords

    I used cable clips to route stray cords—like the handheld blender or rechargeable toothbrush—so they don’t get tangled with cleaning supplies. It’s a small change but keeps the cabinet calmer.

    I initially used cheap adhesive and lost a clip. Invest in strong adhesive clips and press firmly for 30 seconds when you install.

    What You’ll Need for This Look

    15. Clear Bins with Dividers for Small Parts

    I keep plumbing bits and small repair parts in a clear bin with dividers so I don’t lose screws in the abyss. When a drip needed fixing, I found the right washer in seconds.

    I once mixed metal and rubber parts without separating them; the dividers solved that. Label each compartment for fast grabs.

    What You’ll Need for This Look

    16. Rolling Caddy for Portable Cleaning Kits

    A narrow rolling caddy slides out like a little cart. I load it with my weekly cleaning essentials and wheel it to wherever I’m cleaning. It’s faster than carrying a basket and fits tight spaces.

    My early caddy had flimsy wheels and jammed on carpet. Choose smooth casters and a slim width that matches your cabinet opening.

    What You’ll Need for This Look

    17. Hanging Mesh Baskets for Lightweight Items

    Mesh baskets hang from a shelf edge and create extra tiers. I use them for lightweight items like dryer sheets or spare sponges. The mesh keeps airflow and dries damp items.

    I learned not to hang heavy bottles there; the mesh stretches. Use for soft or lightweight supplies only.

    What You’ll Need for This Look

    18. Collapsible Silicone Bins for Flexible Storage

    Collapsible silicone bins tuck flat when not in use and pop up for quick sorting. I keep a set under the sink for odd overflow—seasonal supplies or party extras.

    My mistake: earlier bins were too wide for the depth. Pick collapsible sizes that fit front-to-back, not side-to-side, for better access.

    What You’ll Need for This Look

    19. Compact Fireproof Box for Important Documents

    I tuck a slim fireproof box under the sink for warranties and small valuables. It’s low-profile and safe from curious kids or pets. The cabinet keeps it hidden but accessible.

    Be careful: under-sink is not ideal if your plumbing leaks. I place the box on a raised waterproof mat to protect it from moisture.

    What You’ll Need for This Look

    20. Clear Shoe Organizer for Tall Narrow Items

    A clear shoe organizer repurposed for a cabinet door became my favorite hack. Tall bottles stand upright in pockets and I can see everything at a glance. It’s great for odd-shaped cleaners.

    I used to cram bottles in and break nozzles. The organizer prevents that by keeping items separated and upright.

    What You’ll Need for This Look

    21. Bungee Cord Grid for Odd Shapes

    I created a bungee cord grid to hold oddly shaped items—like oil bottles and spray heads—so they don’t roll. It’s flexible and adjusts to what I store that week.

    My first attempt was too loose; tighten the grid for real stability. It looks utilitarian but works brilliantly for odd shapes.

    What You’ll Need for This Look

    22. Adhesive Hooks for Hanging Gloves and Brushes

    Tiny adhesive hooks are my favorite inexpensive fix. I hang gloves, brushes, and even a measuring cup on them. It’s quick, no tools, and keeps the floor clear.

    I once stuck hooks to a damp surface and they failed. Wipe the area dry and press firmly; they hold much better.

    What You’ll Need for This Look

    23. Wire Shelf Risers to Double Vertical Space

    A wire riser turns one shelf into two. I used it for canned goods under a prep sink and for hair tools in the bathroom. It’s sturdy and keeps items accessible.

    I misjudged weight capacity once; check the specs. Risers are great for light-to-medium loads.

    What You’ll Need for This Look

    24. Small Drawer Units for Under-Sink Organization

    A compact 3-drawer unit gave me separate homes for extras: small toiletries, replacement sponges, and zip bags. It stacks well and won’t get knocked over when I open the door.

    I initially bought brittle plastic; now I choose sturdier acrylic for frequent use. Drawers slide more smoothly and feel durable.

    What You’ll Need for This Look

    25. Moisture Absorbers to Prevent Mold

    I tuck a few moisture absorber packs in every under-sink space. They’re small, cheap, and have stopped the musty smell that used to build up after summer humidity.

    One pack didn’t cover a large cabinet. Use multiple small packs spread around for better coverage.

    What You’ll Need for This Look

    26. Labeling System for Easy Rotation

    Labels saved me from buying things I already had. I label bins, drawers, and jars with waterproof tags. Now I know exactly where replacements live and what’s low.

    My first handwritten labels faded. Invest in a small label maker or waterproof stickers for longevity.

    What You’ll Need for This Look

    27. Mini LED Motion Lights for Quick Finds

    I installed a couple of motion LED lights and stopped fumbling for items in dim cabinets. They turn on when I open the door and make everything instantly visible.

    Don’t place them where water can drip. I mount mine on the underside of a shelf away from plumbing for safety.

    What You’ll Need for This Look

    Final Thoughts

    You don’t have to do every idea. Pick two or three fixes that match your cabinet size and habits and start there. Small changes add up quickly.

    I’ve lived with all of these solutions and kept the ones that made daily life easier. Start simple, measure carefully, and enjoy opening your cabinet again.

  • How To Declutter A Tiny Bathroom And Make It Feel Spacious

    How To Declutter A Tiny Bathroom And Make It Feel Spacious

    I used to dread getting ready in my tiny bathroom. Counters piled with bottles and a towel on every hook.

    It felt claustrophobic, even after a clean. I learned that small choices change the feel more than big ones.

    This method is how I quietly thin the clutter and make the room breathe.

    How To Declutter A Tiny Bathroom And Make It Feel Spacious

    Here I show how to declutter a tiny bathroom so it reads calm and spacious. You’ll get practical edits that change how the space feels, not a long to-do list. It’s doable in short sessions and keeps the room simple and livable.

    What You’ll Need

    Step 1: Clear the Visible Surfaces and Keep Only What You Use

    I start by clearing the vanity, windowsill, and shower ledge. I leave out only the items I use daily. This immediately reads calmer. Visually, the room looks larger because my eye has room to rest.

    Most people miss that “daily” means seven items or fewer. A small tray keeps those items tidy. Mistake to avoid: hiding everything in a drawer without editing—out of sight clutter still crowds the room in other spots.

    Step 2: Contain Like Items for a Clean Look

    I group similar items into containers. Cotton pads go in one apothecary jar, q-tips in another, and extras live in the seagrass basket. Grouping reduces visual noise and makes the essentials easier to find.

    You’ll notice the sink area stops looking busy because the eye reads groups, not many individual pieces. A common miss is using mismatched containers—choose a consistent material palette. Avoid overfilling baskets; that actually looks messier.

    Step 3: Use Vertical Space to Free the Floor and Counter

    If the counter is small, go up. I install a narrow floating shelf above the toilet and fit the mirrored cabinet where possible. Moving infrequently used items up makes the counter and floor breathe.

    The room feels taller and less cluttered when vertical space is used. Many people forget to stagger heights—mix low and tall items so the shelf reads layered, not crowded. Don’t overload the shelf; leave negative space to keep balance.

    Step 4: Limit Visible Products and Edit Regularly

    I choose one soap dispenser, one tray, and one small jar for the counter. Everything else goes inside the slim mirrored cabinet or the seagrass basket. Reducing visible product count makes the room feel curated.

    A tip people miss: rotate items seasonally rather than displaying everything. Mistake to avoid: thinking “out of sight” equals “out of mind”—I still audit drawers monthly so hidden clutter doesn’t build up.

    Step 5: Add Simple Balance and Keep It Lived-In

    After editing, I tune balance. I place the tray to one side of the sink and a single apothecary jar to the other. The floating shelf holds two clear jars and a folded towel for rhythm. Small asymmetry feels intentional.

    People often over-style to “show” a tidy space. I keep a lived-in softness—one folded towel, not a display stack. Avoid making every surface match perfectly; a touch of imperfection keeps the room comfortable.

    What This Solves

    This method solves the constant countertop overflow and the claustrophobic feel in a tiny bathroom. You’ll stop bumping into bottles and find your routine smoother.

    It also keeps the space flexible. A couple of simple containers and a shelf change the room’s mood without a renovation. The result is a calm, usable bathroom you actually enjoy.

    Quick Styling Tips

    Stick to two materials and two colors so the eye moves easily. I use clear glass and natural fiber, with white and warm wood tones to keep things cohesive.

    Leave little breathing room around objects. A single tray or jar with negative space reads cleaner than three tightly grouped items.

    Small Maintenance Habits

    Spend five minutes after your shower to put one item back where it belongs. I make this a quick habit and it prevents bigger decluttering sessions.

    Once a month I reassess what’s inside jars and baskets. If I haven’t used something in three weeks, it goes to an “occasional” box.

    Final Thoughts

    Start small. Clear one surface, contain one category, then add a shelf. I find quick wins keep me motivated.

    You don’t need to buy much. Thoughtful placement and fewer visible things do the heavy lifting.

    Do one short edit a week and the room will keep feeling spacious and calm.

  • How To Organize Bathroom Shelves For Maximum Efficiency And Style

    How To Organize Bathroom Shelves For Maximum Efficiency And Style

    I used to open my bathroom shelves and feel overwhelmed. Towels were lumped with bottles. Small things disappeared. Mornings felt clumsy and slow. Now I edit what stays. I place things by use and look. The shelves are calm and easy to use.

    How To Organize Bathroom Shelves For Maximum Efficiency And Style

    This shows exactly how to make shelves both useful and calm. You’ll end with clear zones, balanced groupings, and a few decorative touches that feel intentional. It’s practical and realistic. I use this method when a shelf still feels unfinished.

    What You’ll Need

    Step 1: Create Clear Use Zones

    I start by emptying the shelf and naming zones: daily, backup storage, and a small display. It makes choices simple. When each zone has a purpose, the shelf reads calm instead of cluttered.

    Visually you’ll see three small clusters, not a line of random bottles. People often forget to leave negative space. A common mistake is stuffing every inch. Let a little air show.

    Step 2: Group by Function and Containerize

    I put similar items together and give them a home. Labeled canisters hold cotton, q-tips, and backups. The apothecary jar holds small, pretty things. Containerizing makes the shelf feel curated and tidy.

    What changes is the rhythm — repeated shapes and colors calm the eye. People miss matching container scale to shelf depth. Avoid using too many mismatched vessels; that creates visual chaos.

    Step 3: Layer with Trays and Baskets

    I add a tray to corral loose bits and a woven basket for bulk items. Trays anchor small items and keep edges neat. Baskets hide the overflow without erasing texture.

    The shelf gains depth and a tactile mix. Most people put everything flat on the shelf. Don’t let a tray swallow the shelf — choose one that frames items, not covers them.

    Step 4: Add Vertical Interest and Softness

    I layer a small plant and a stack of hand towels to give height and softness. Vertical pieces draw the eye up and prevent a flat, heavy look. The reed diffuser adds a small sculptural line.

    Visually the shelf feels warmer and more intentional. People often forget scale — too-tall items will block sightlines. Avoid placing an oversized vase in the middle of a low shelf.

    Step 5: Place Daily Items Front and Keep the Rest Stylishly Hidden

    I keep what I use every morning at the front in clear or simple organizers. The acrylic organizer makes things easy to grab but still tidy. Backups live in the basket or labeled canisters.

    The shelf becomes efficient without losing style. One insight is to resist spilling decorative items into the daily zone. Don’t let your pretty pieces become practical obstacles.

    Maintaining the System

    I check shelves once a week. I toss empties and rotate anything that’s not used. A small five-minute edit keeps the look calm and prevents buildup.

    If something feels off, I move one object and wait a day. That quick test tells me if it’s needed. Small maintenance is all it takes.

    Styling Tips for Small Shelves

    Stick to three main textures: something soft, something natural, and something clear or ceramic. Repeat a color once or twice across the shelves for cohesion.

    Keep negative space. One tidy gap makes the whole arrangement breathe. If a shelf feels busy, remove the smallest decorative piece first.

    Quick Swaps for Season and Mood

    Swap towels and the diffuser scent with the seasons. A darker towel or a warmer scent can change the shelf’s feeling without redoing it.

    Rotate a small display item every month. It keeps the shelves feeling fresh and intentional without more clutter.

    Final Thoughts

    Start with one shelf. Make small edits and live with them a day. Confidence comes from using the shelf, not perfect styling.

    You don’t need every product on display. Keep the daily at hand and the backups tidy. The goal is a shelf that feels calm and actually helps your routine.